I am taking a class to make a mountain dulcimer. The class is over a weekend in June. One of the required tools is a scratch awl. I have a scribe I made for metalworking, but it is not quite right for woodworking as the handle is too skinny. I found a few articles on making one from scratch. The article I chose to follow is in Shopnotes, #44, page 28. The article uses a long drill bit and a brass plumbing ferrule. I plan to use drill rod, which I can harden, and make my own "ferrule" from brass.
The first order of business was gluing up a blank for the handle. I used a scrap of walnut from the mirror frame. It was about 5/8" thick and was cut to 10" long. The rabbeted edge was removed leaving a 4" wide board. This was cut down the middle and the two 10" boards were crosscut on center. This produced four 2" X 5" blocks. After determining which way to best align the grain, the boards were marked and glued into a four board stack with hide glue.
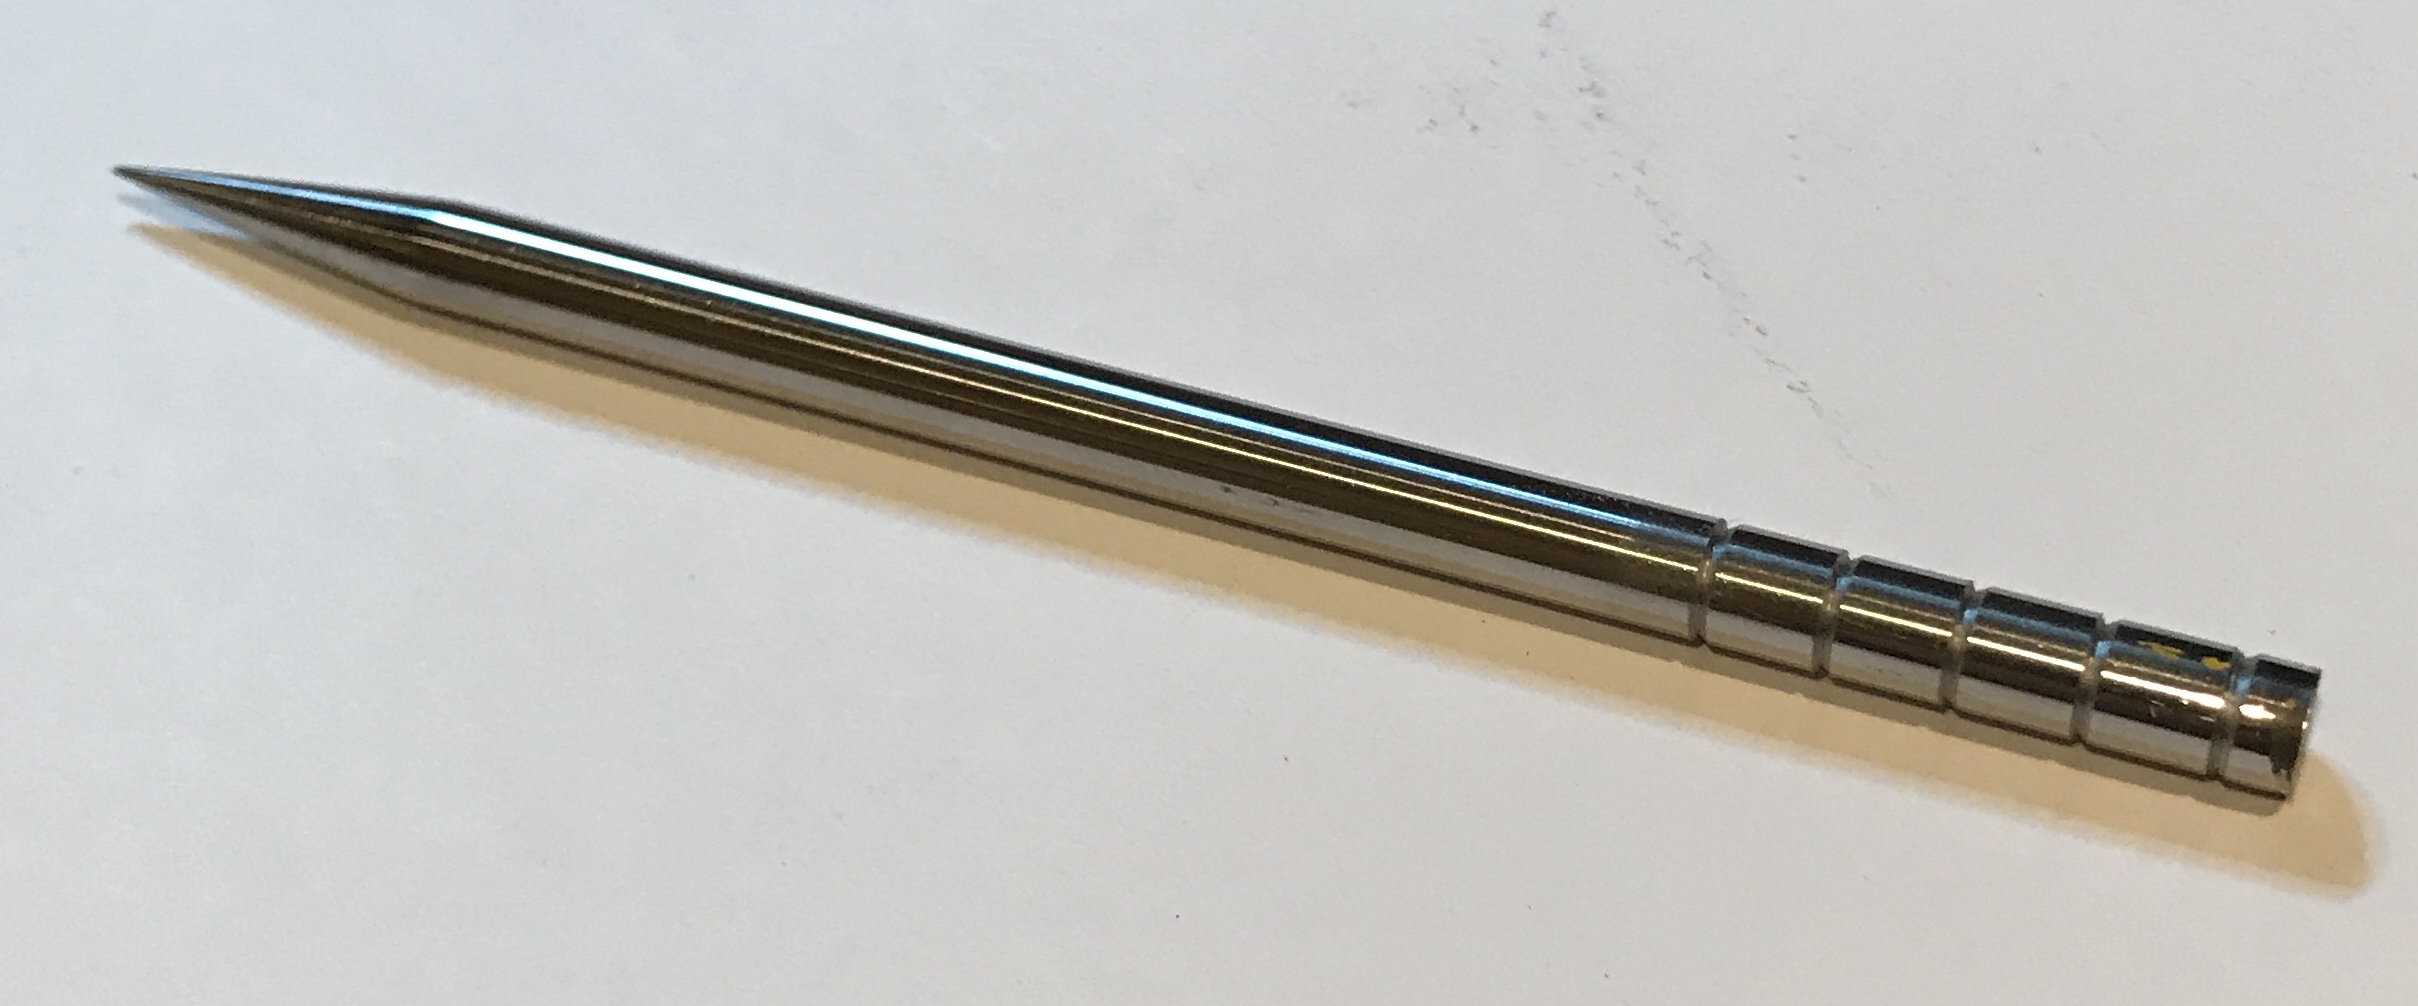
While the glue was drying the steel point was made. A 5" length of 1/4" drill rod was chucked in the lathe. The head was set at a 7° angle. The rod was cut yielding approximately 1" of taper on the end of the rod. This was quickly sanded to a point on the sanding belt with the use of the cordless drill to rotate the rod. The point of the rod was heated to cherry red and quenched in oil. Hardness was verified with a file. The rod was sanded from 100 to 1500 grit on the lathe. To improve the grip when glued into the handle the end of the rod had five 0.02" grooves cut at 0.25" intervals. A picture of the completed rod is shown below.
The block was squared up a little on the table saw. One end was marked on center. After center punching it was drilled with a center drill. It was put in the four jaw chuck on the South Bend. (The corners were too large to fit over the cross slide on the Sherline.) A live tailstock center was used to help align the block in the chuck. The block was reduced until a cylinder was produced for about 3 3/4". This work piece was transferred to the Sherline. The diameter of this cylinder was reduced to 1 13/16". This leaves 1/16" for sanding to the final diameter. A length of 1 3/4" was further reduced to 1" diameter. Finally, the rough shape was completed by reducing a length of 3/8" to 3/8" diameter.
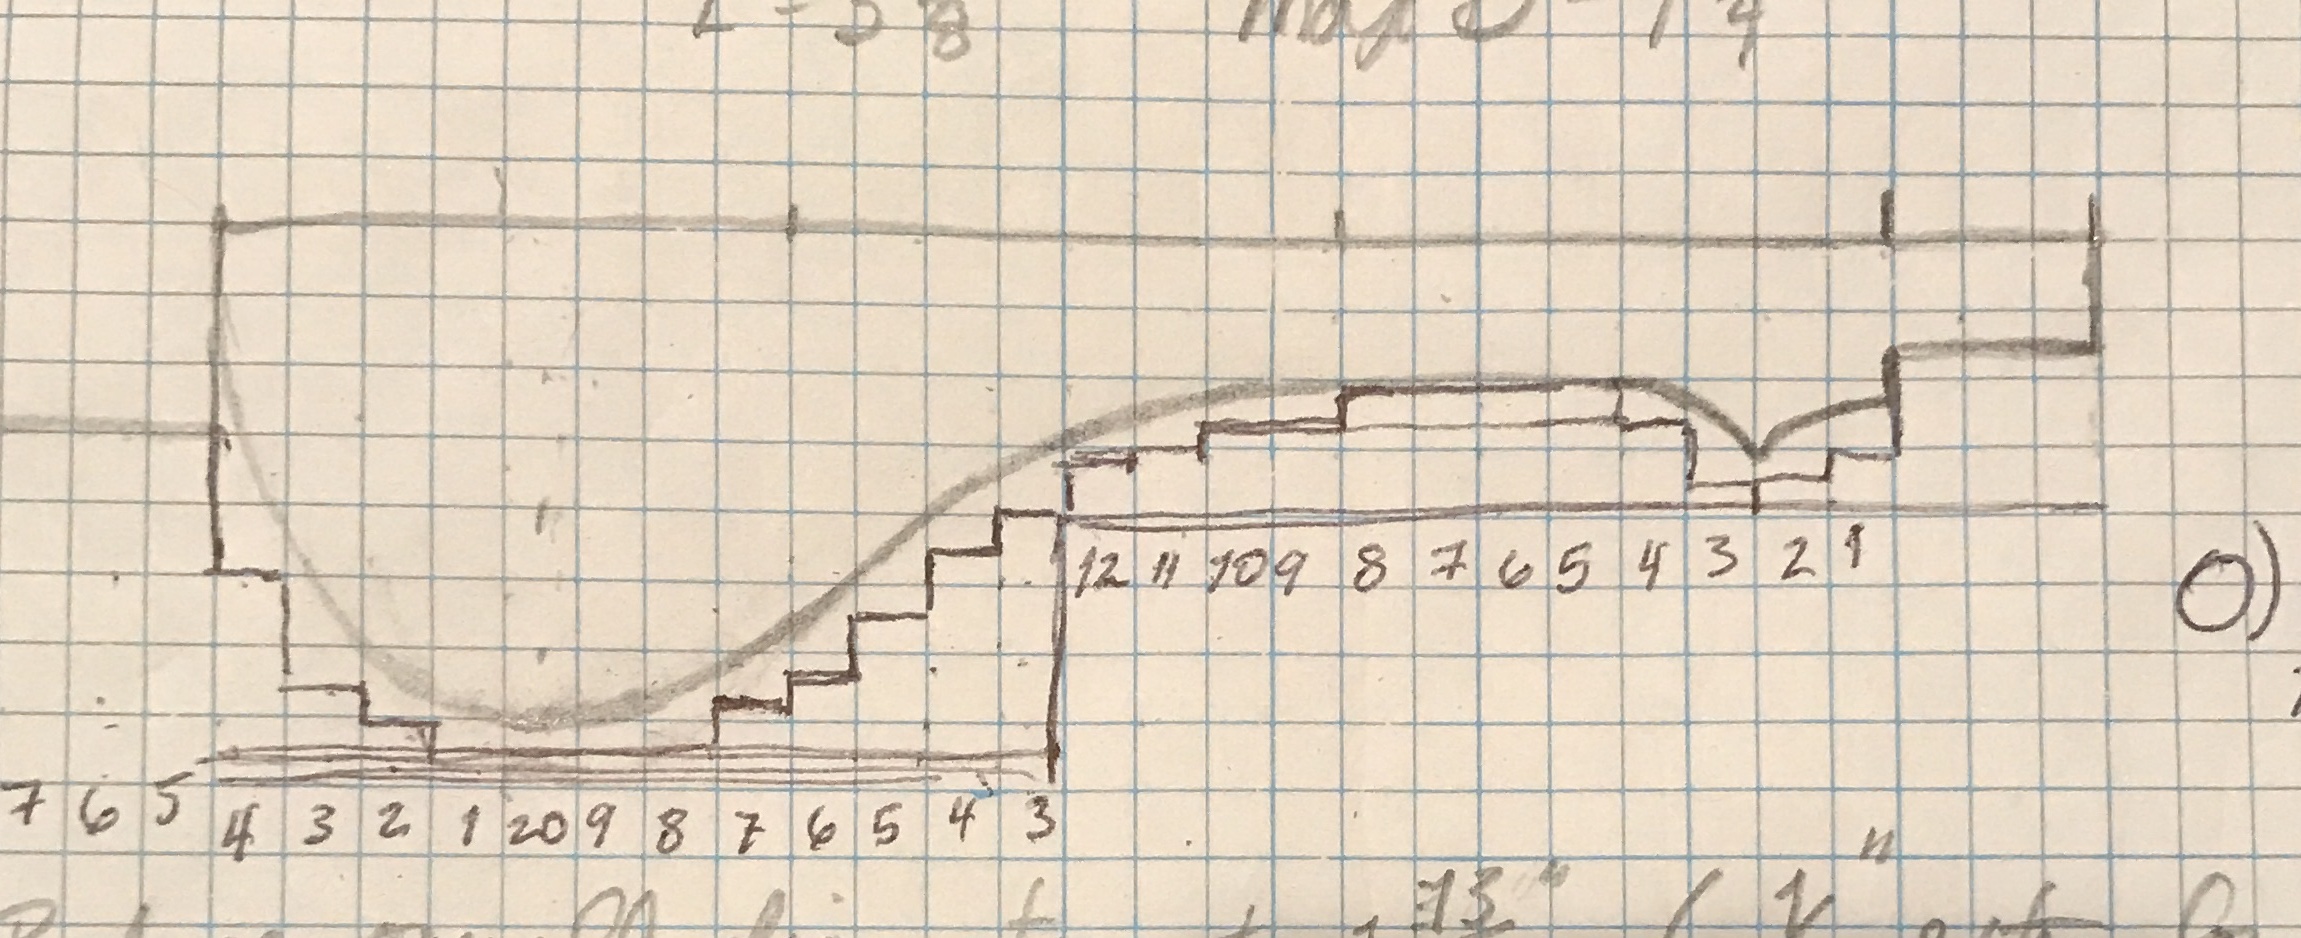
A guide was produced for roughing out the outline of the handle's shape. It was based on the pattern included in the article. Essentially, the depth of cut for every 1/8" is predetermined. This guide is pictured below.
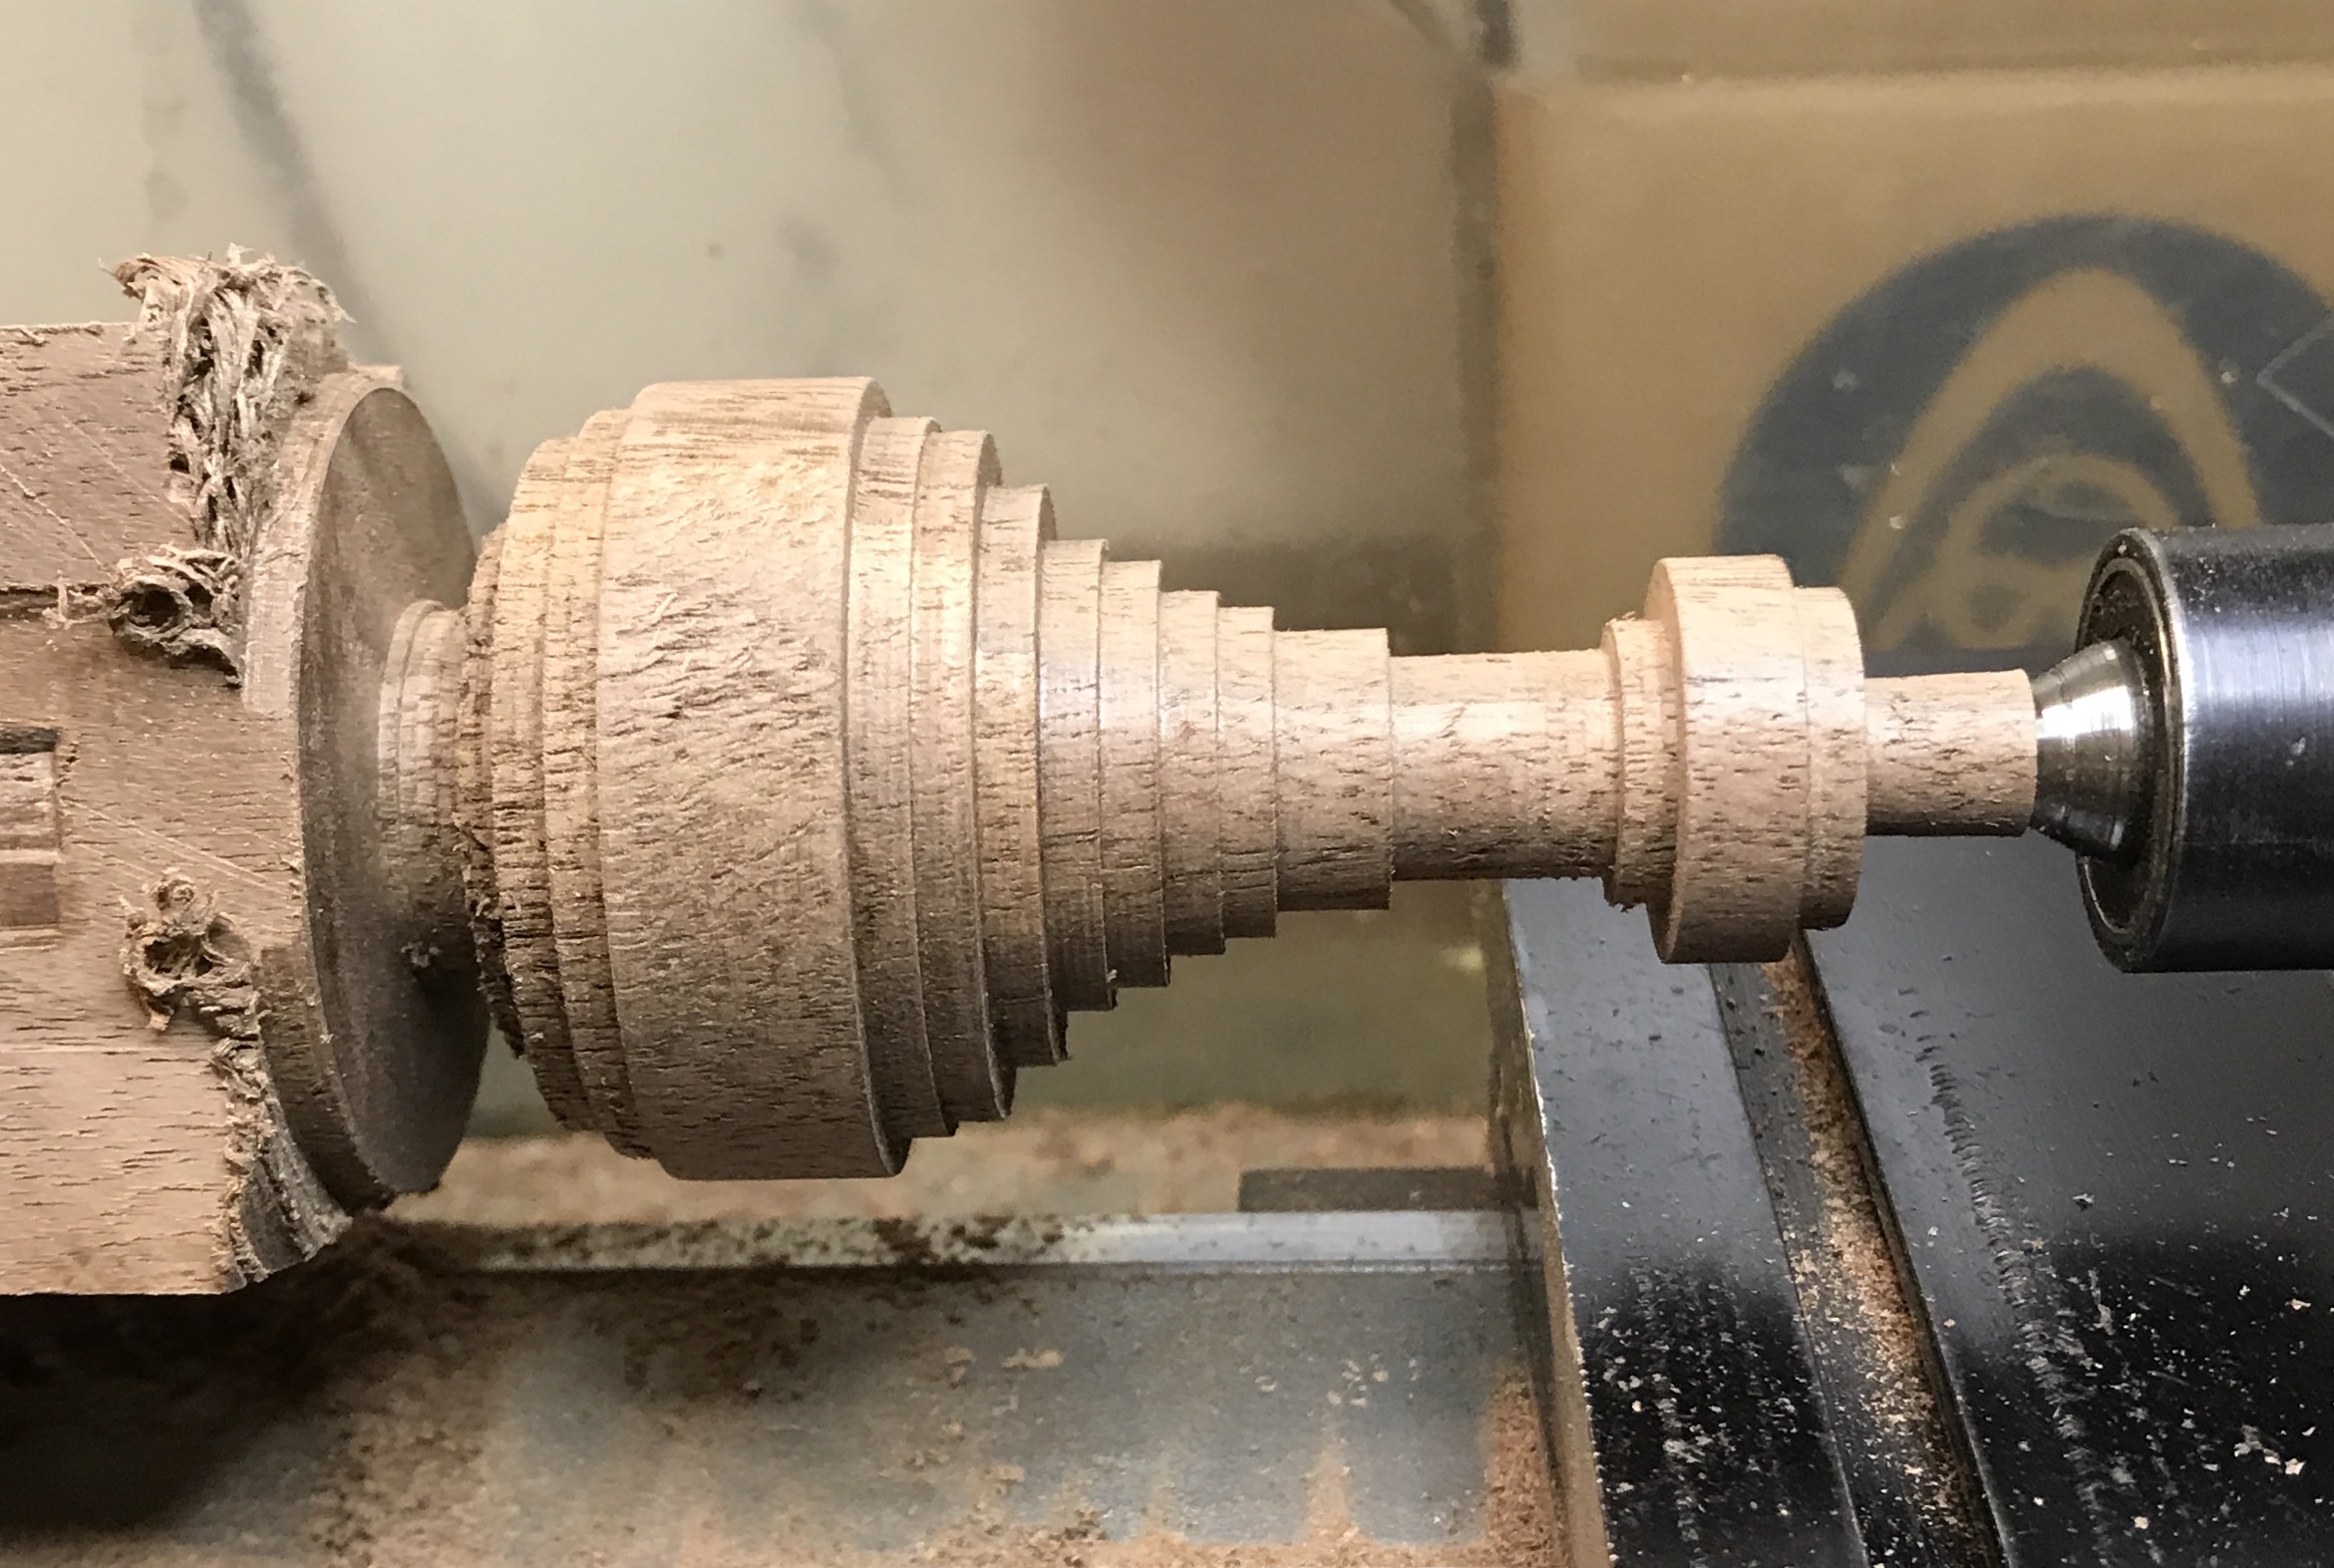
The guide was followed with two lathe tools. In some cases it was simplest to use the cutoff tool and and use the regular tool when a wide enough groove was made. The rough cut handle ready for the rasp is shown in the photo below.
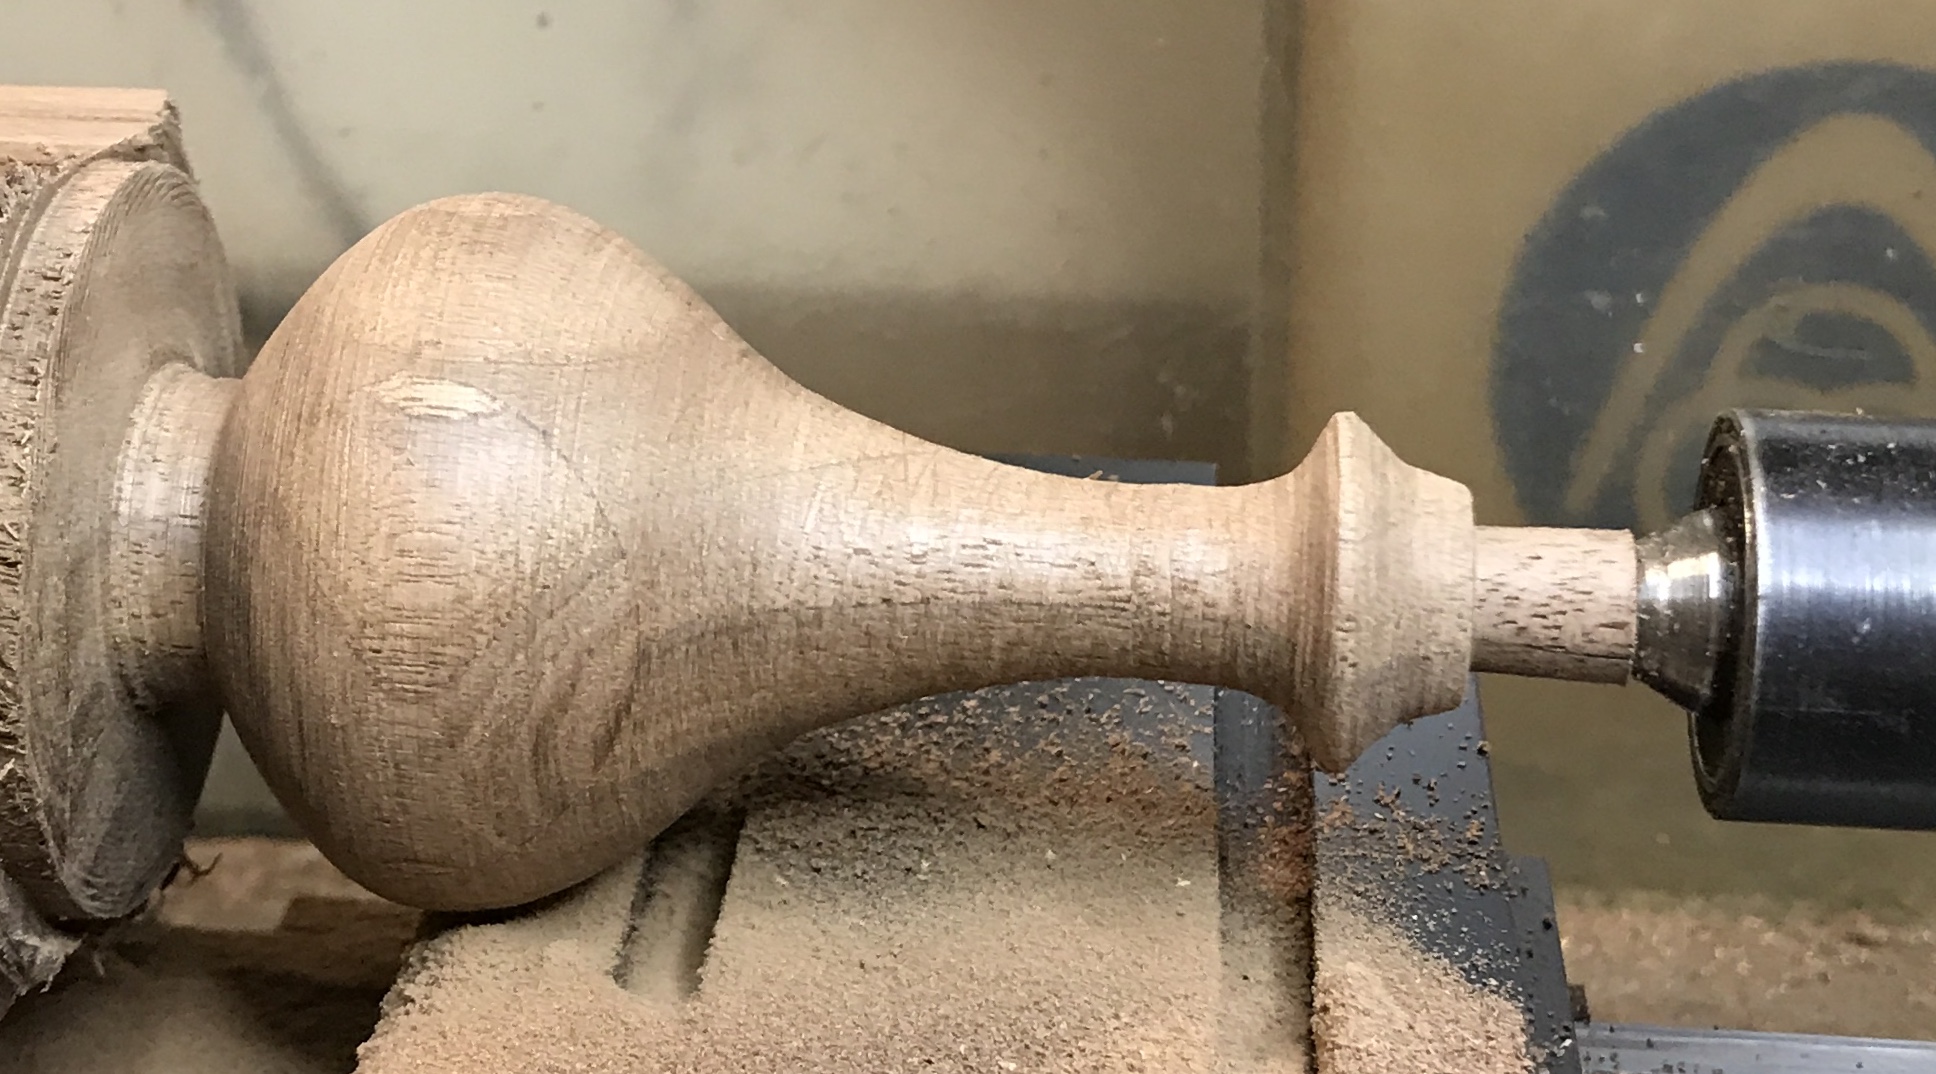
A rasp was used to get the general shape. A round file was then used to remove the rasp marks and to finish the two smaller curves near the steel end. 150 grit sandpaper was used to smooth the surface. A photo after this stage is the first below. The work piece was removed from the lathe and the block end held in a vise. The Japanese pull saw was used to remove the handle from the block. The stub was sanded off on the belt sander. Round strokes were used without turning the sander on. The entire handle was then sanded by hand with 150 and 220 grit paper. A photo at this stage is shown next.
An attempt to insert the steel into the handle indicated that the drilled hole was too tight, especially if epoxy was to be used. I was afraid to redrill the handle with a power drill, so I did it by hand. An F drill (0.257") was forced into the handle while twisting. It went in very slowly. It was necessary to hold the drill with Visegrips. After this reaming the steel easily slid in and out.
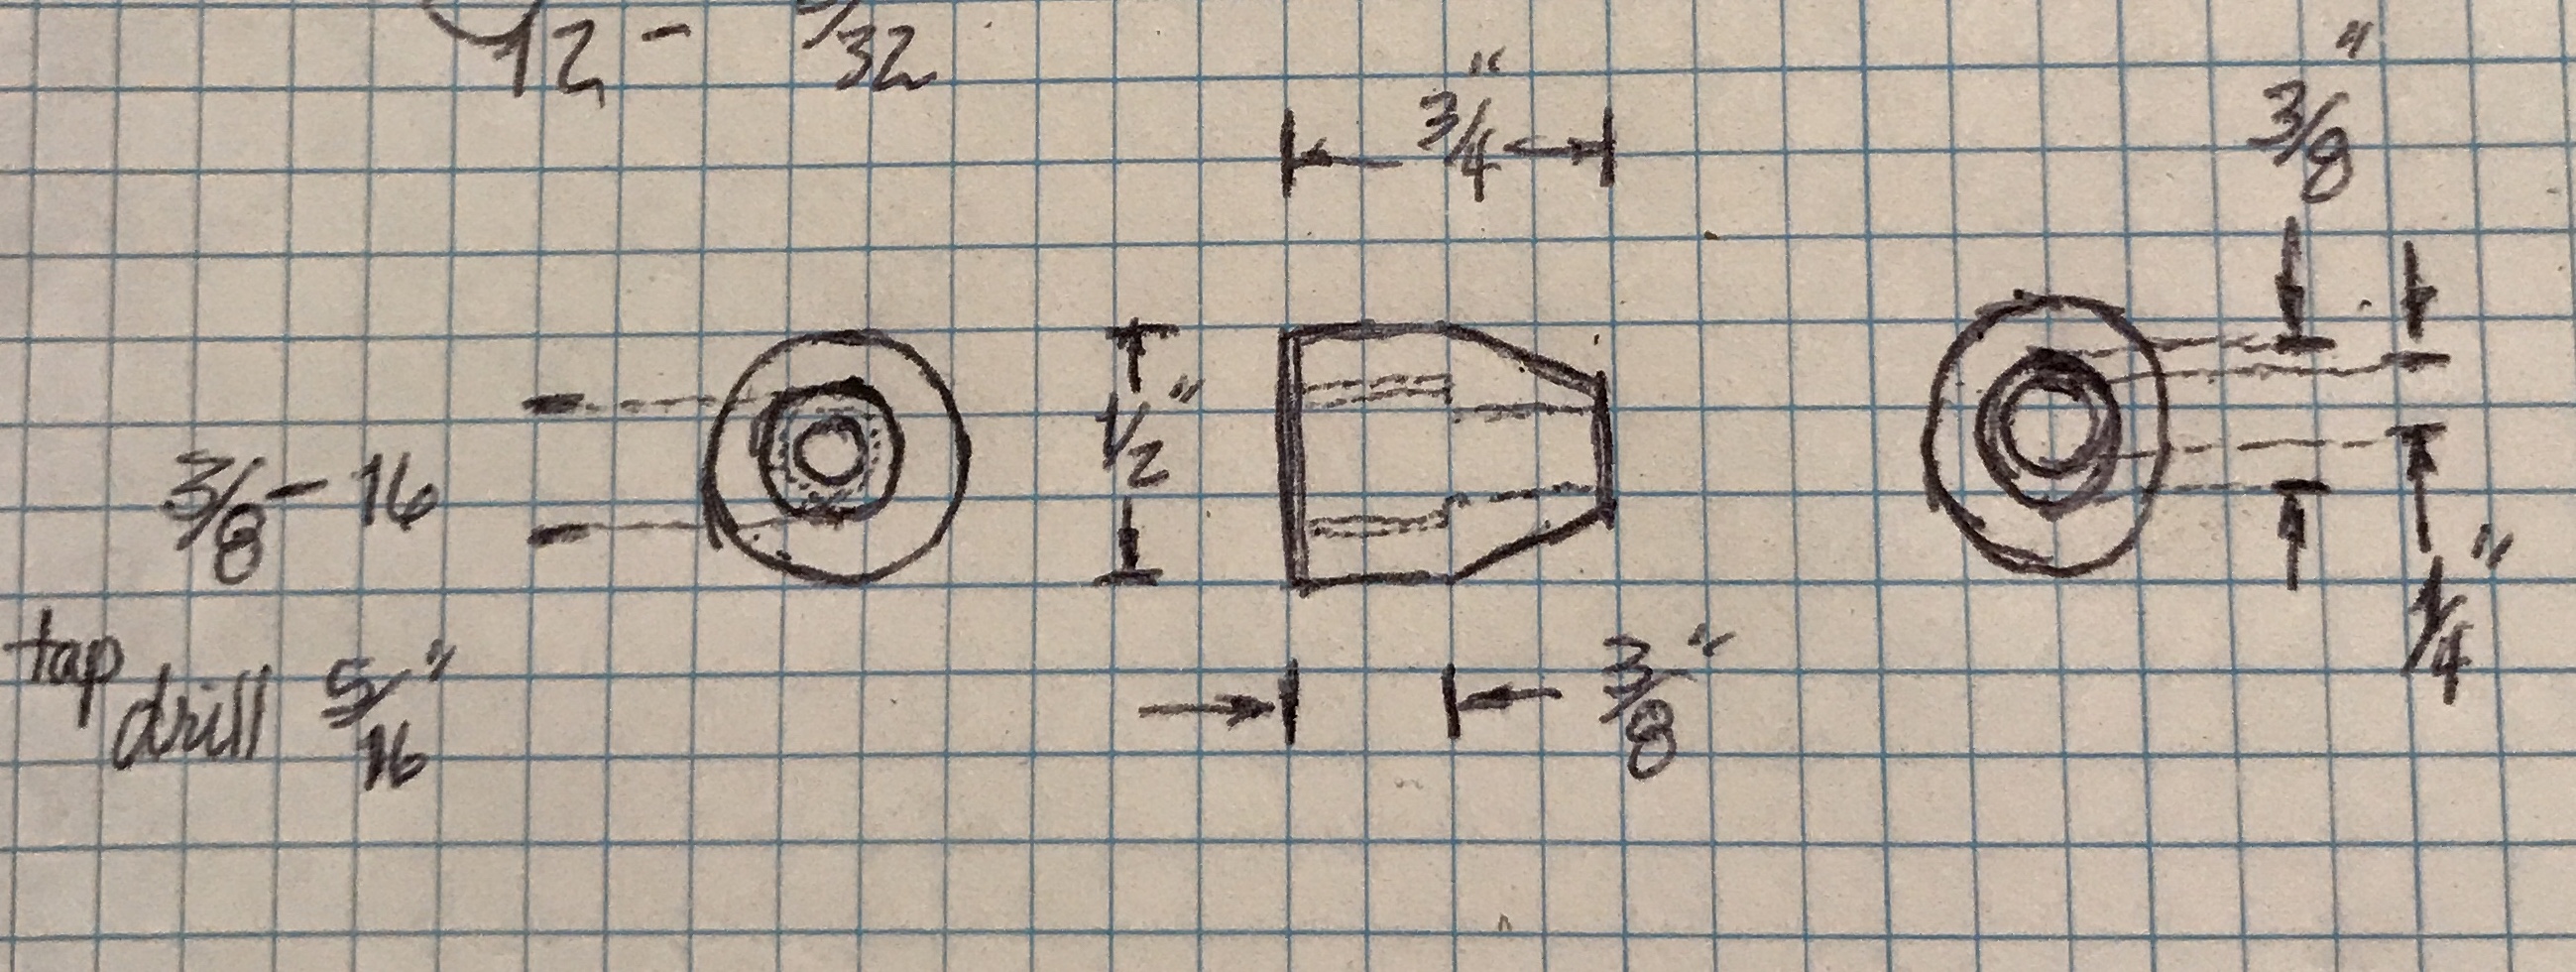
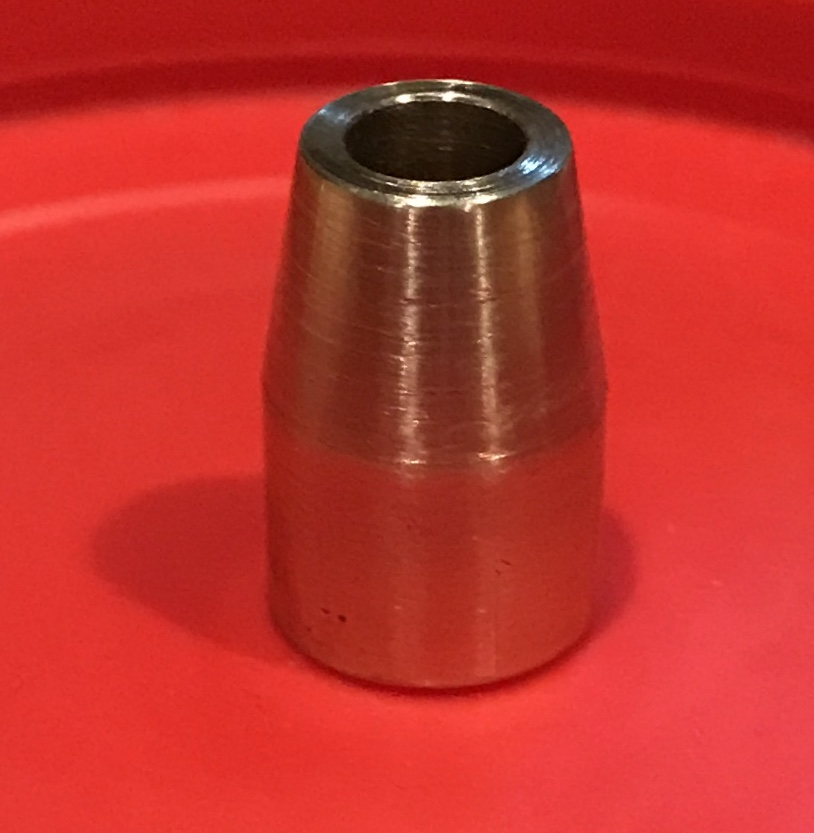
The brass ferrule is the last part to be made. A photo of the design is below. A 1 1/4" length of 1/2" brass was cut off with a hack saw. One end was faced. It was drilled 1" deep with a C drill and reamed 1/4". The end was widened for 3/8" with a 5/16" drill and tapped 3/8-16. Only about three threads were formed. The exposed end was sanded up to 1500 grit. The ferrule was parted off at 3/4". The ferrule was flipped end for end in the chuck and held with aluminum soft jaws. The new end was faced. The head was offset at a 9.5° angle and the end was reduced until the length of the angled cut was 3/8". This end was then sanded to 1500 grit. The hole was deburred. The completed ferrule is shown below.
The threads were a non-starter. The threaded ferrule would not thread onto the end of the handle. Attempting to thread the handle end with a 3/8-16 die only further damaged the end. So the threads were drilled out of the ferrule with a 3/8" drill. The ferrule and steel were put in the handle for a dry fit, which is shown below. Epoxy was made up and placed in the hole and around the end of the handle. The steel was pushed in and the ferrule was slid on. Just have to hope that the epoxy holds it all together. The instructions say it may take up to 3 days to fully harden.
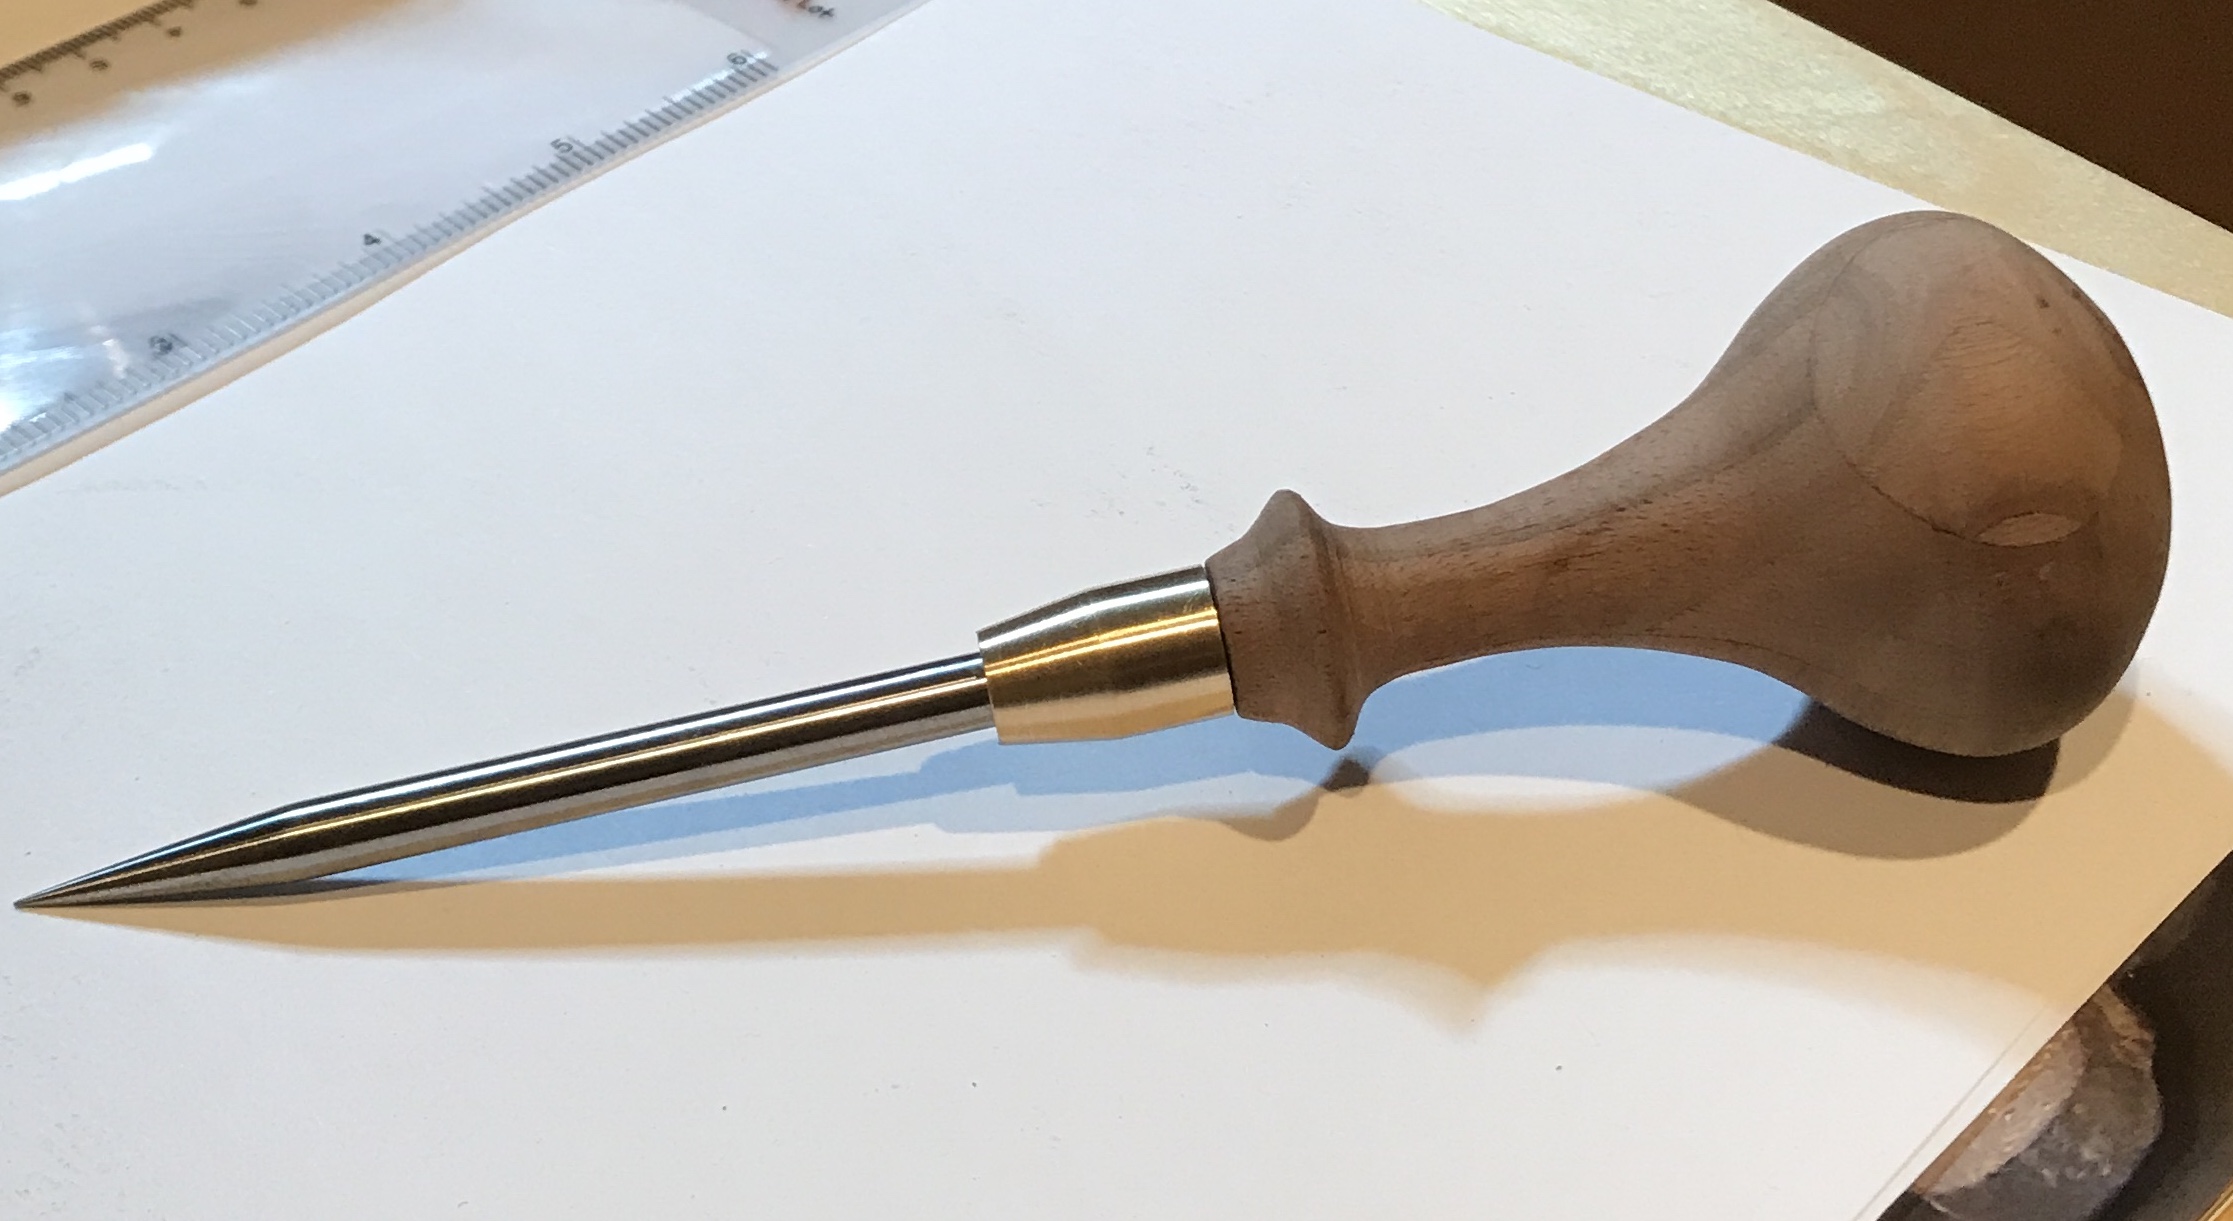
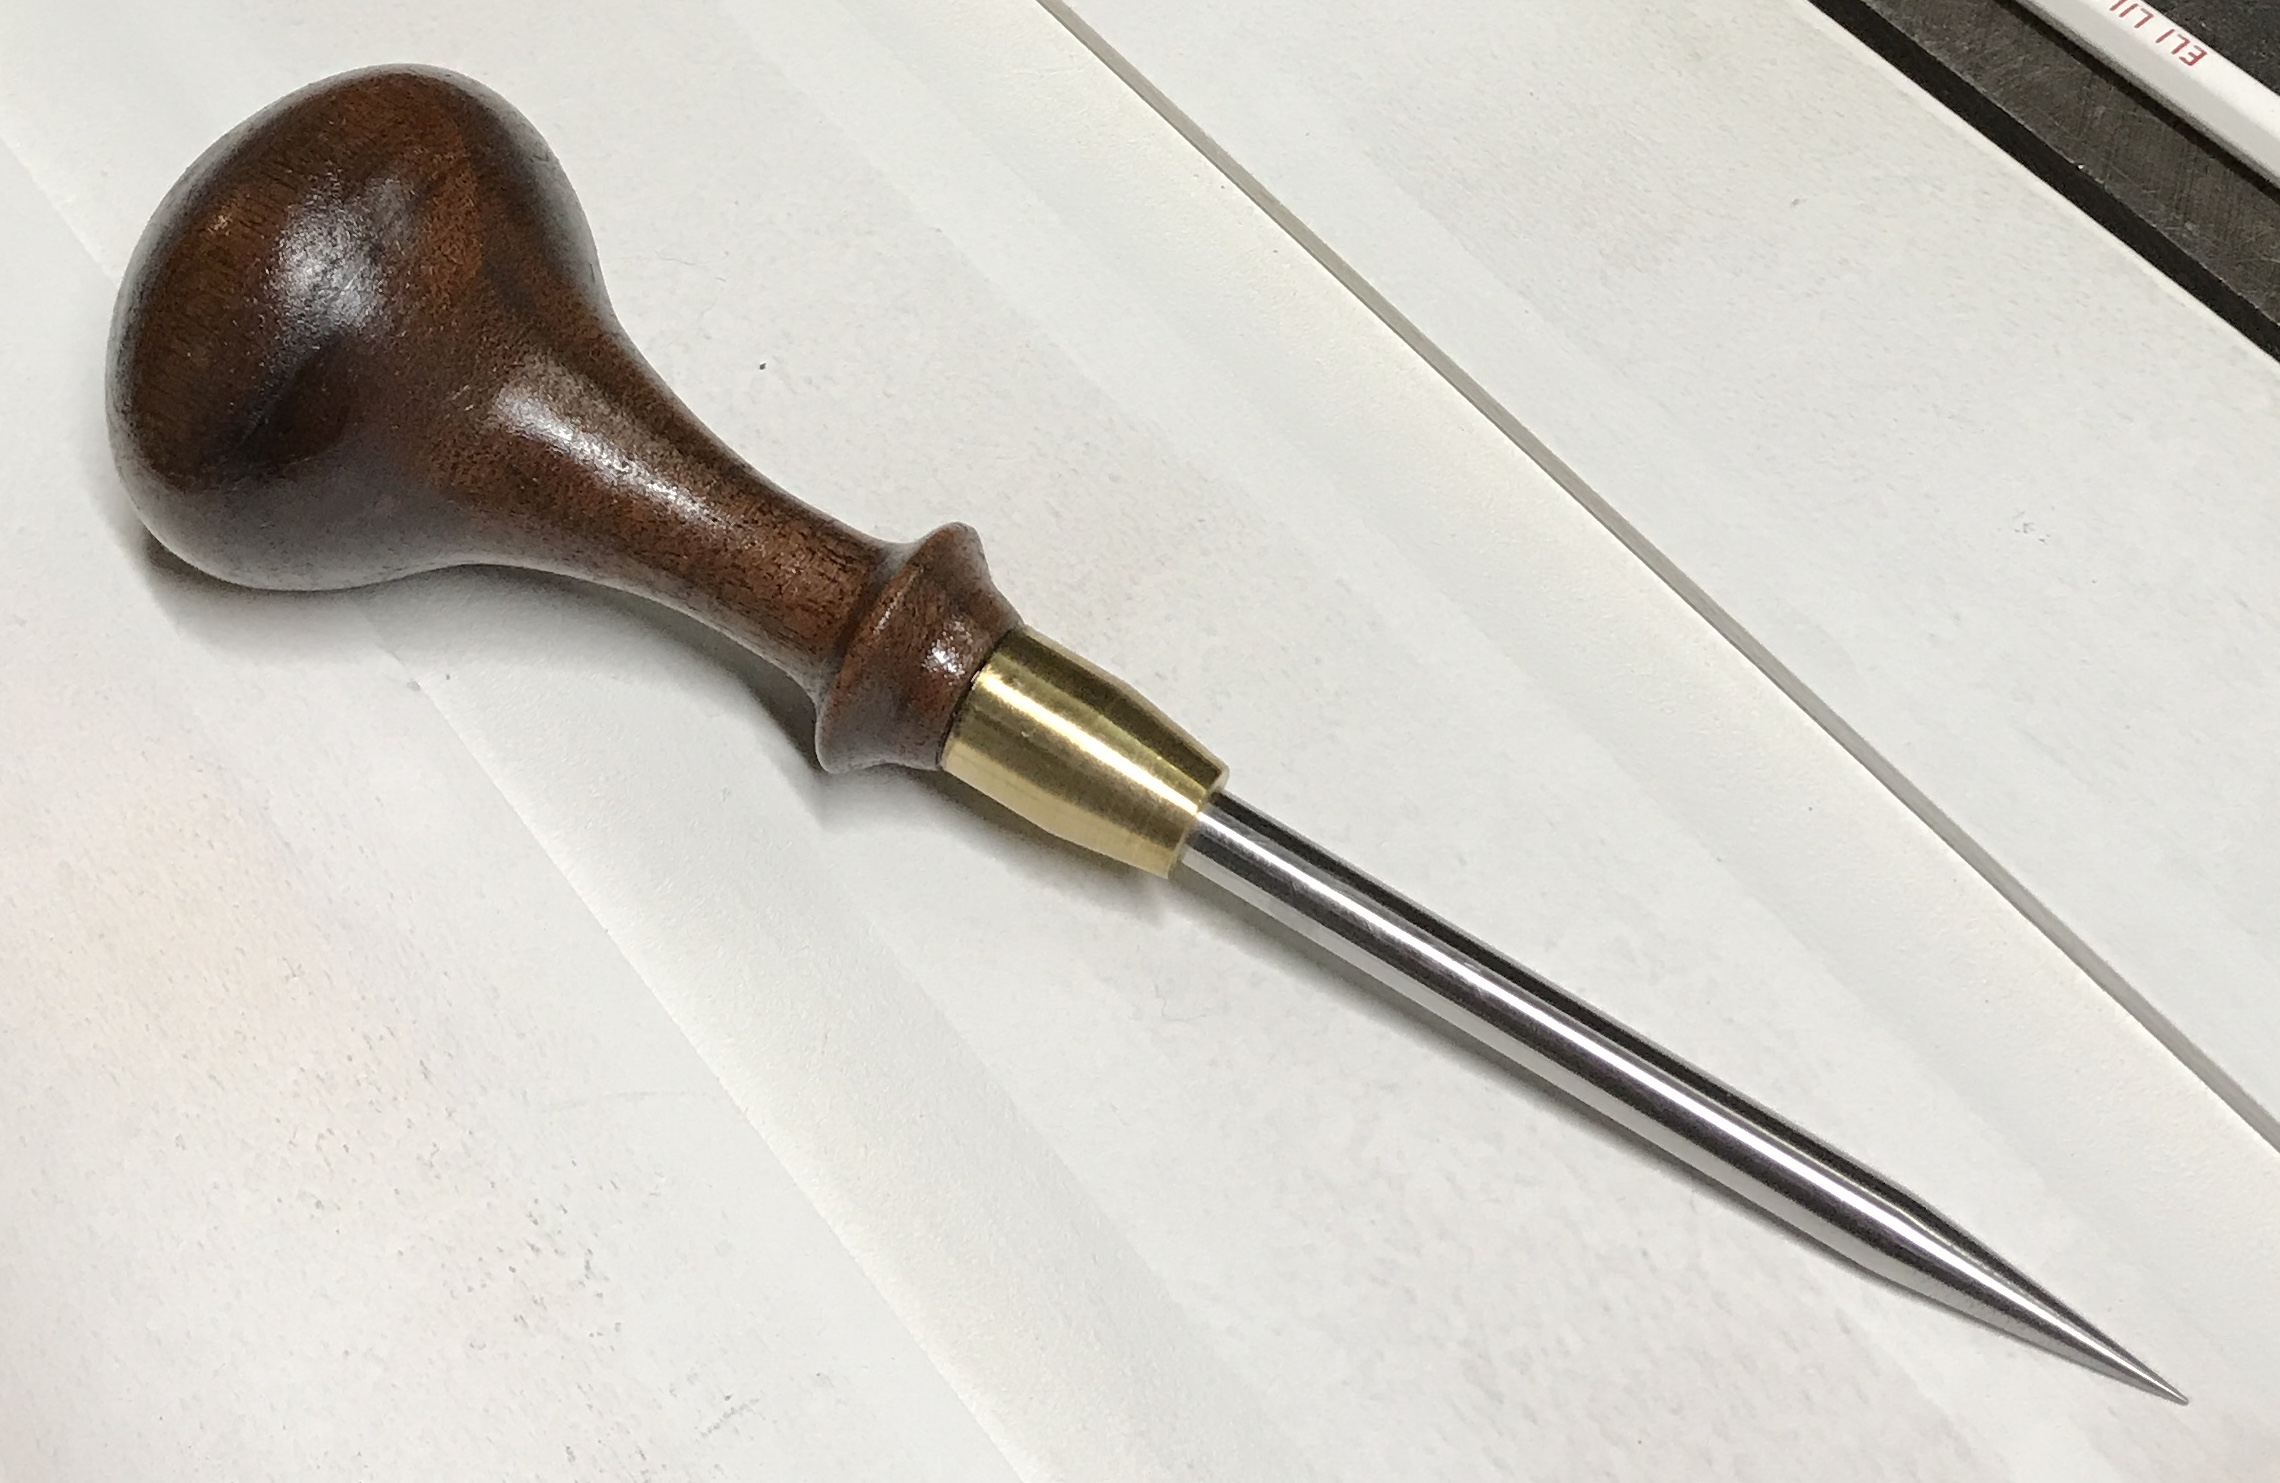
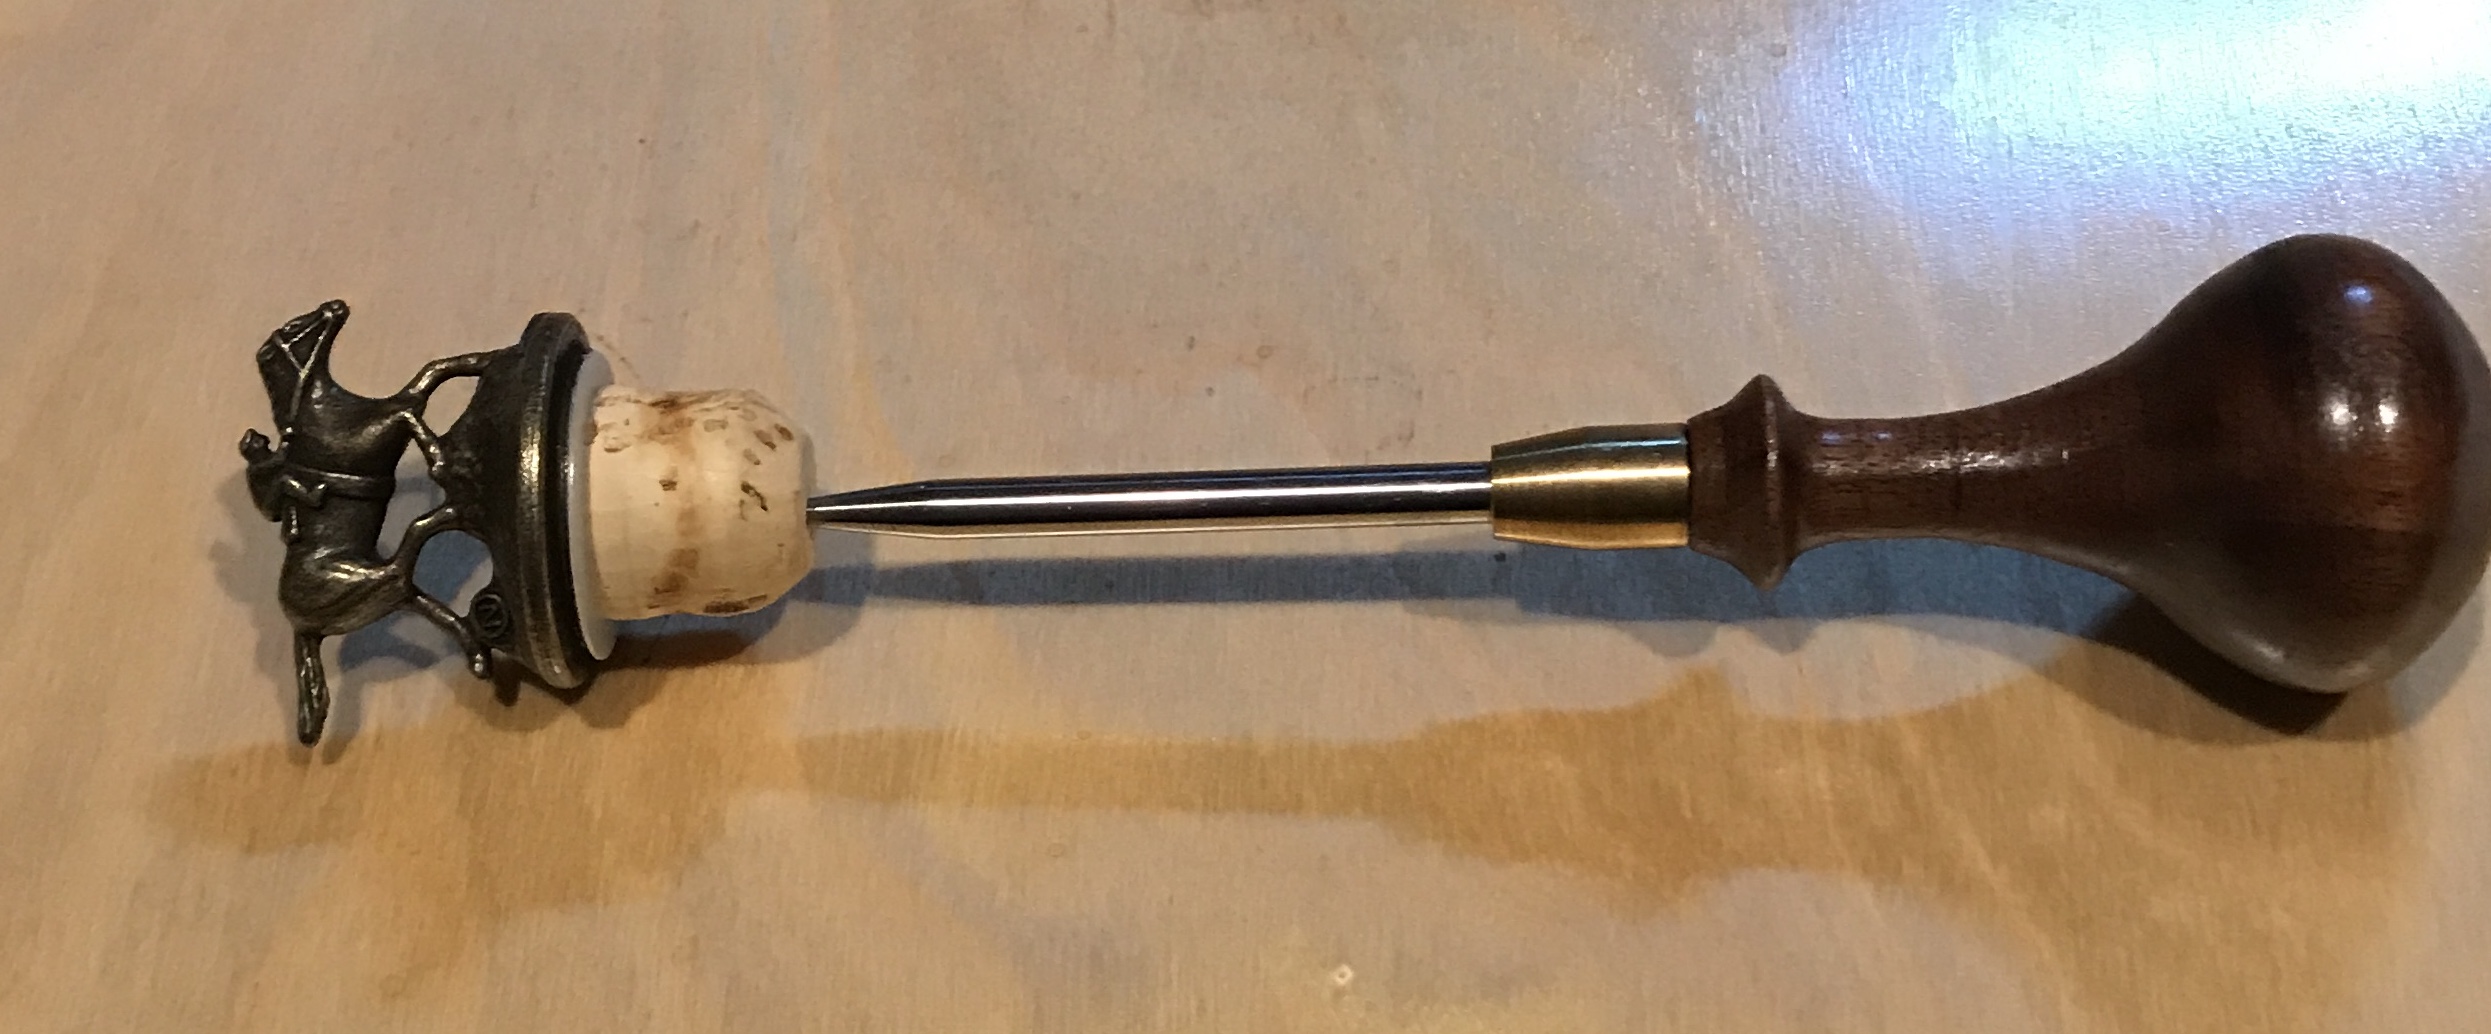
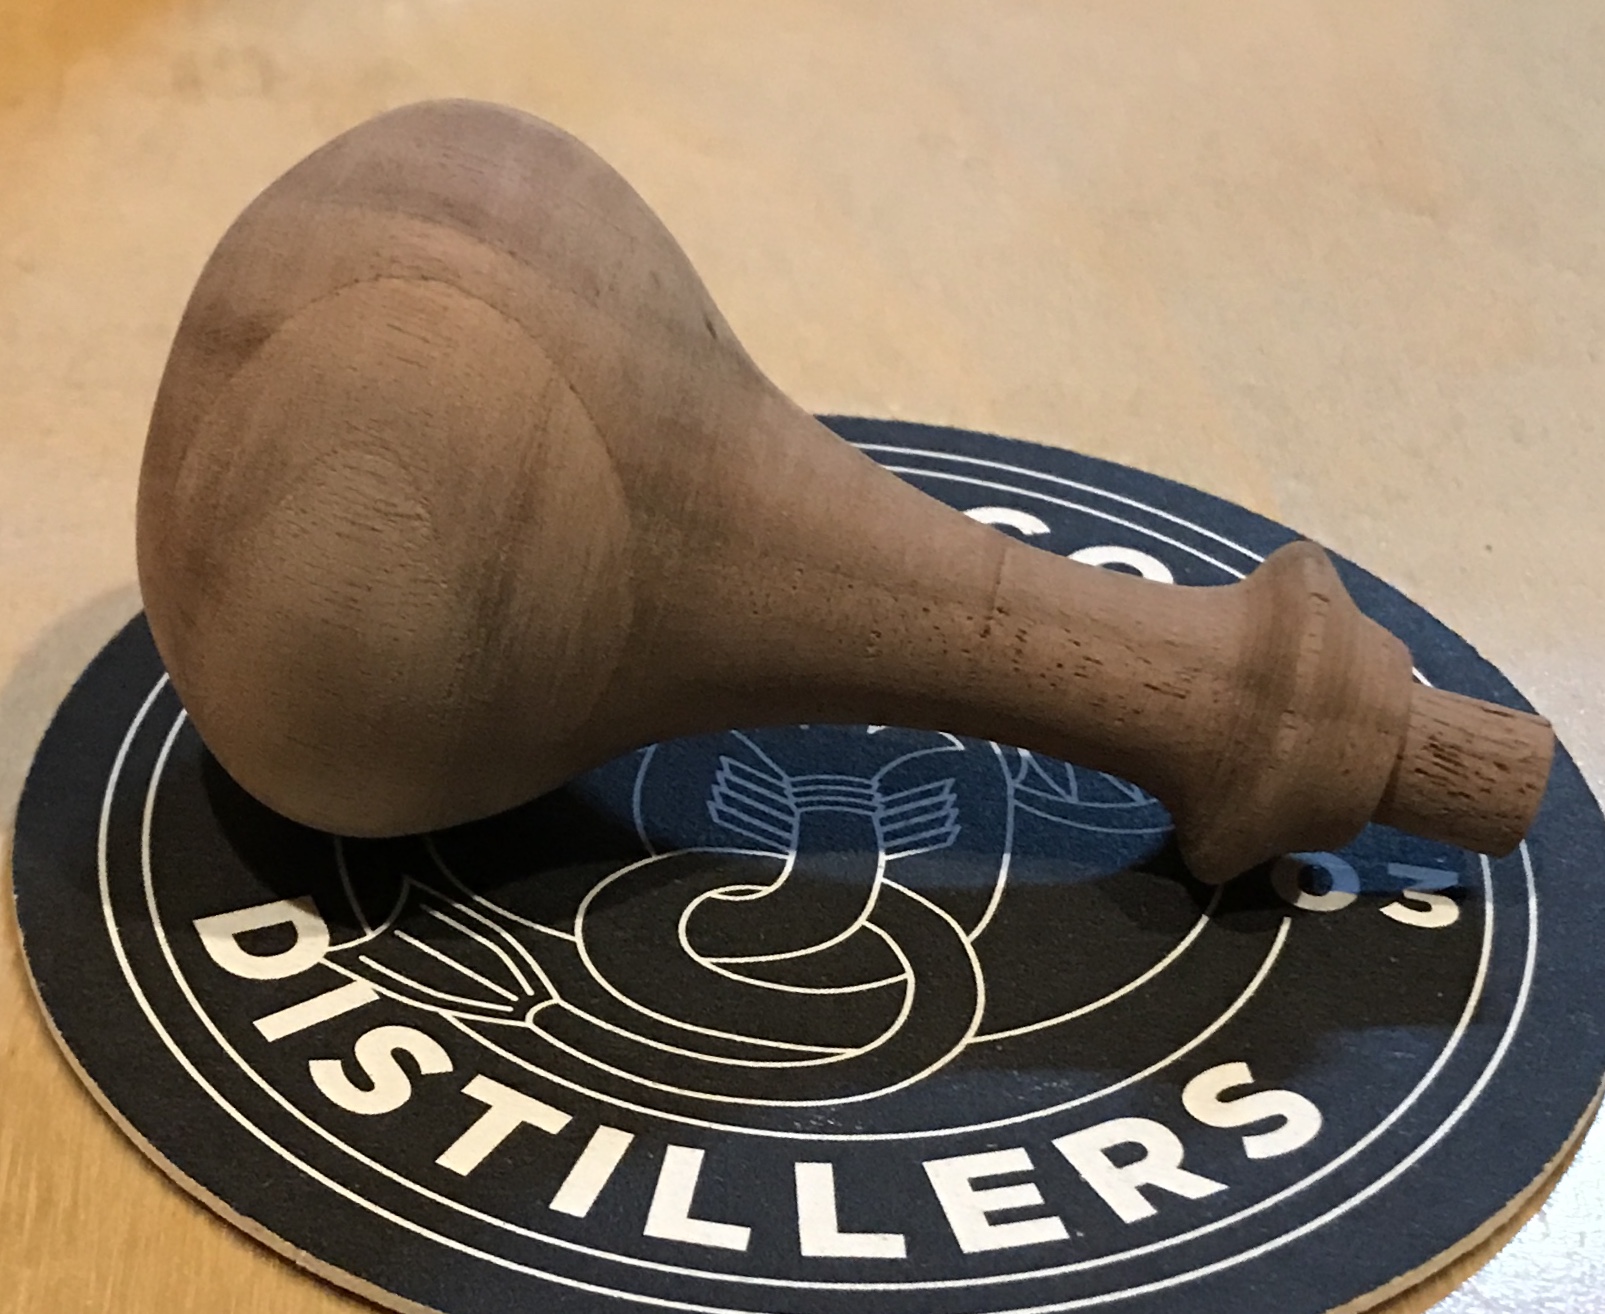
After 24 hours it seemed safe to start applying the finish. I liked the tung oil finish on the mirror frame. Since the handle is a scrap from the same walnut boards, tung oil will be used here as well. The first of three coats was applied this morning. It was immediately absorbed by the walnut. Coat two was applied the following morning. Most was still rapidly absorbed. There is a hint of shine here and there. Coat three on Memorial Day. Will definitely need at least four coats. Applied the fourth coat of tung oil this morning after rubbing the handle down with a rough paper towel (dried tung oil). Below is a picture of the finished scratch awl and a picture with the Blanton's whiskey cork installed for tip protection.