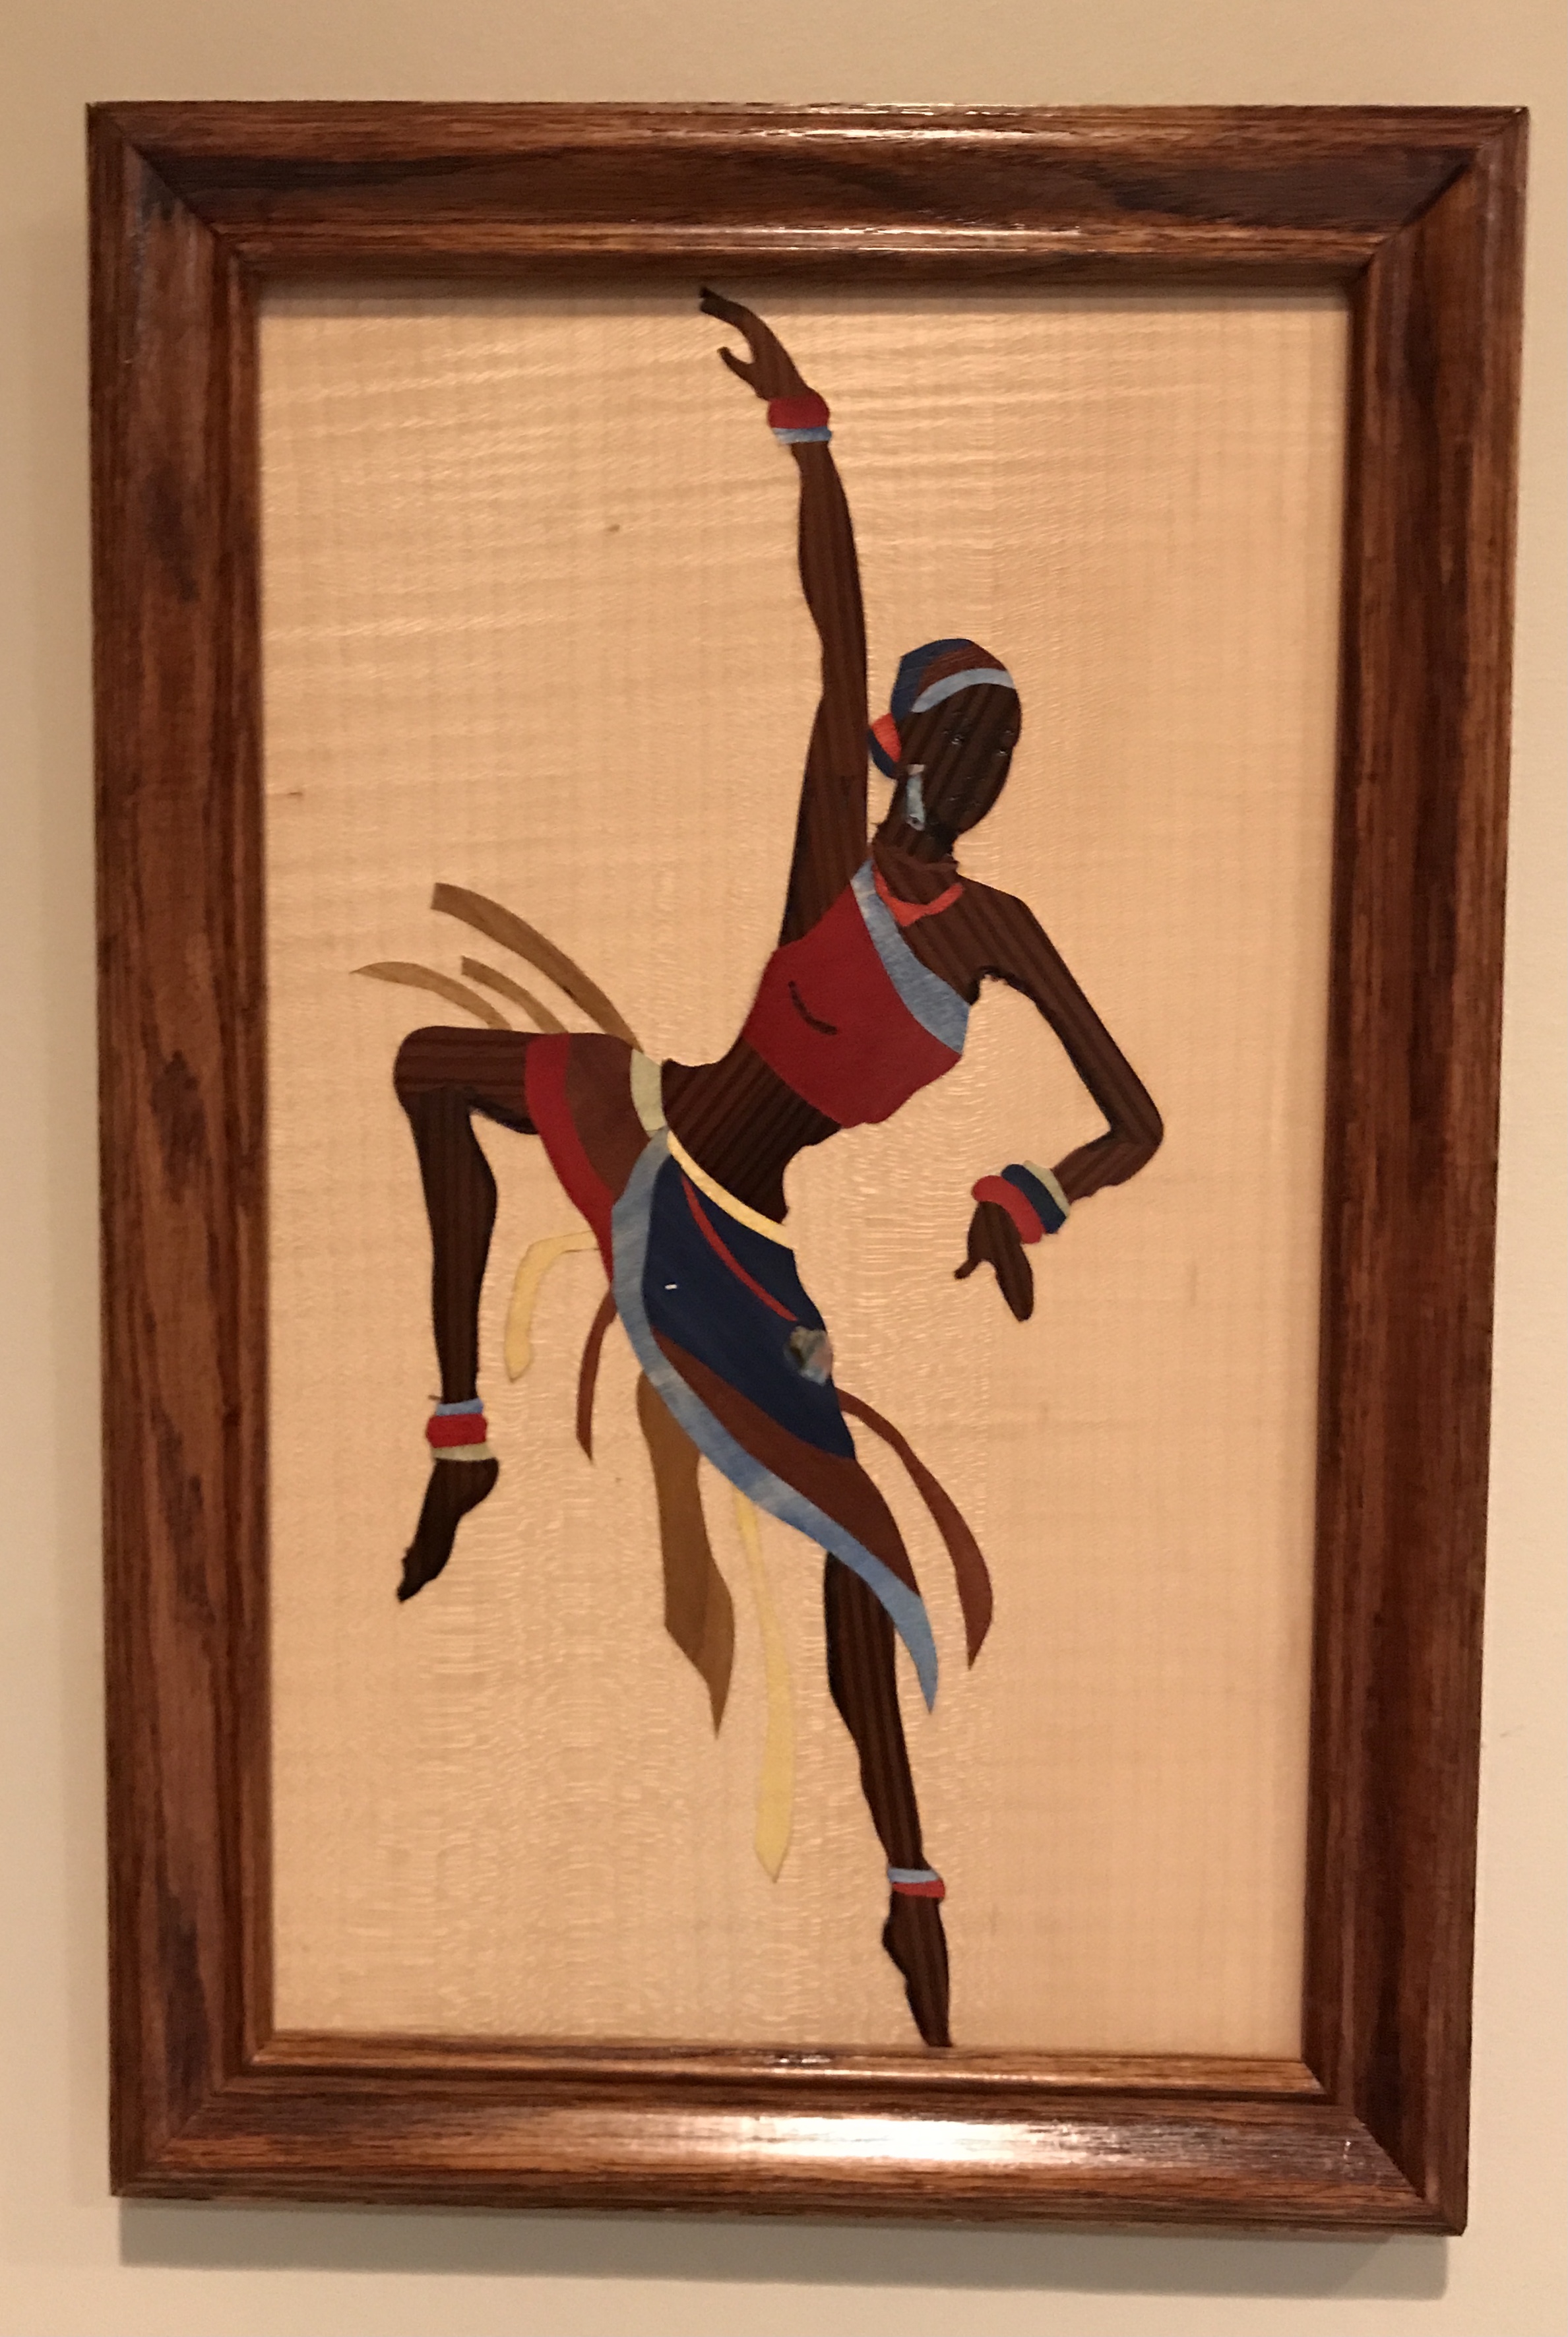
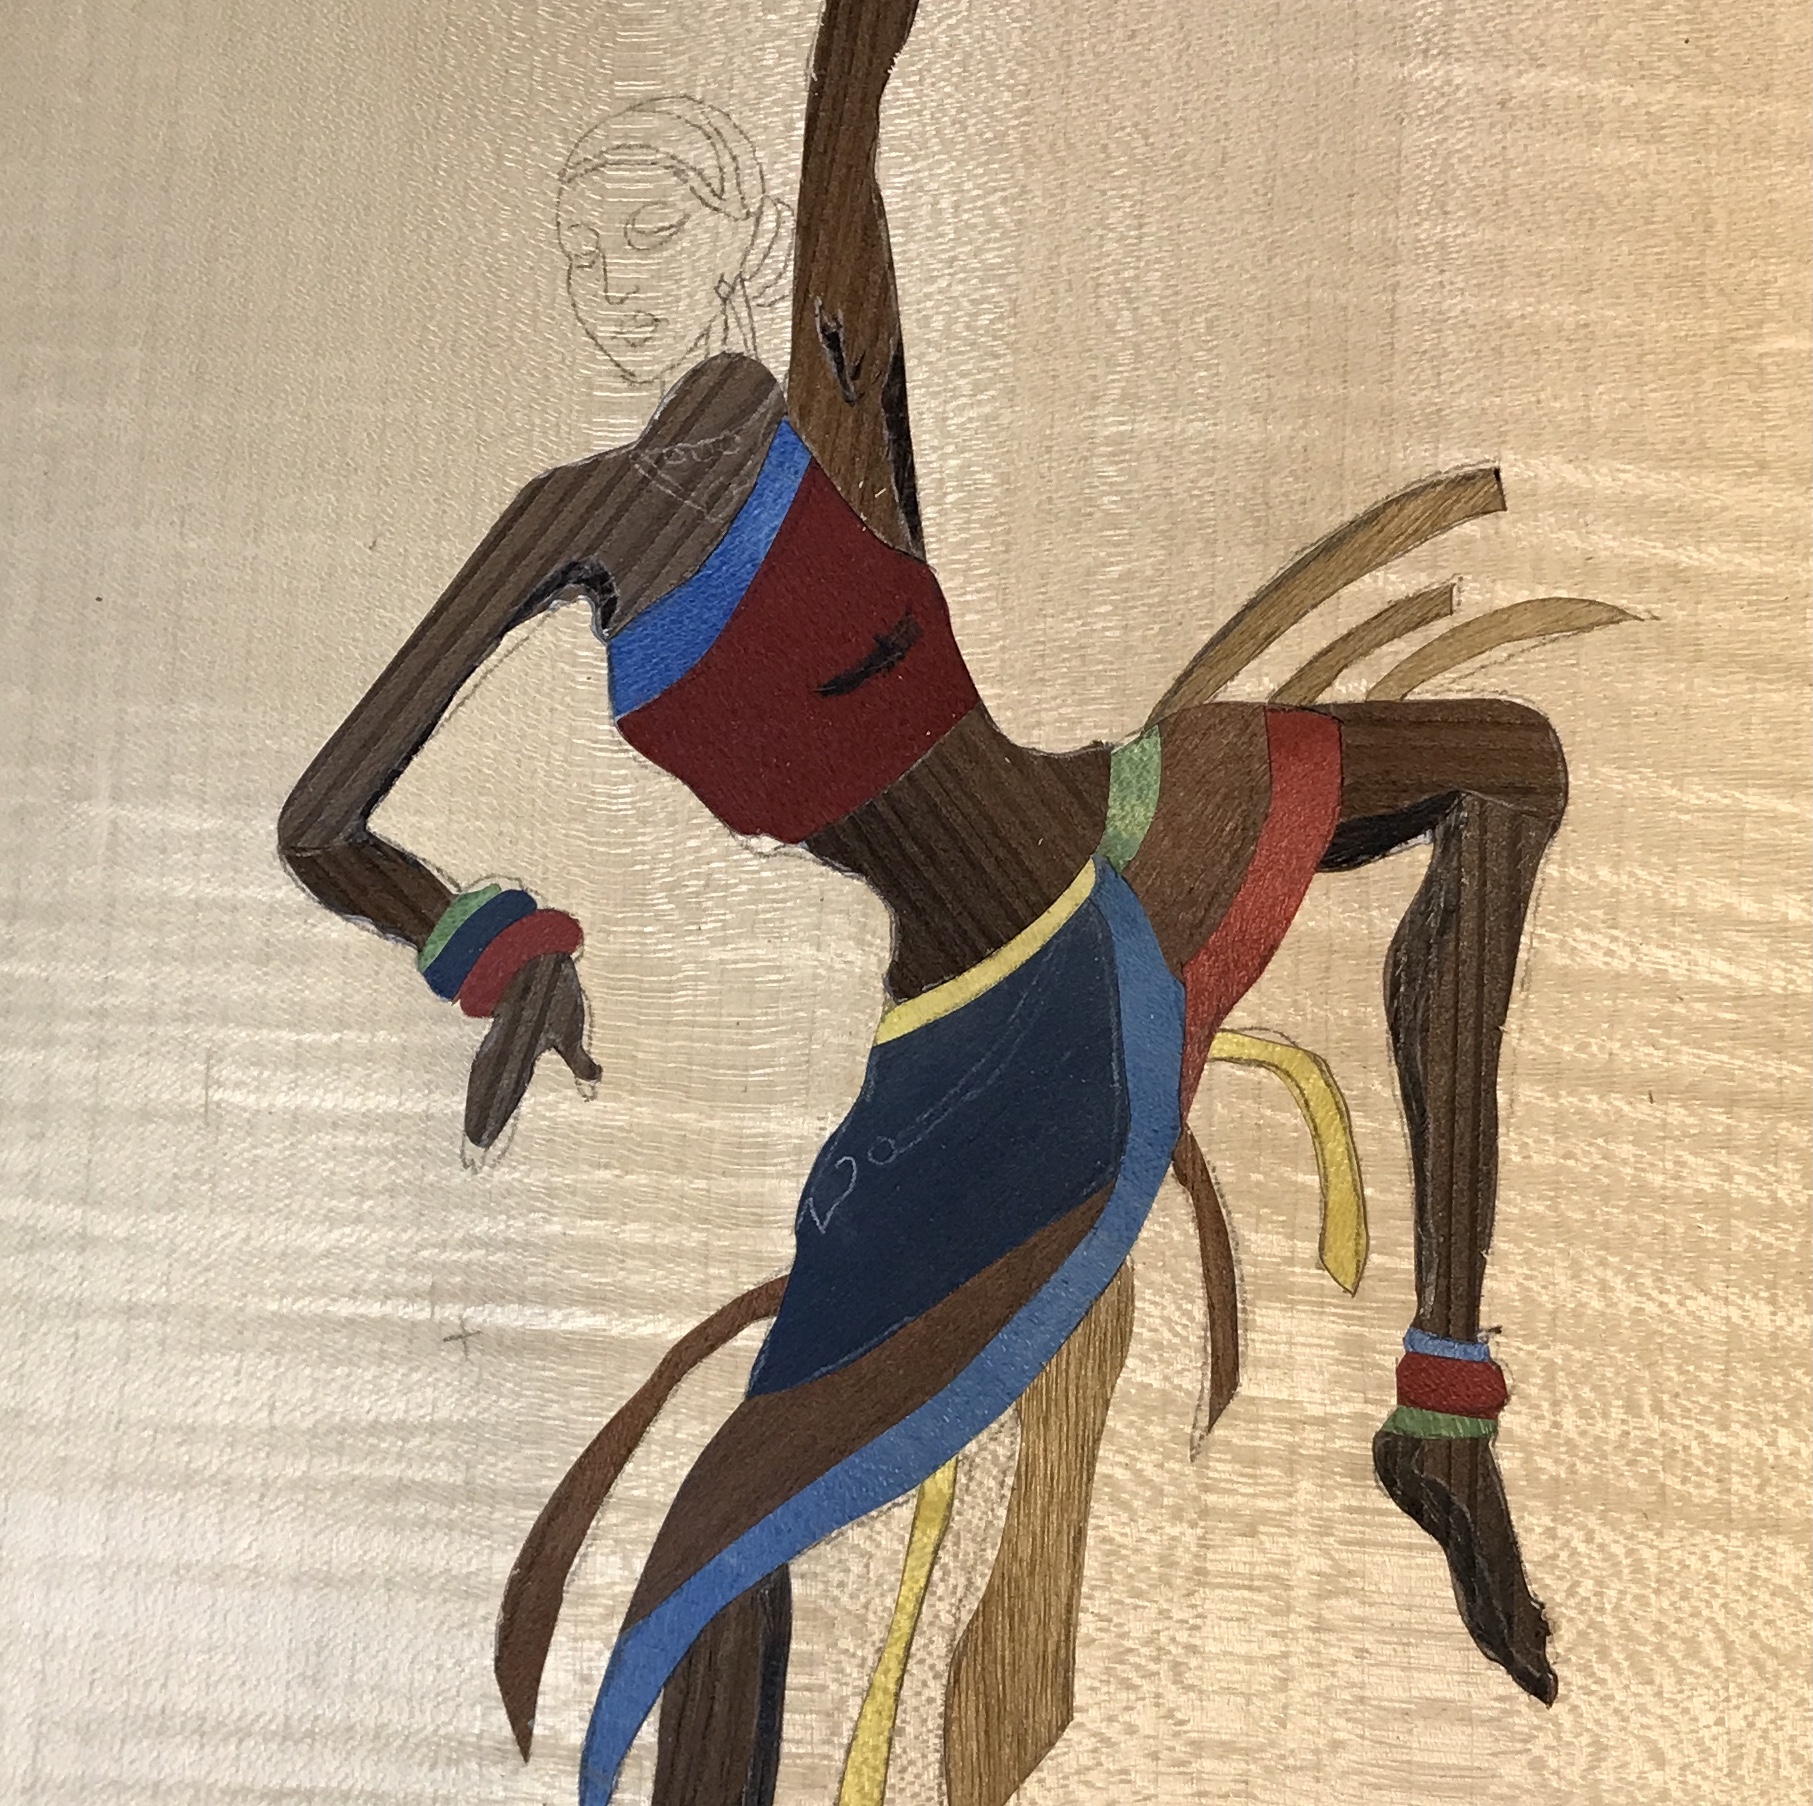
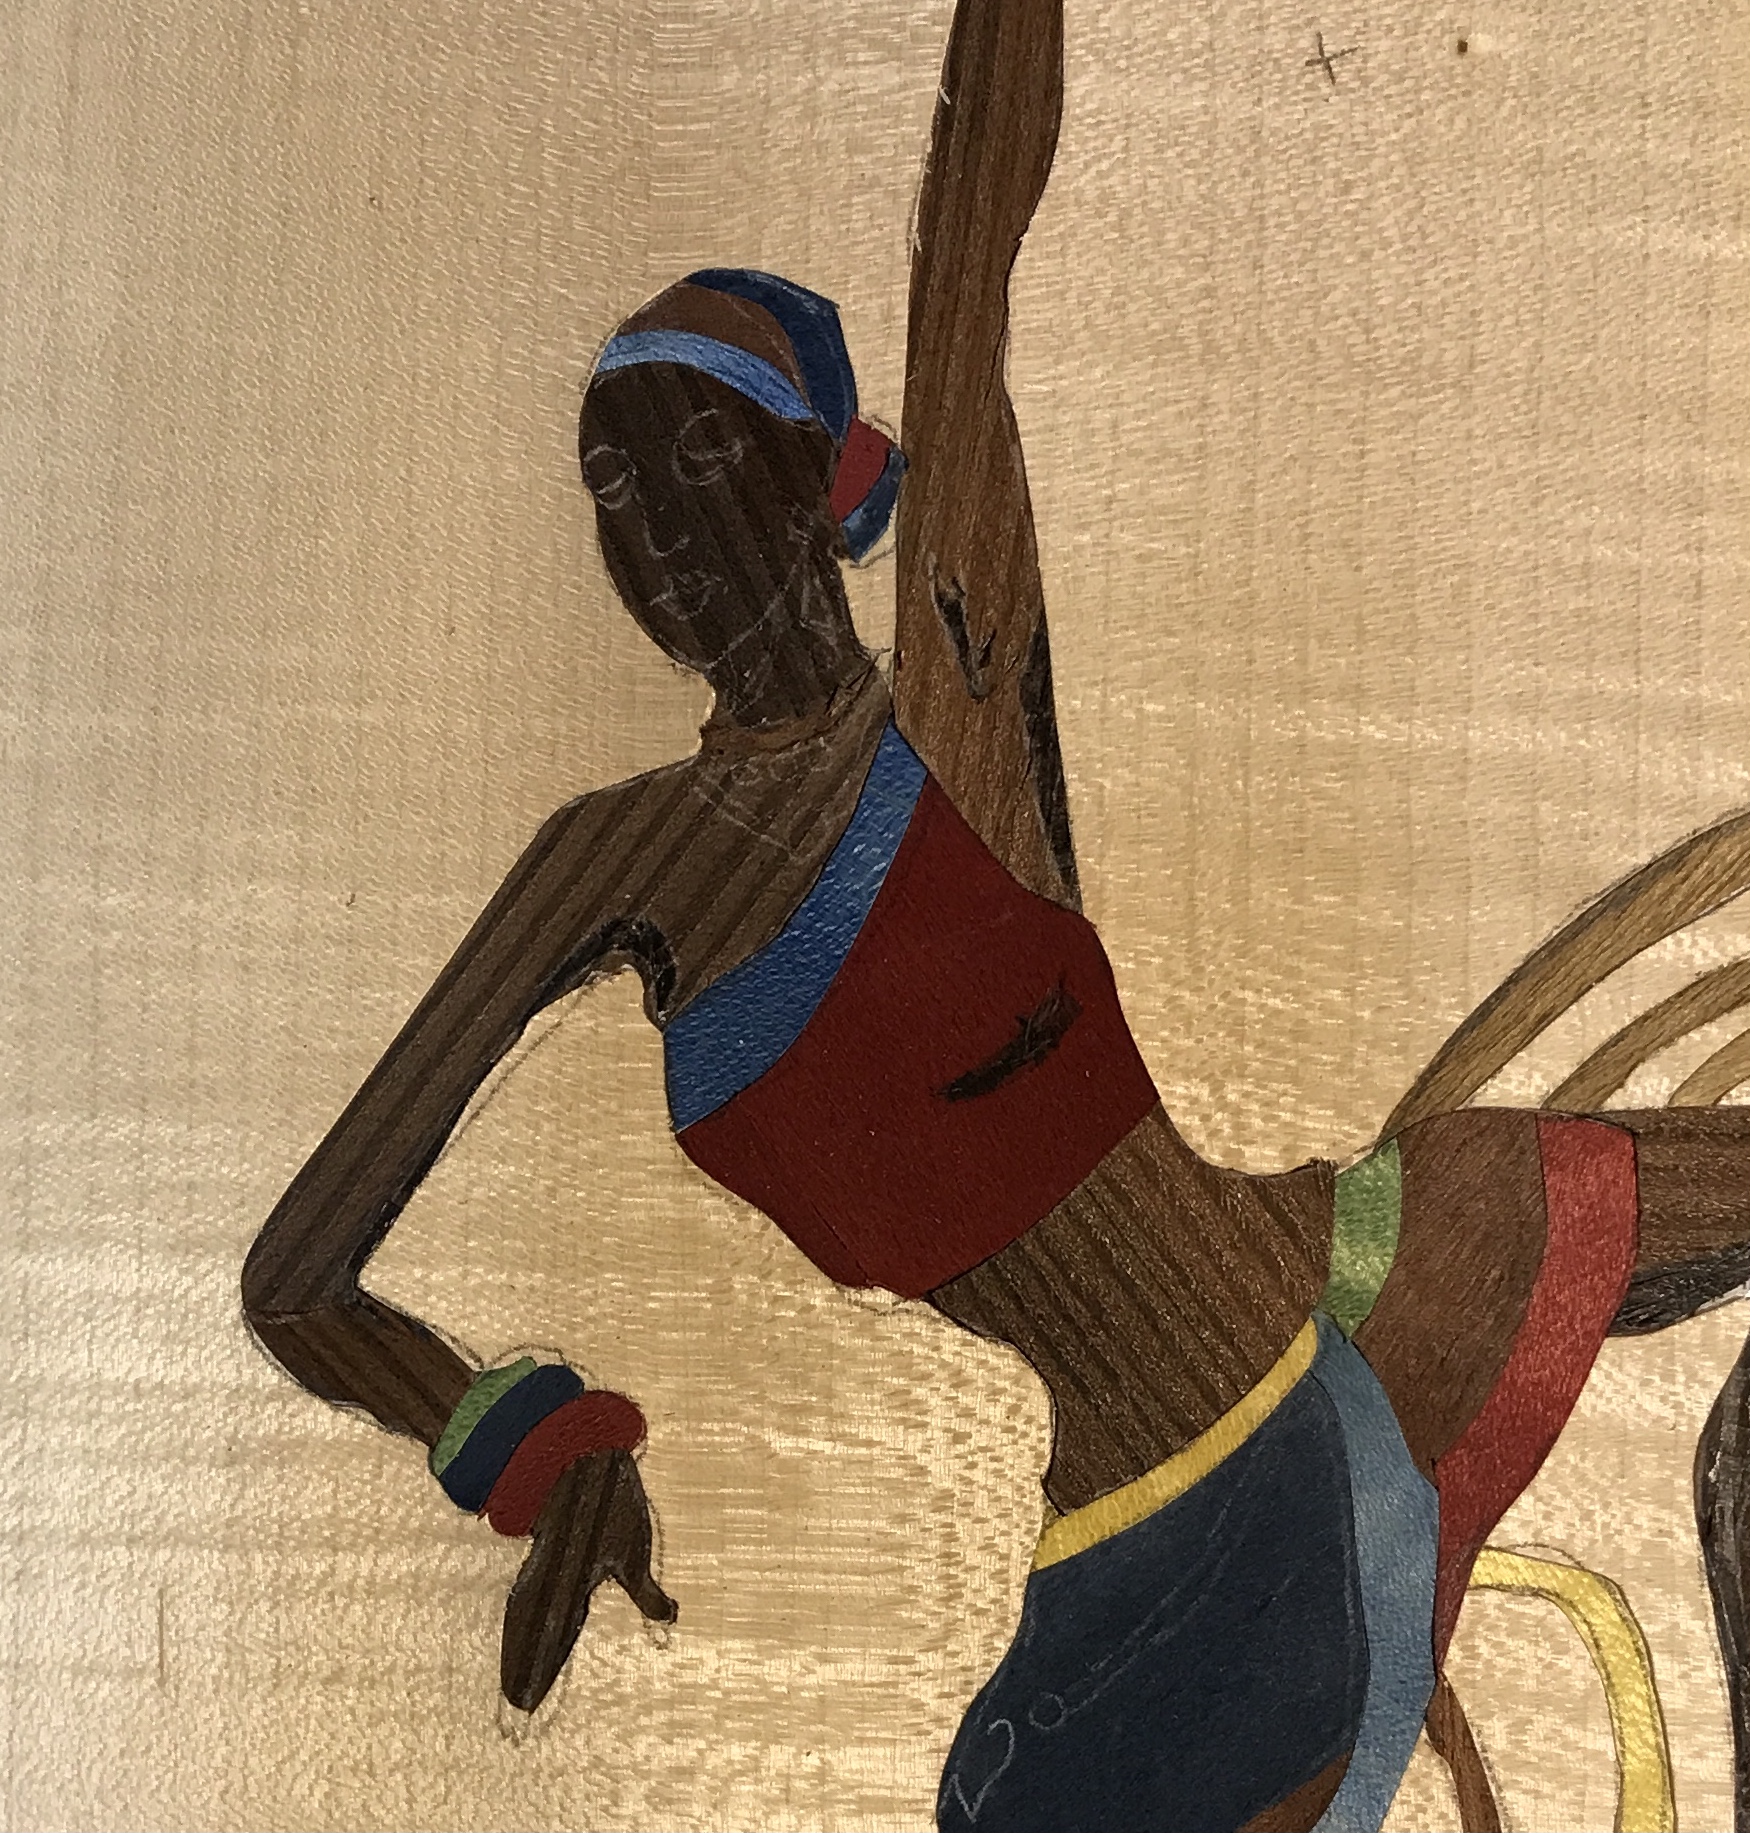
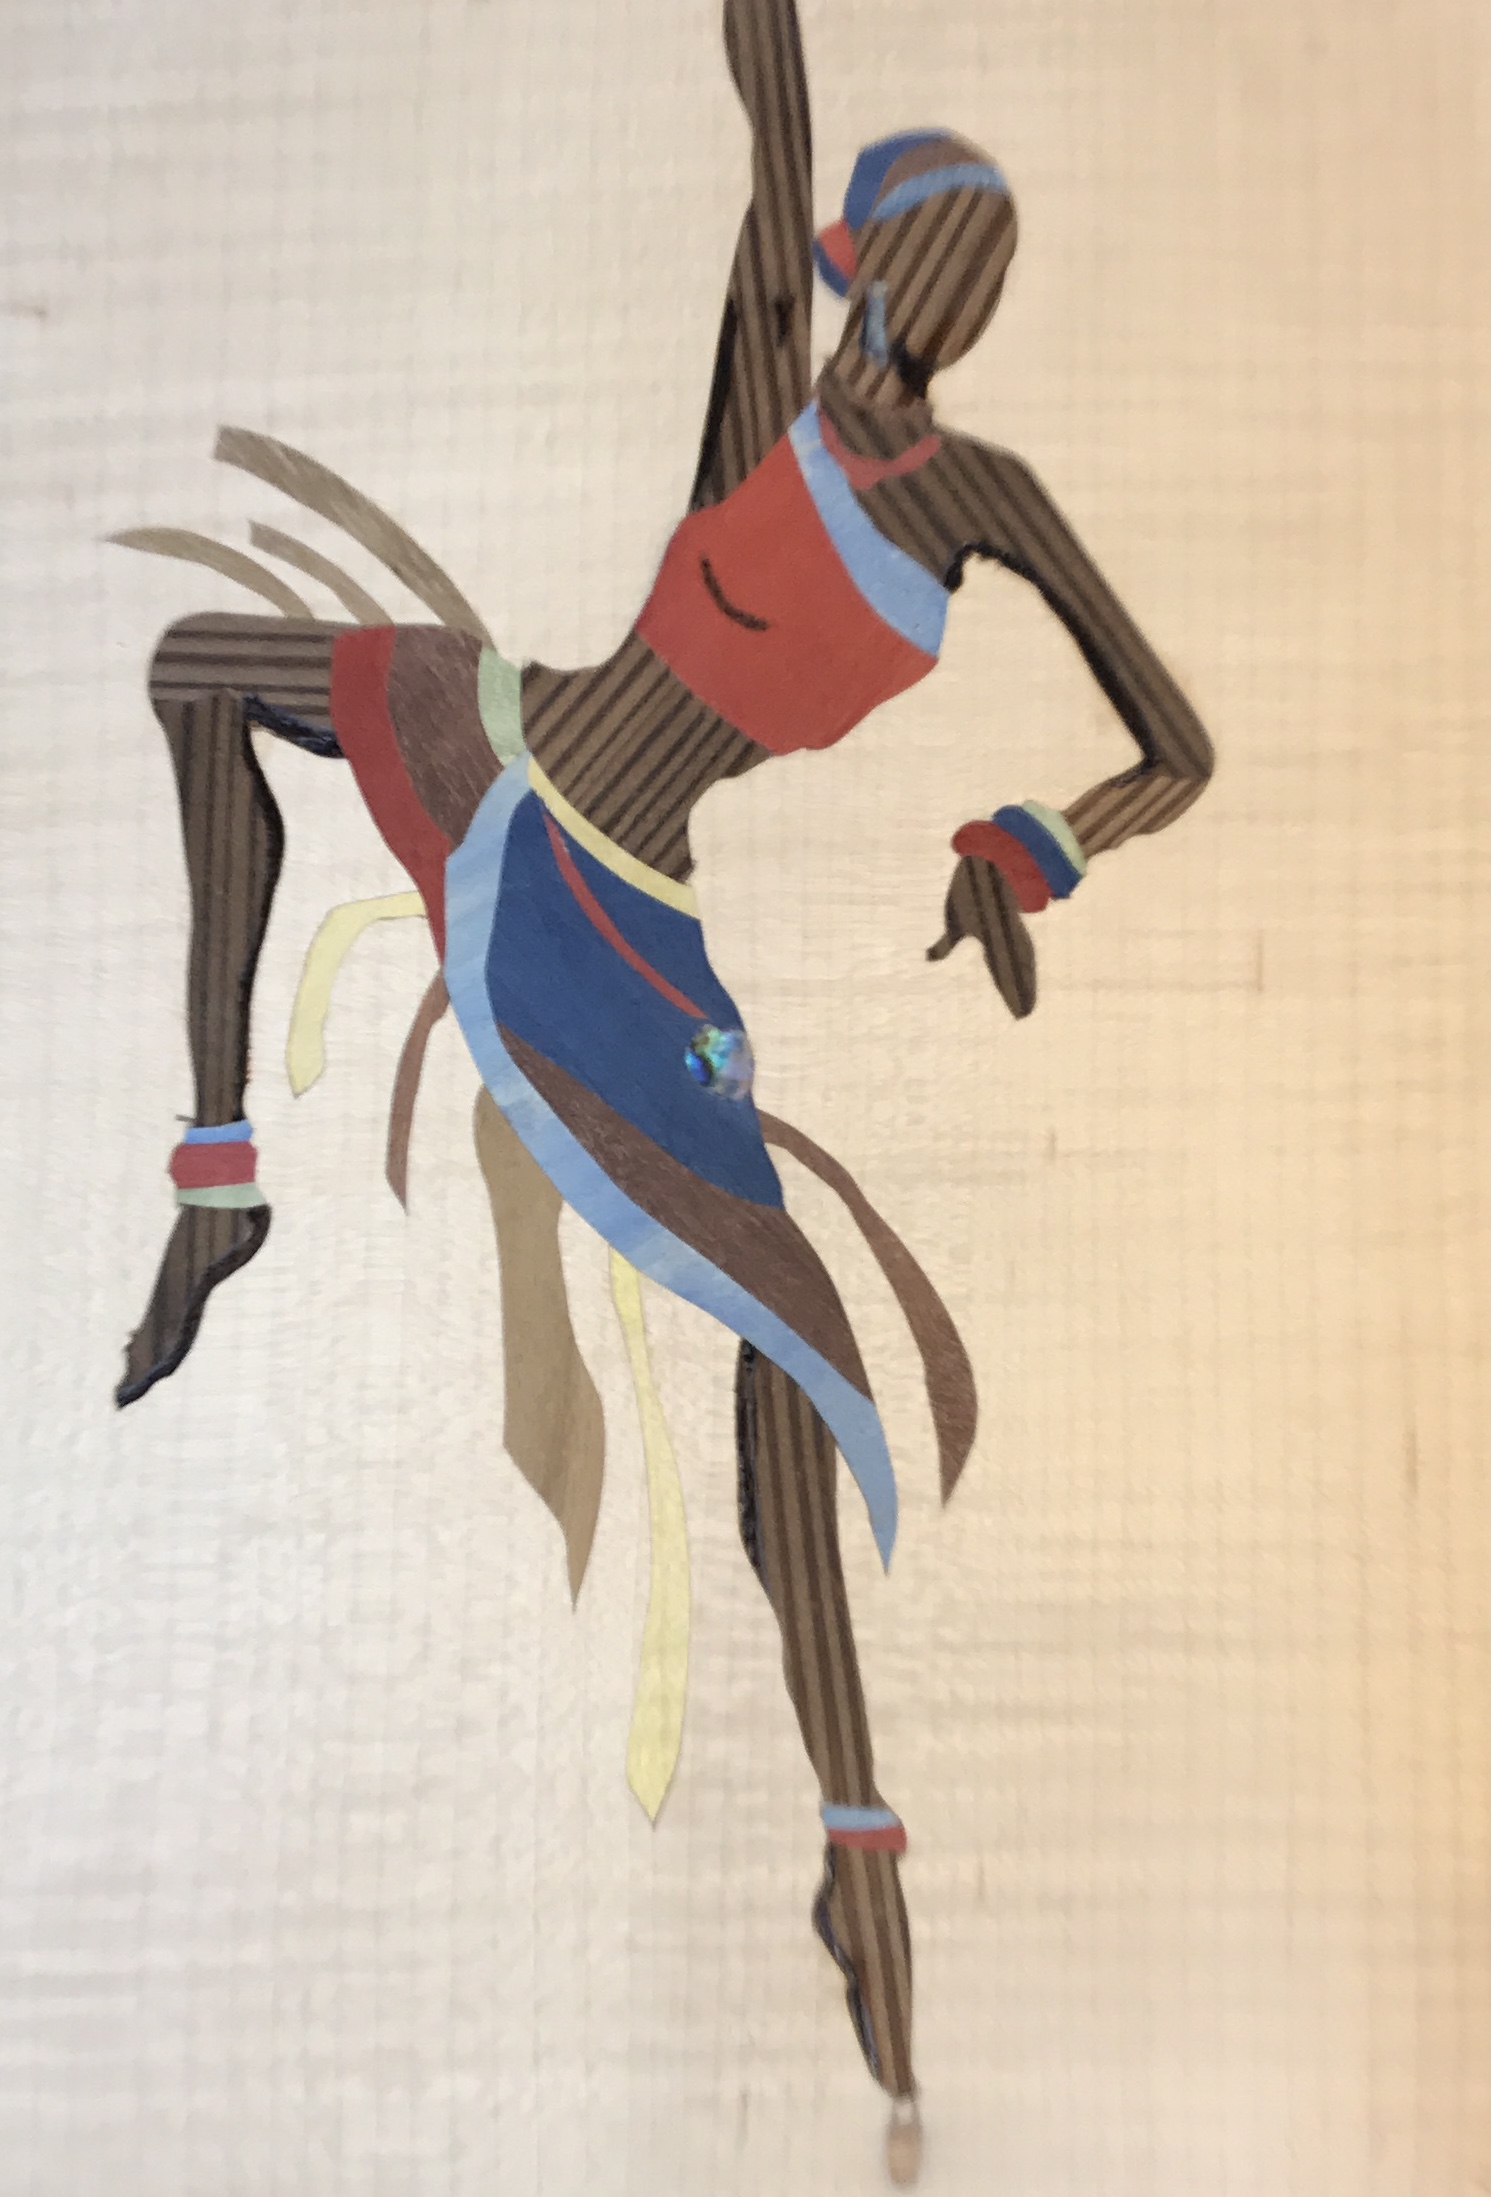
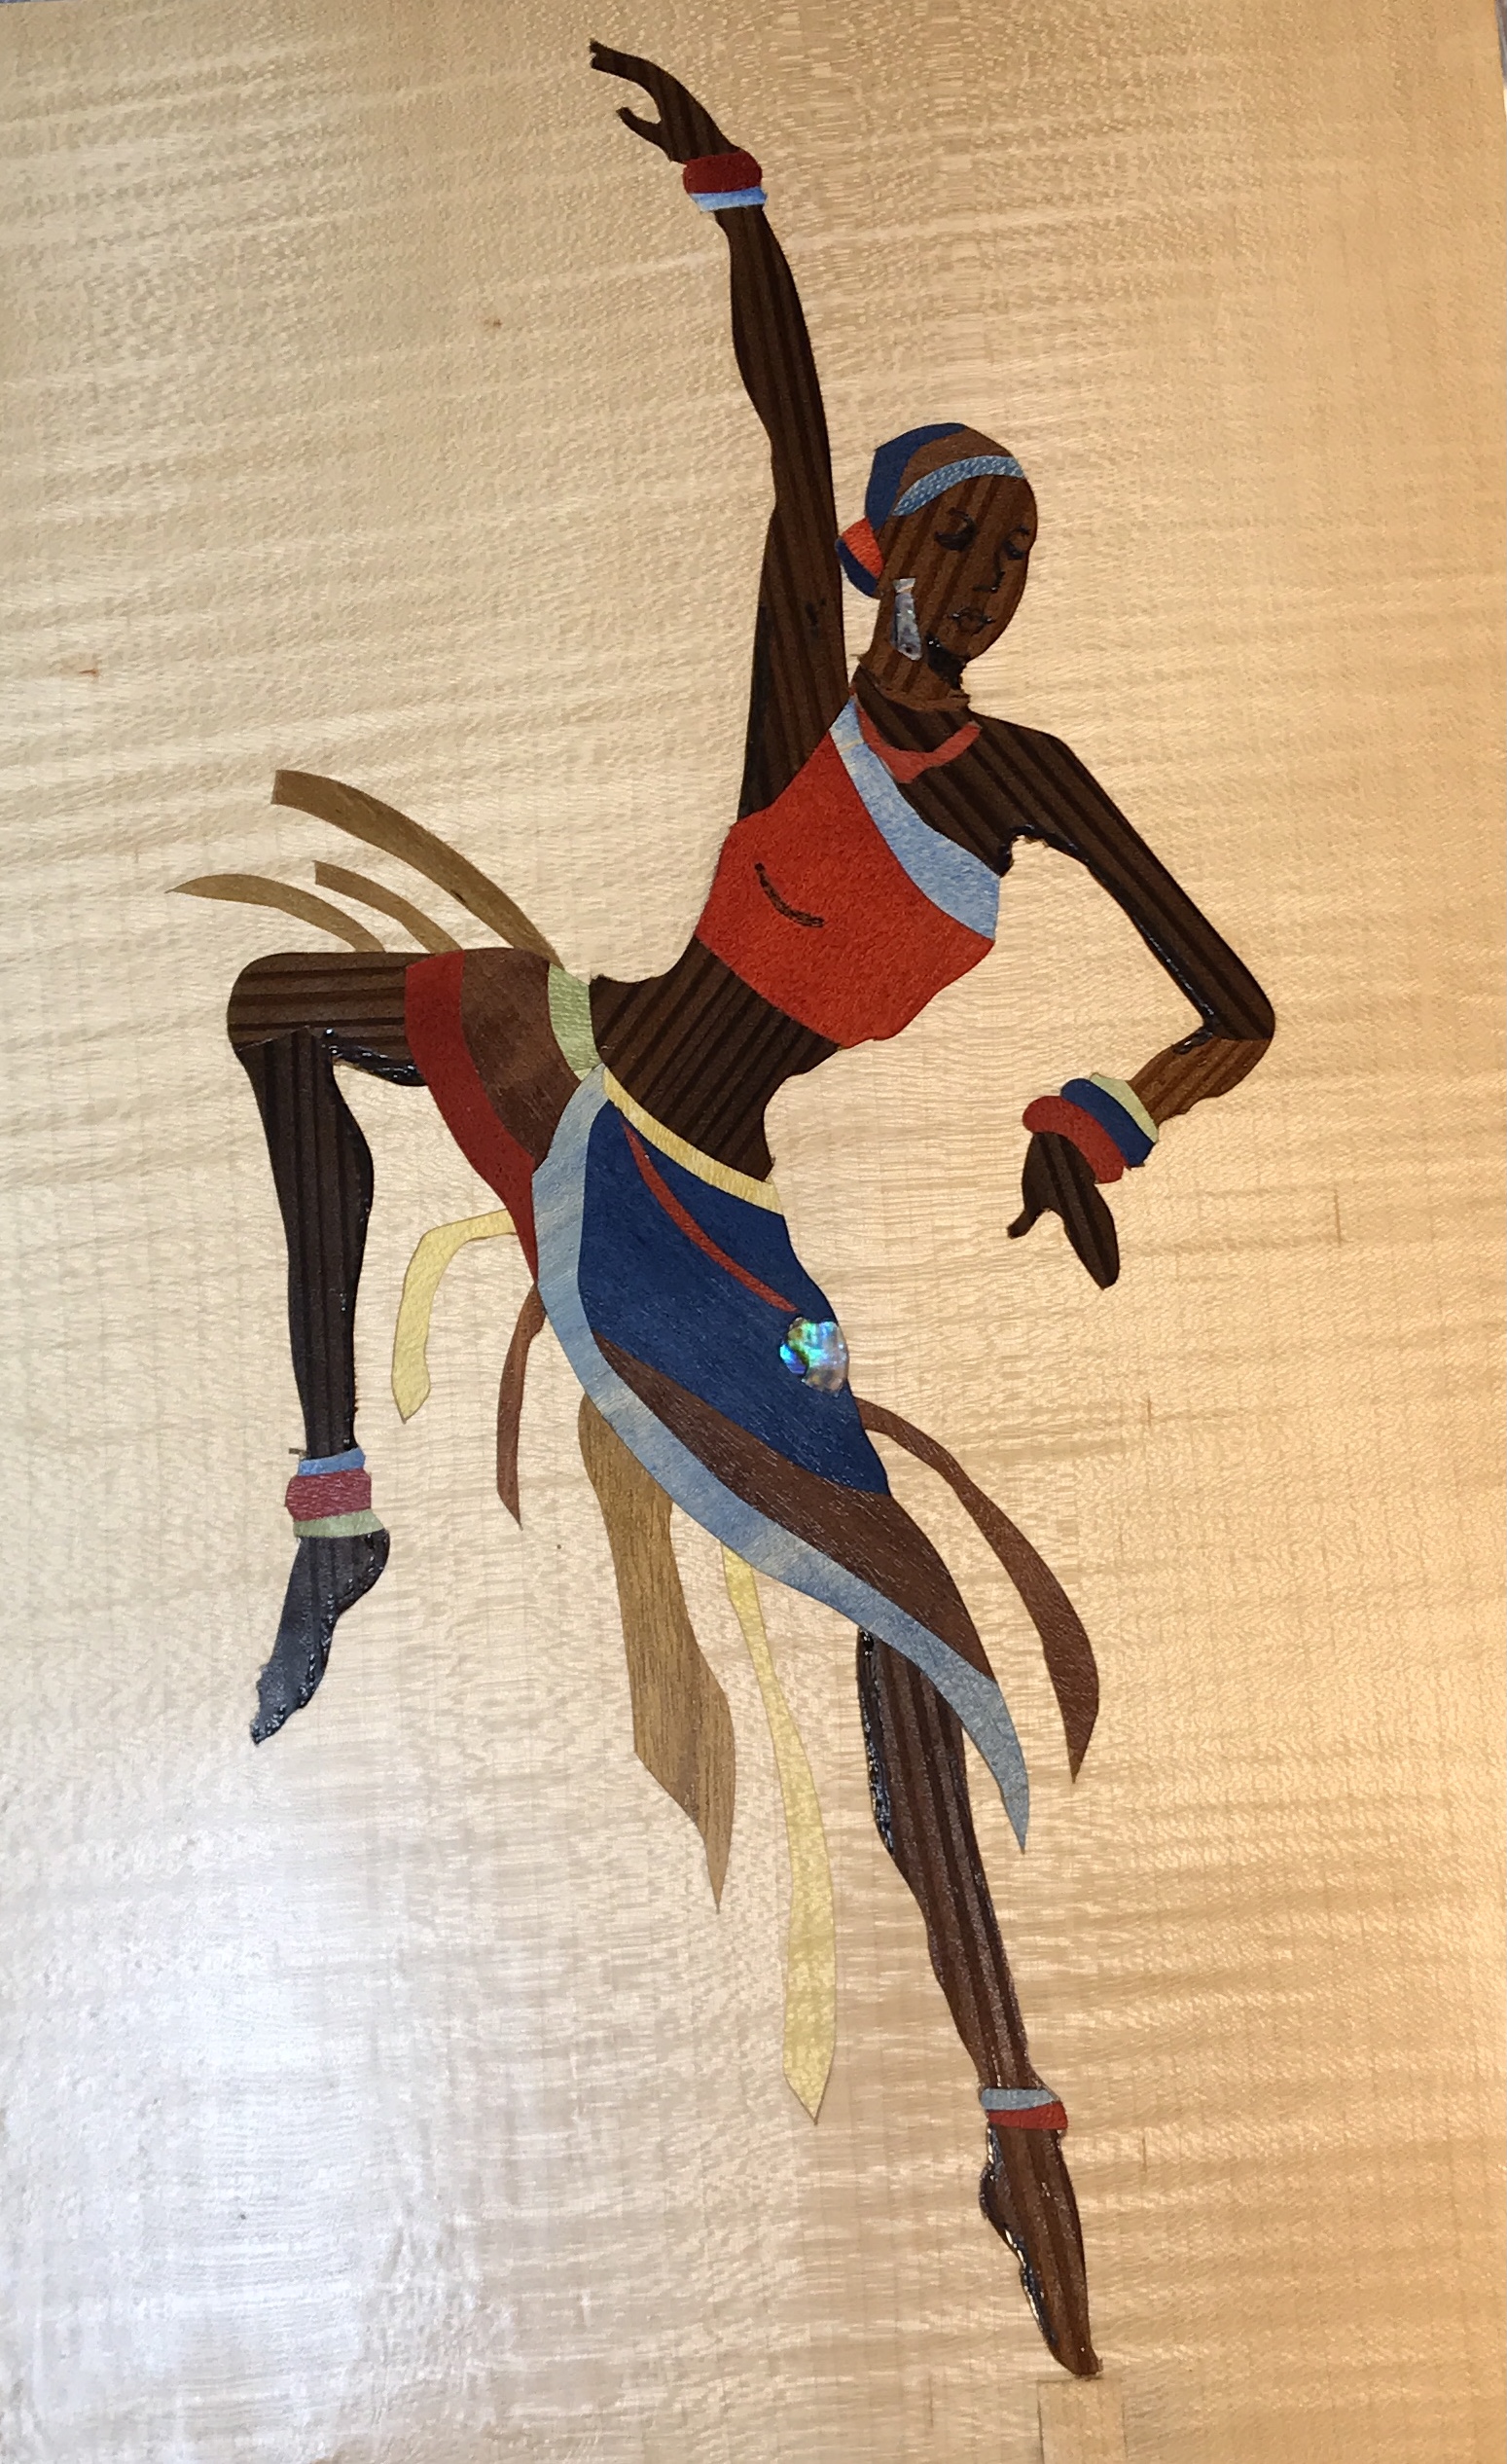
The plan is to make a marquetry present for Rhea's upcoming birthday in three months. If I start now, it might be ready in time. A picture of a dancer was selected from pics on the web and is shown below. The picture looks simple enough that I should be able to manage the marquetry.

First, the marquetry plan needs to be laid out. The first step in this process is defining the packets. A packet is a natural unit that usually incorporates some level of complexity warranting a separate construction prior to installing in the background veneer. This image has eight potential packets. The head, neck, shirt, and skirt should be treated as packets. The arms and legs will also be treated as packets due to the bracelets on each. Another approach for these last four would be treating the sets of bracelets as entities and just cutting them into the corresponding arm or leg after installing the arm or leg in the background.
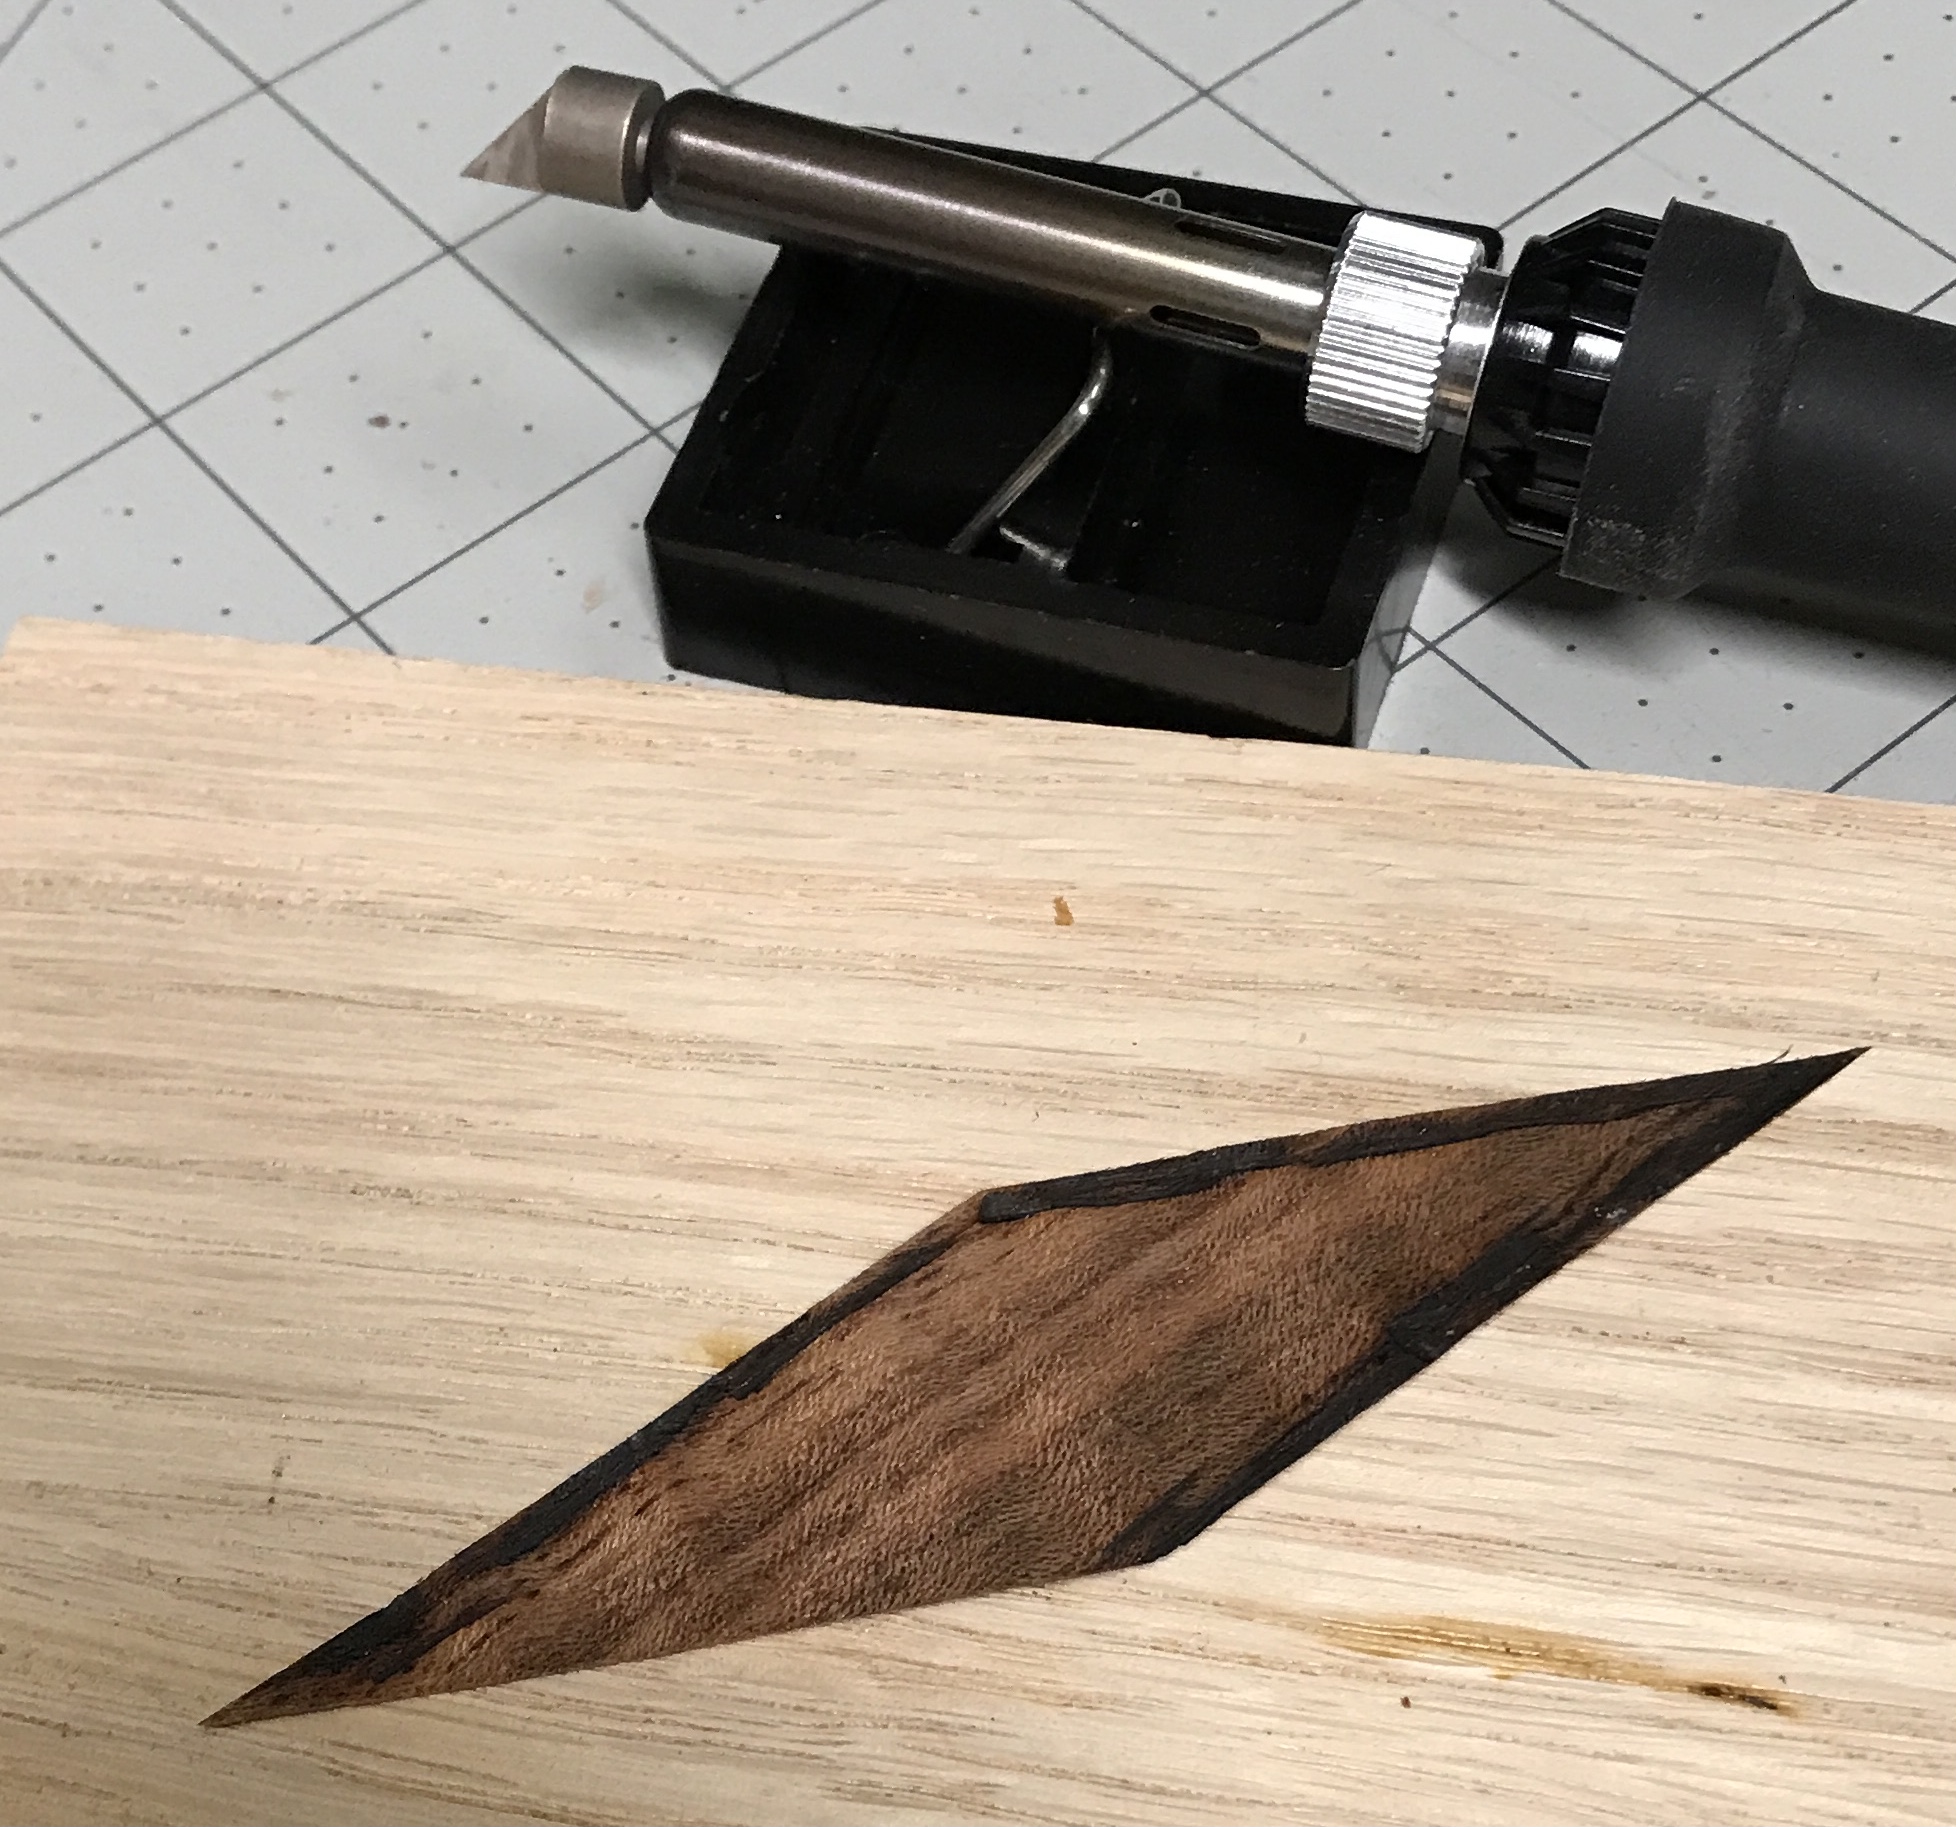
The next step is determining the number of colors and the veneer that will portray each color. There are at least eight colors minimum, maybe as many as twelve, plus the background. Of course most of the colors will be changed to wood tones. The skin in many places has darker shadows. Some actually represent shadows and some represent bodily features, e.g. eyes, nose, and mouth. This darkening could be accomplished by burning the wood. My class taught how to burn an edge or a piece of veneer to serve as a shadow, but most of the darker places here are internal or along the inside of bends. These could not be made by briefly dipping the veneer in hot sand. Wood burning might be the way to proceed. It just so happens a wood burning or soldering kit was purchased a few years ago and used only once.

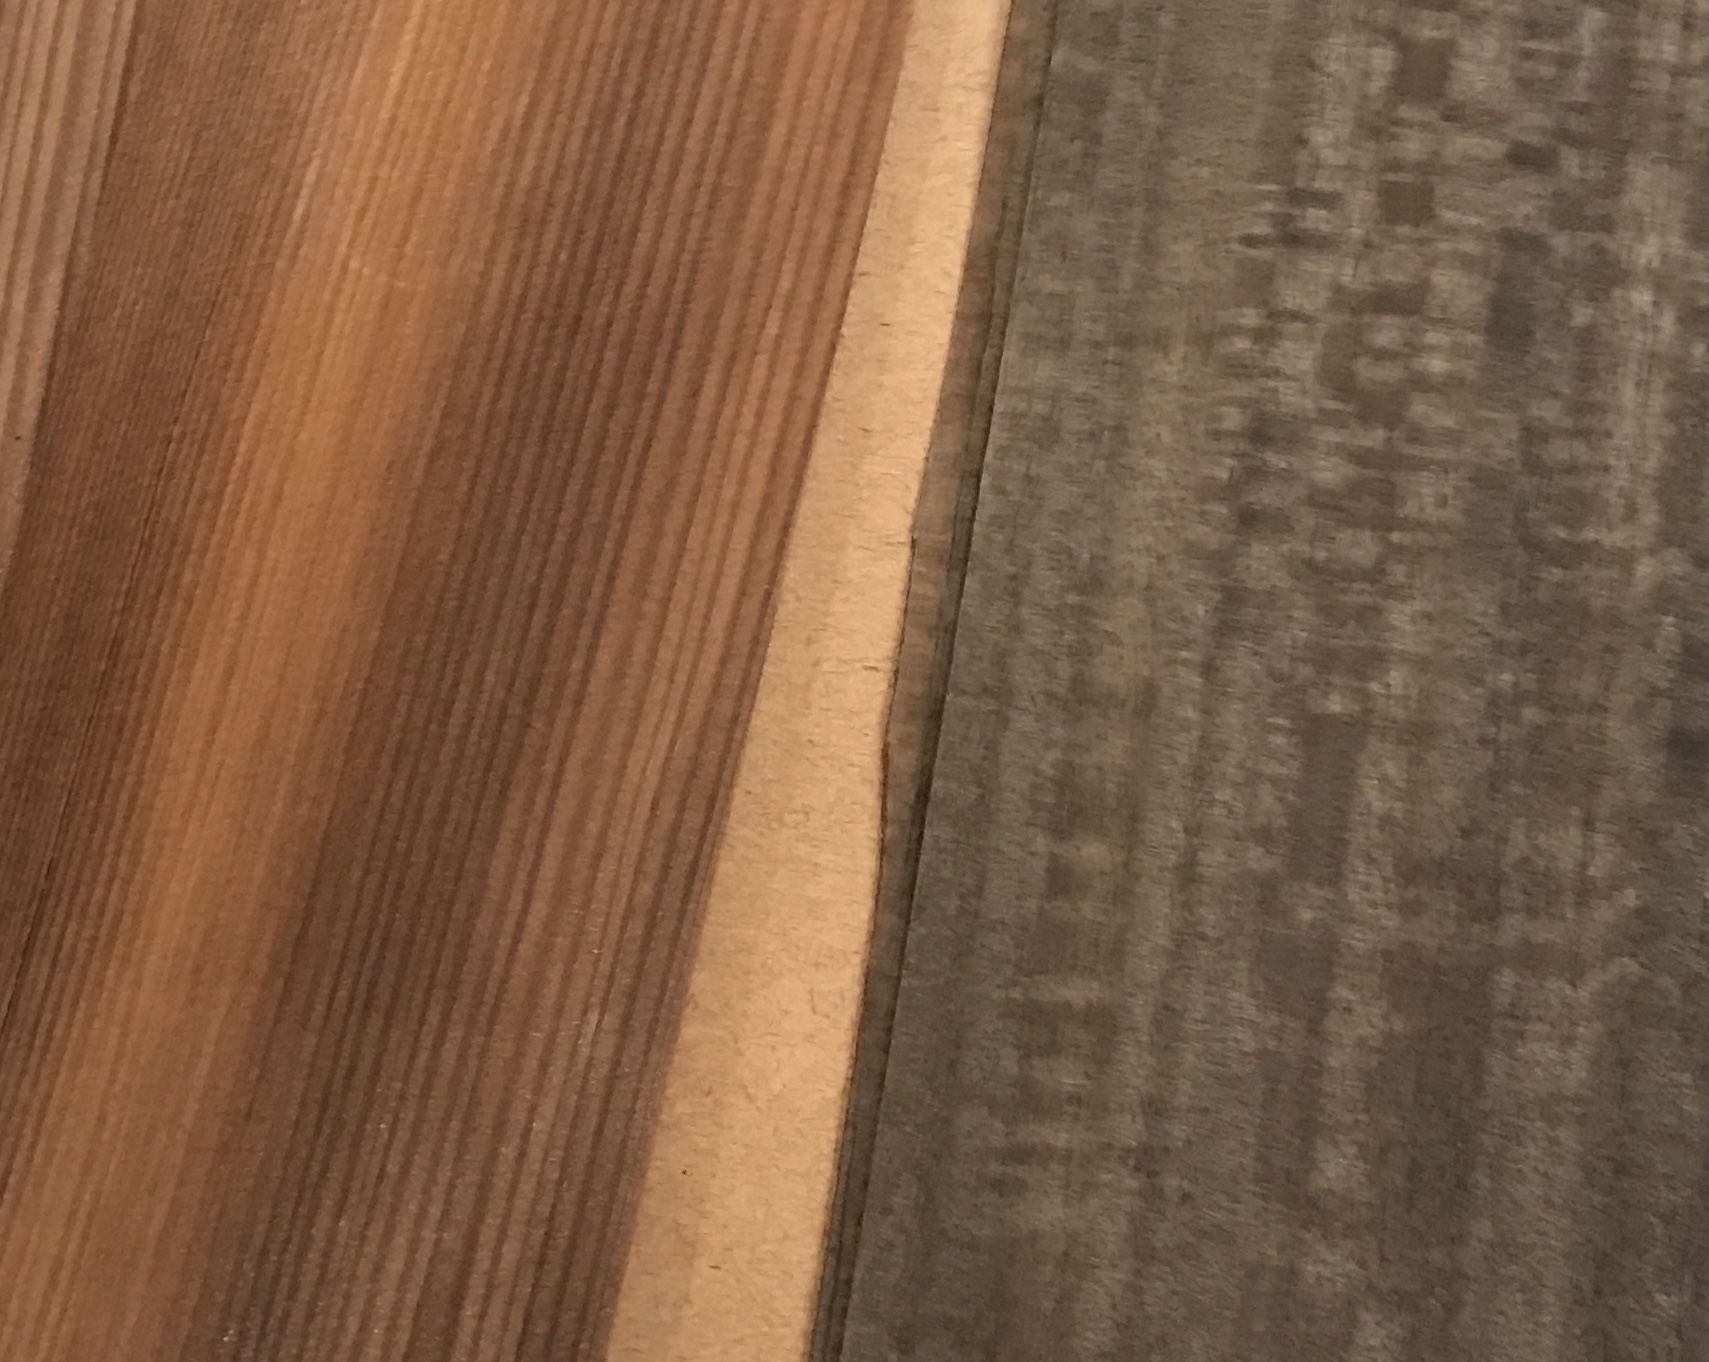
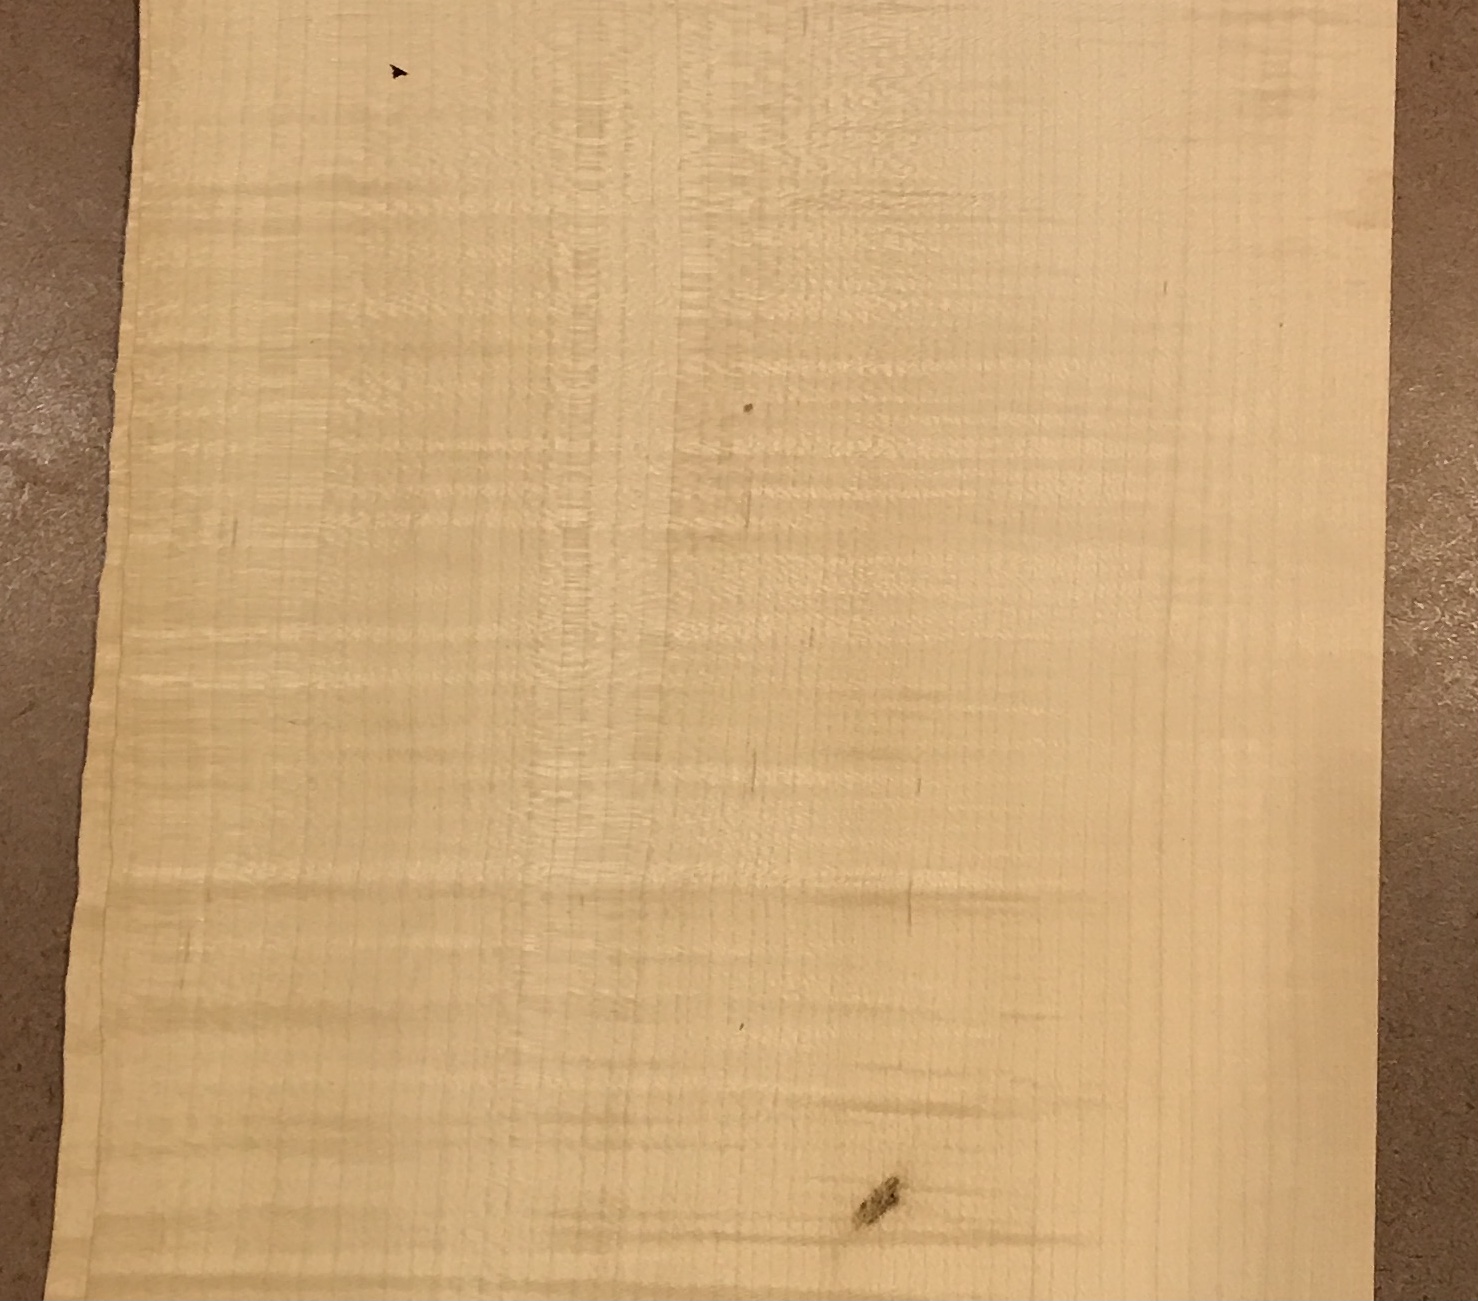
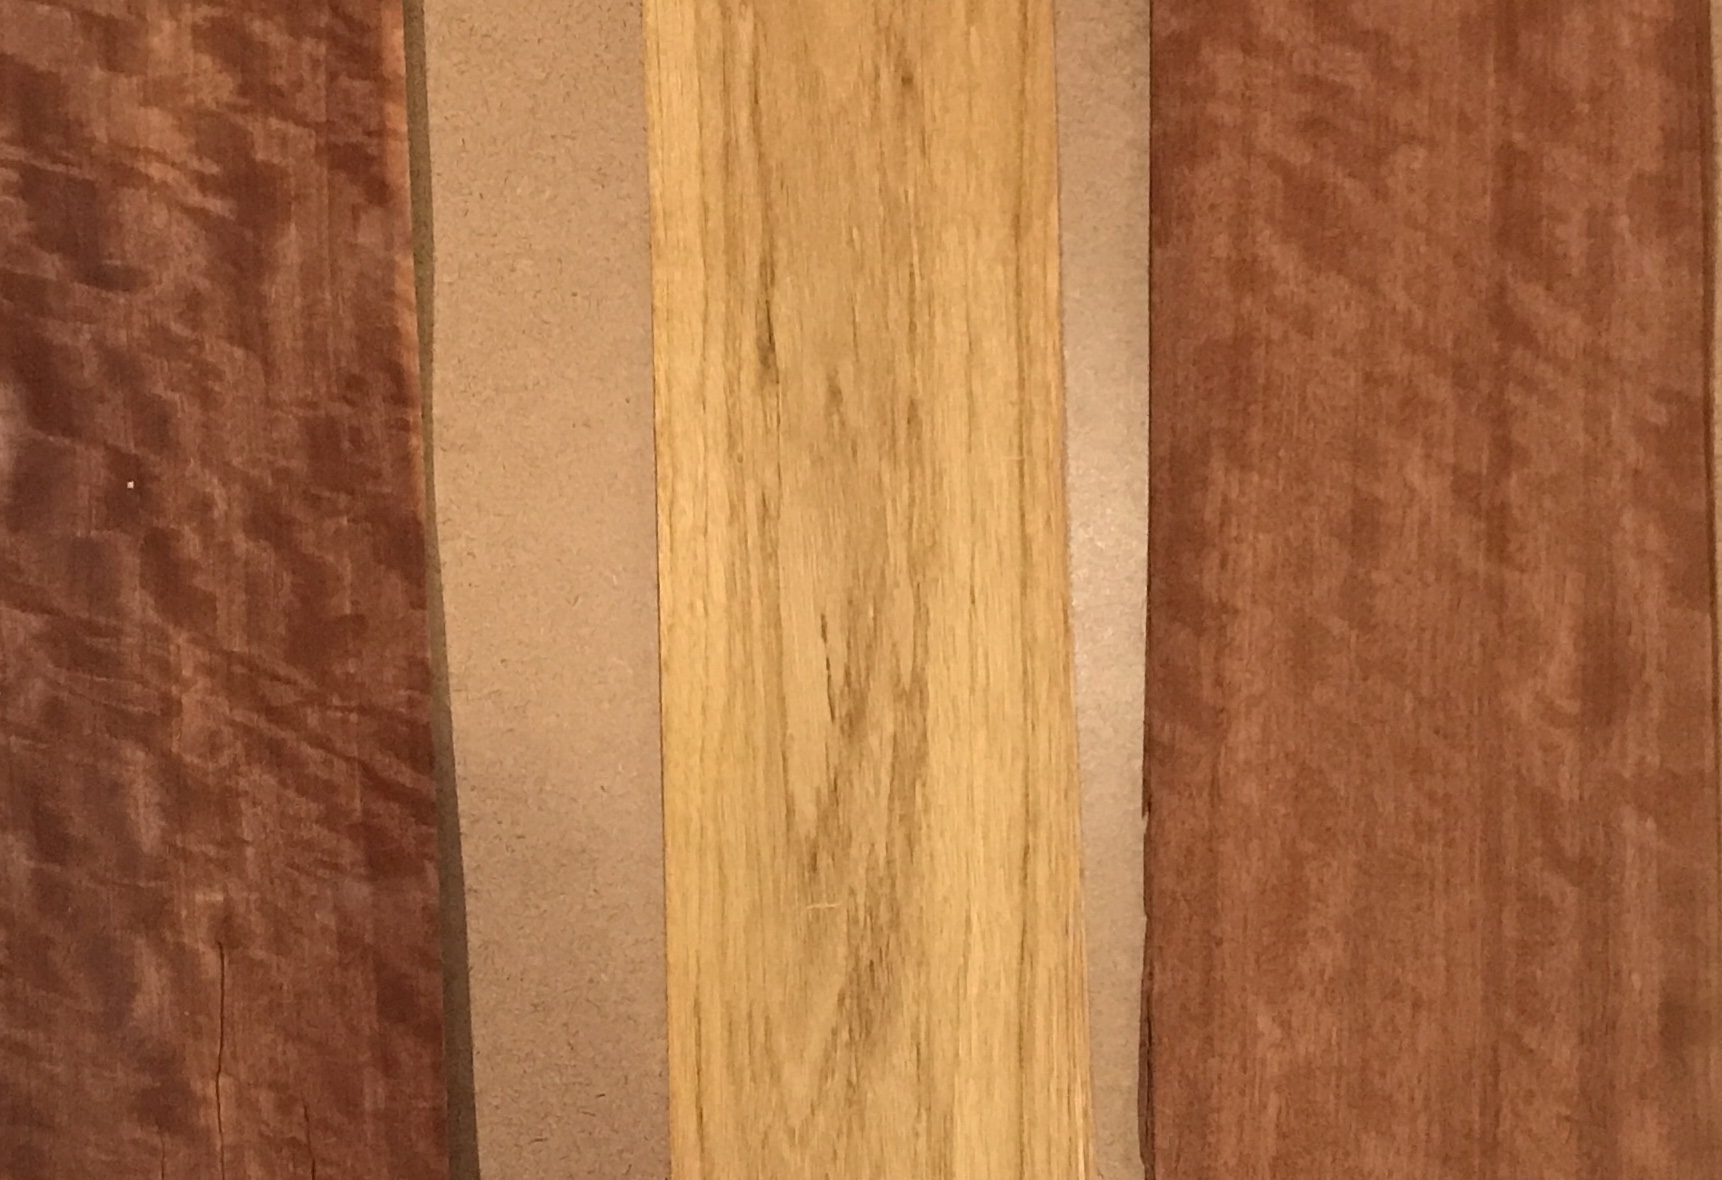
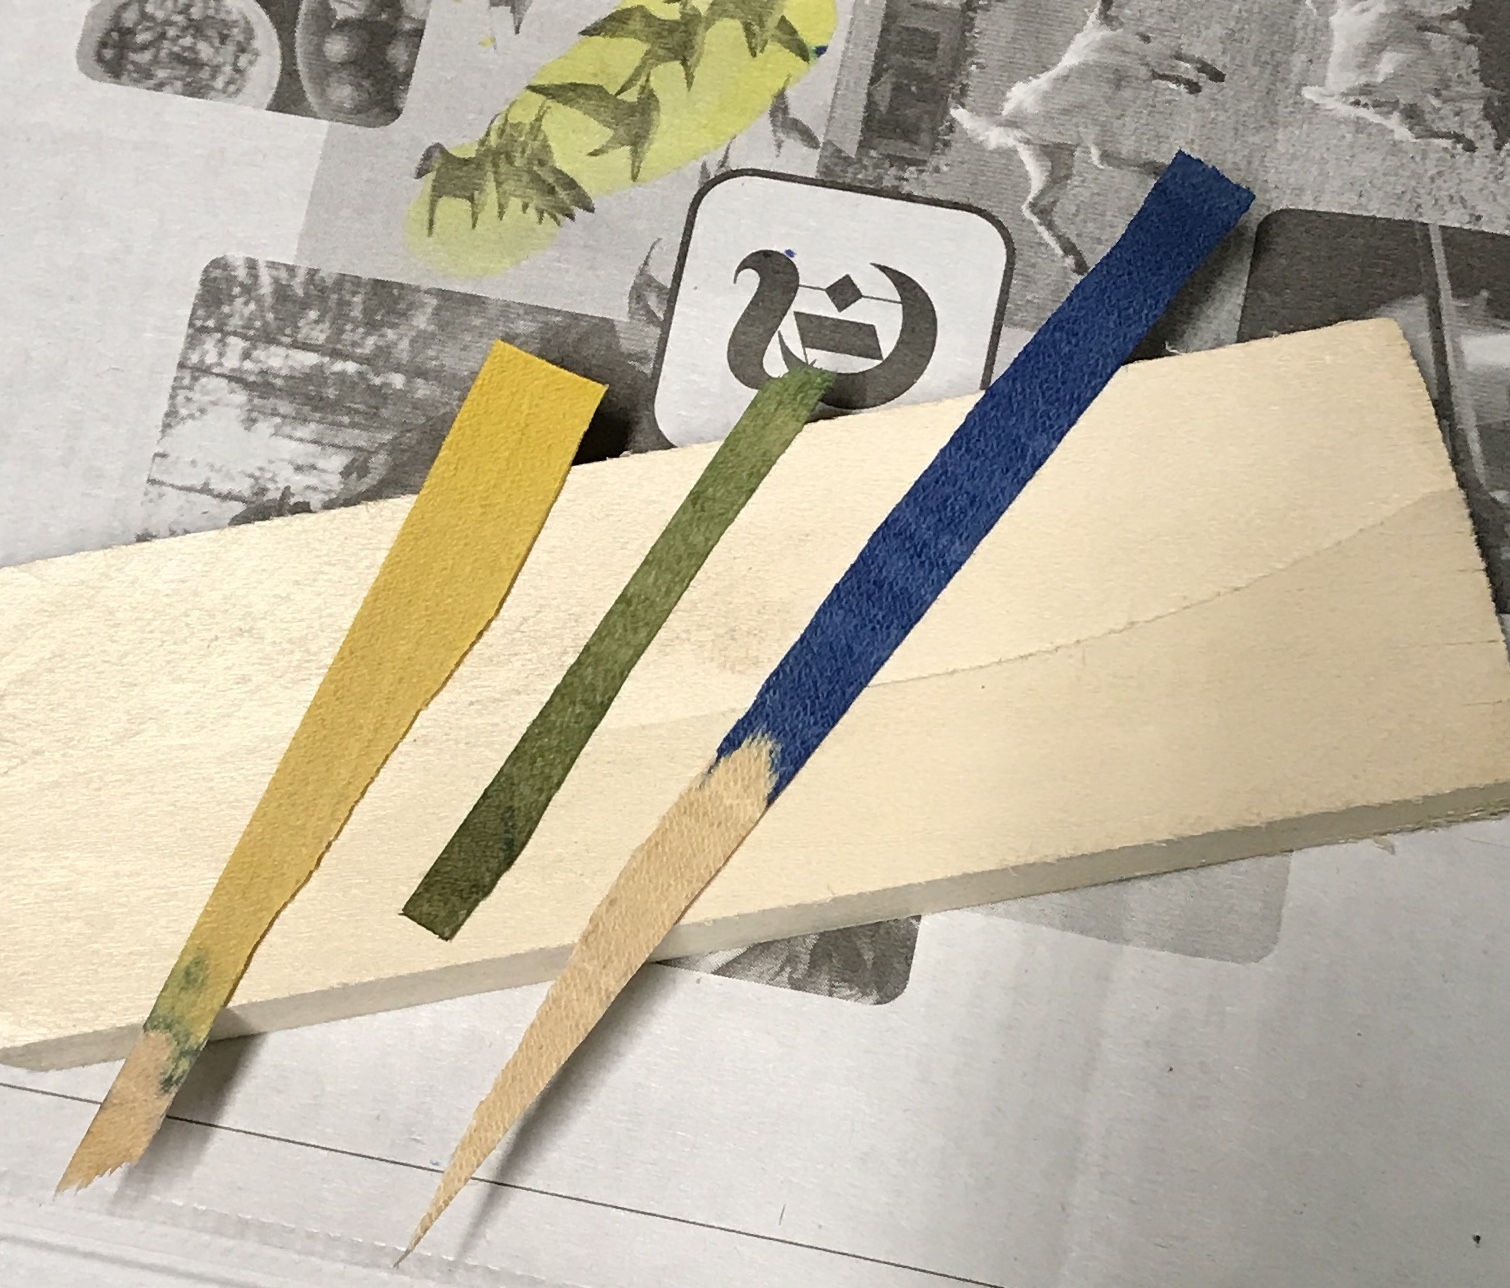
Today I ordered $100 worth of veneer. I went to Veneer Supplies and ordered their "Incredible Box of Veneer". It is over 100 square feet of veneer from over 40 types of wood. I think this should last me a lifetime. It will certainly have the variety needed for this project. The box arrived a few days later and is as spectacular as I hoped. Lots of different species of trees are included. Time to make some tough decisions. I realized one of the two dyed colors needed is blue, which I don't have. I will purchase some dye from Veneer Supplies. It is not up to Marc Adams standards, but may be sufficient for my needs. Shown below are the veneers chosen so far, for skin color and its shadow, the background, and three orange colors.
It is time to map out the order of events to produce this "painting in wood". The following set of marquetry steps is from the marquetry class notes.
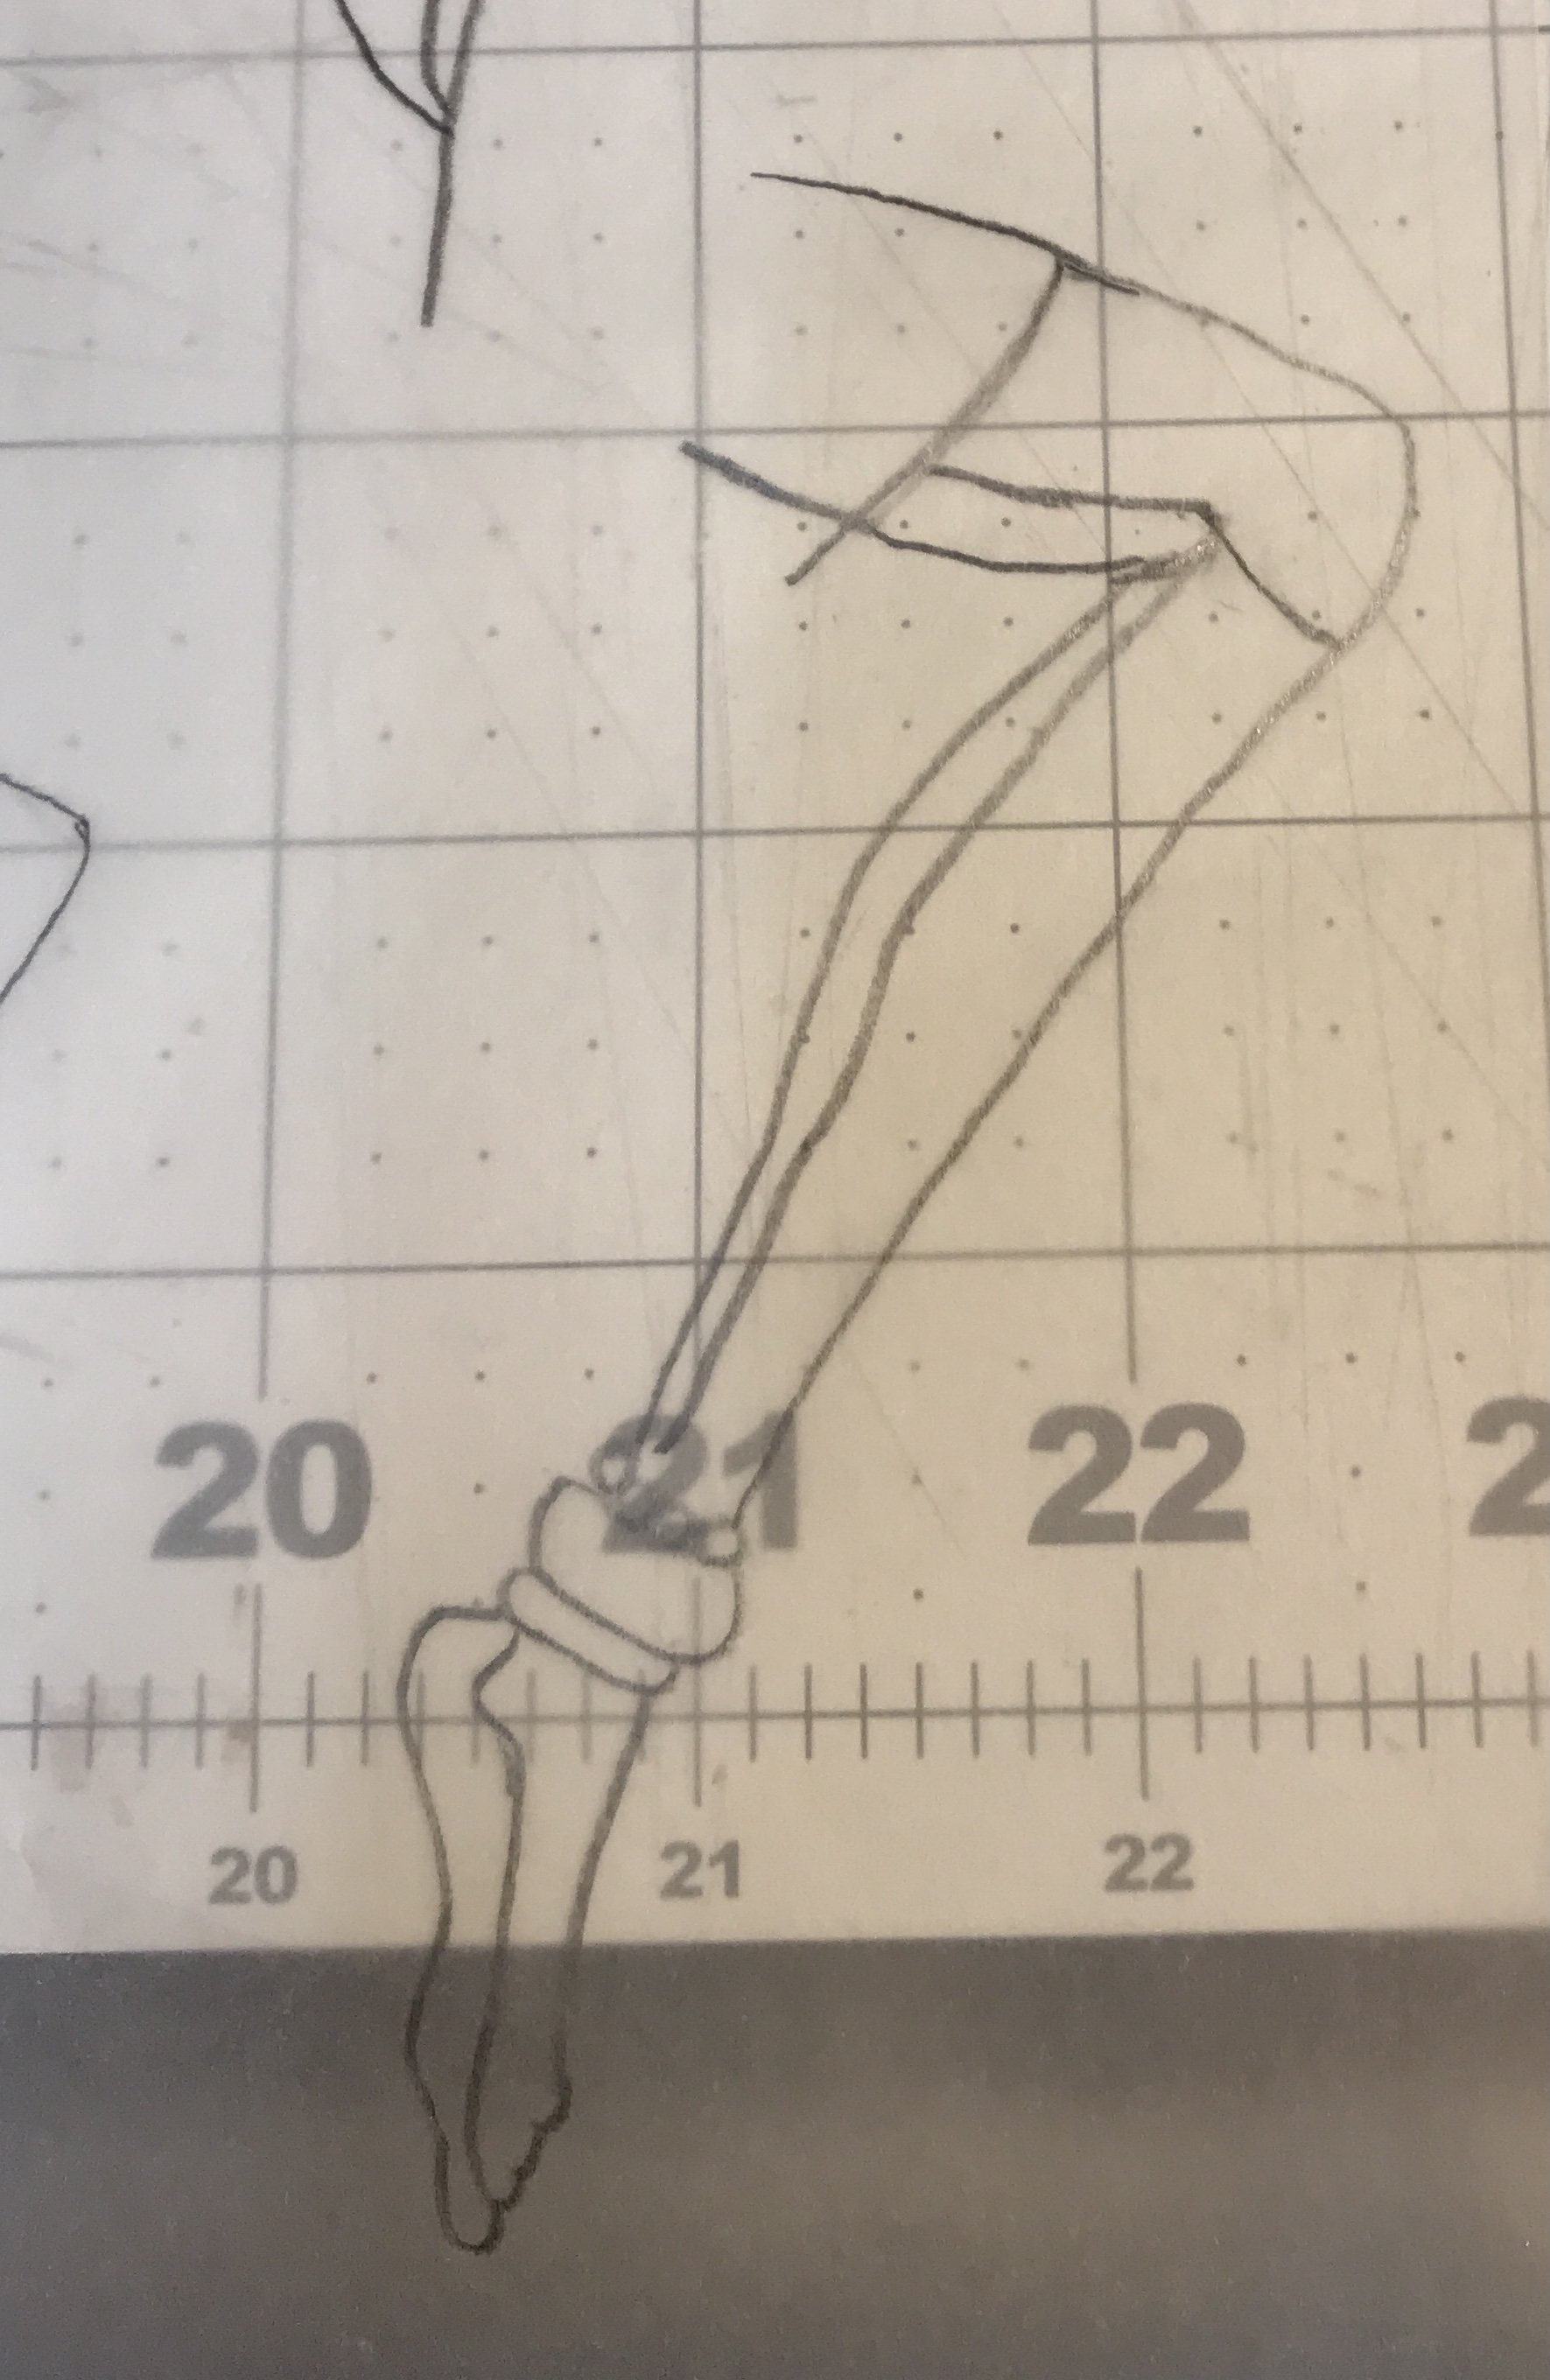
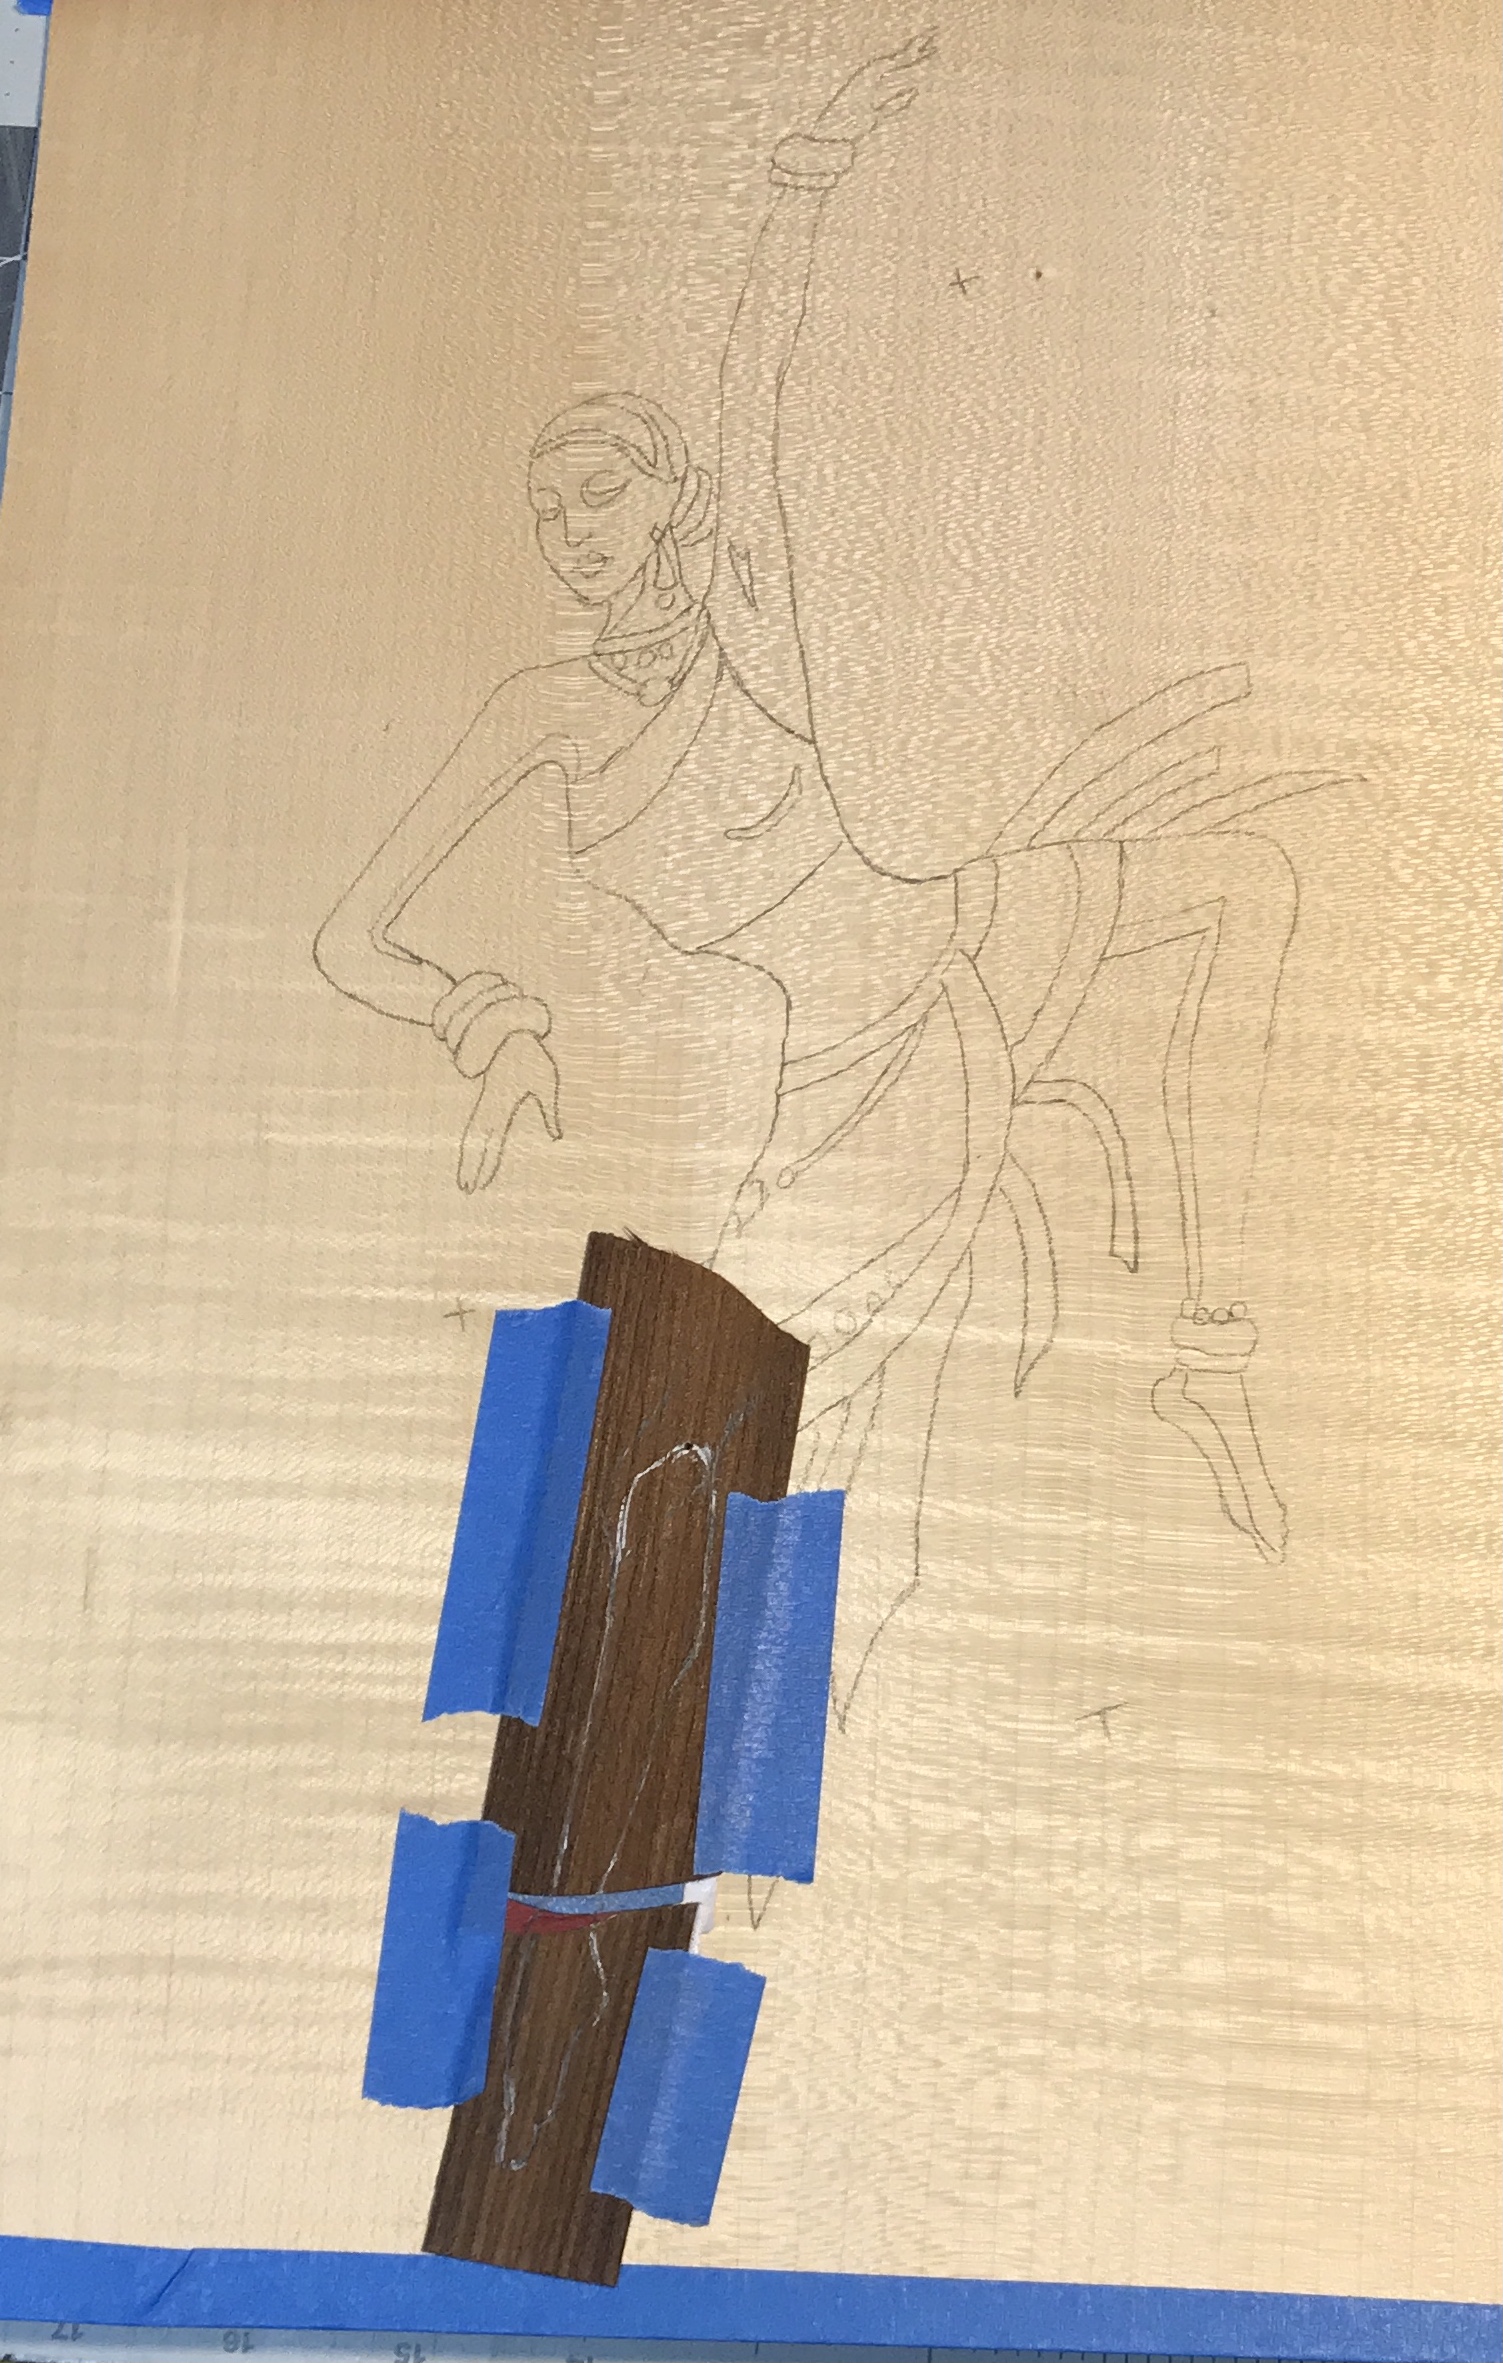
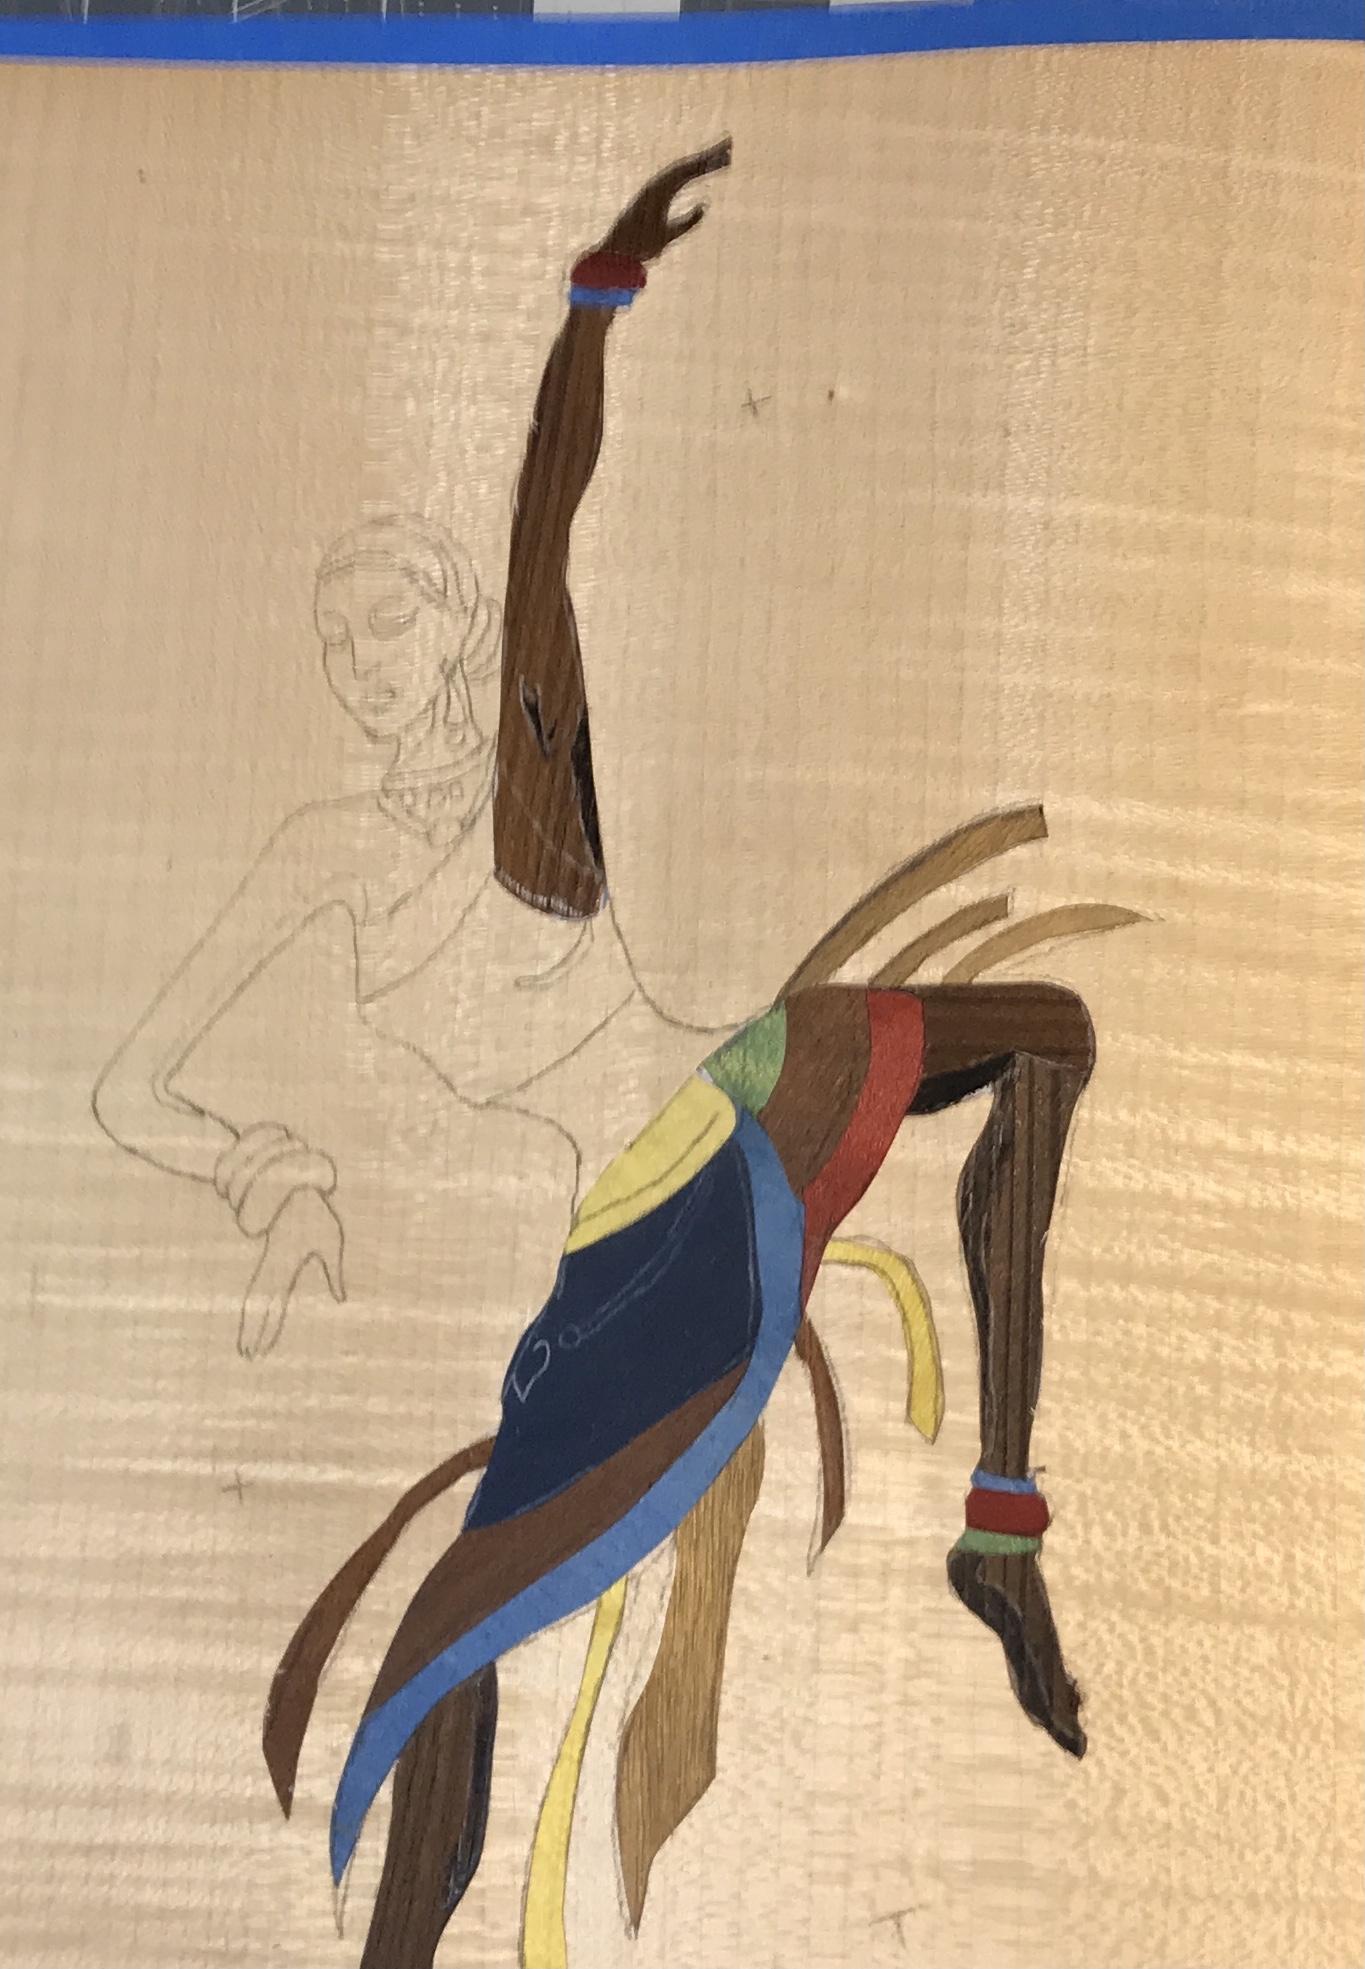
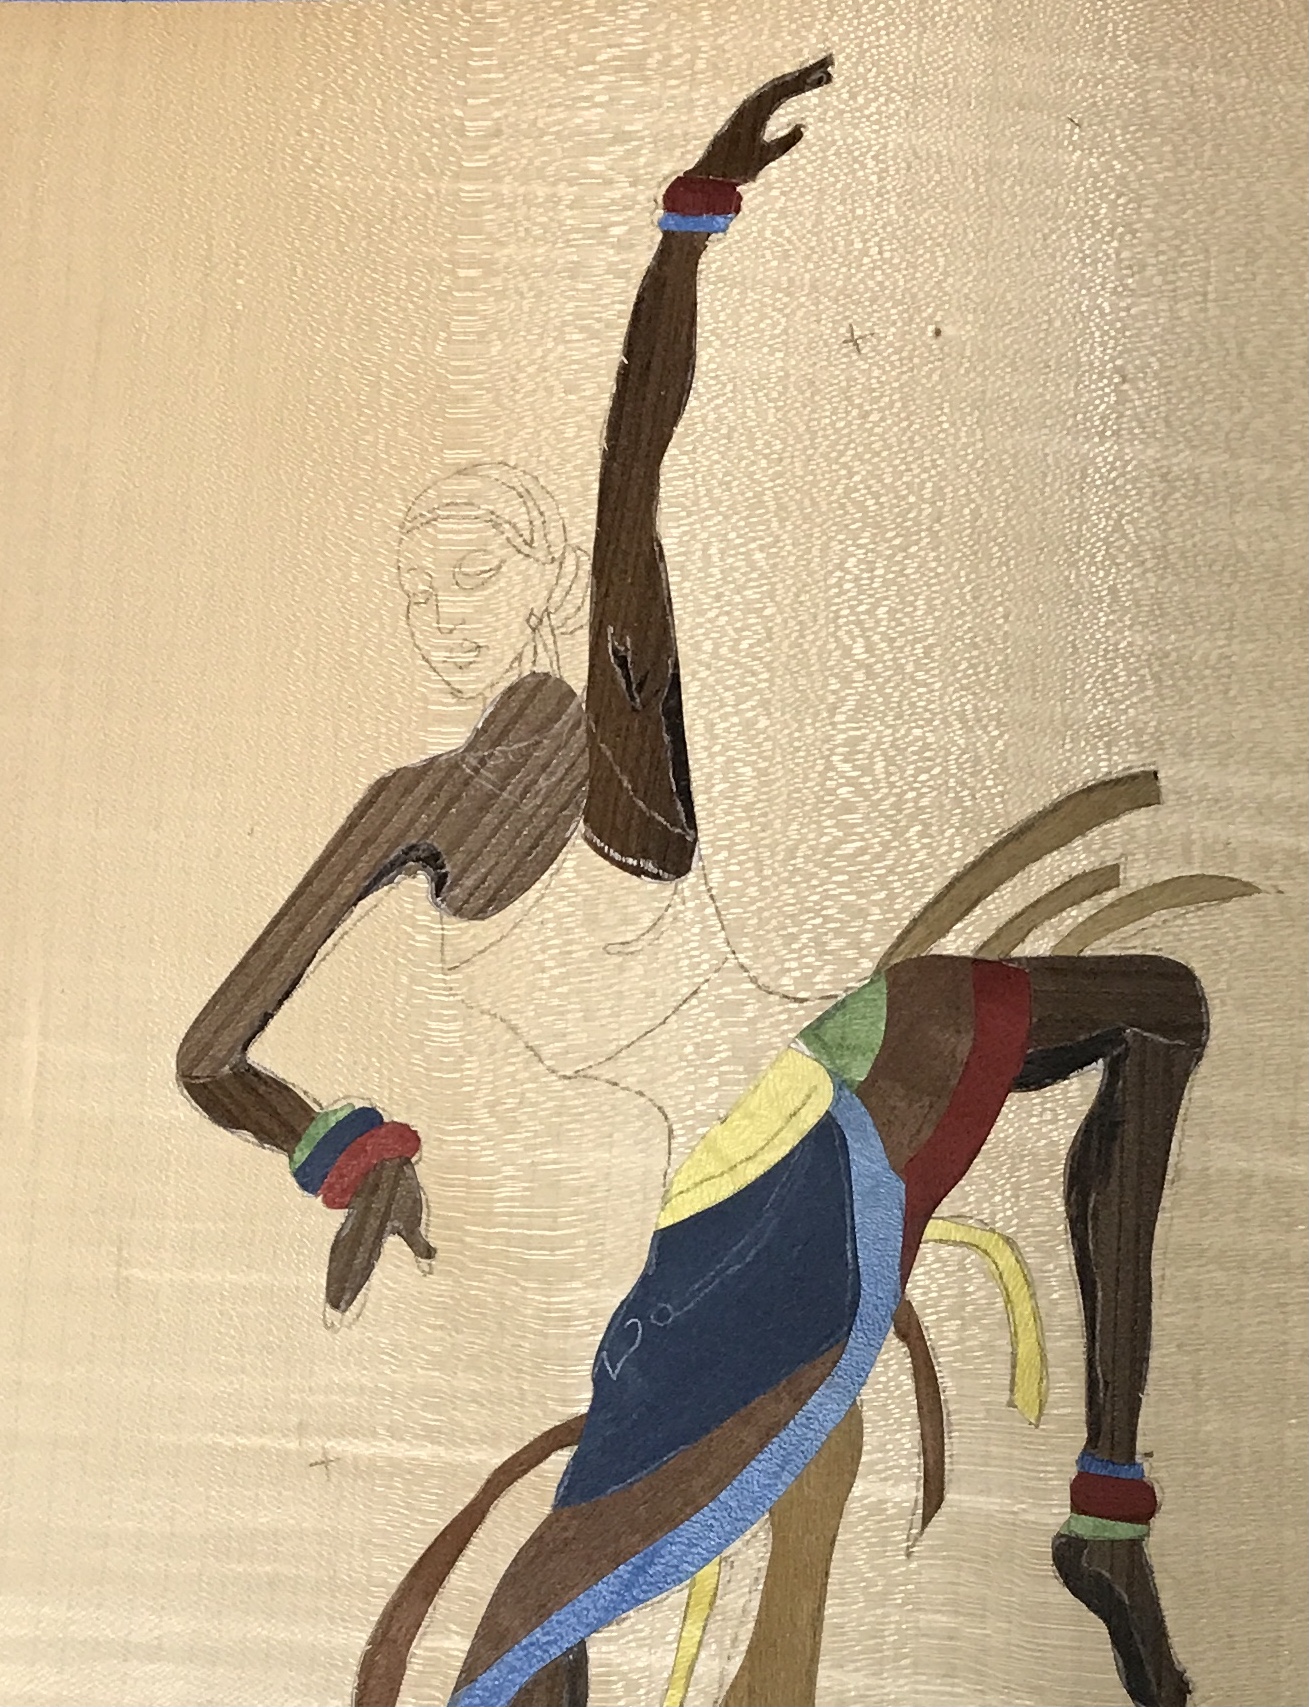
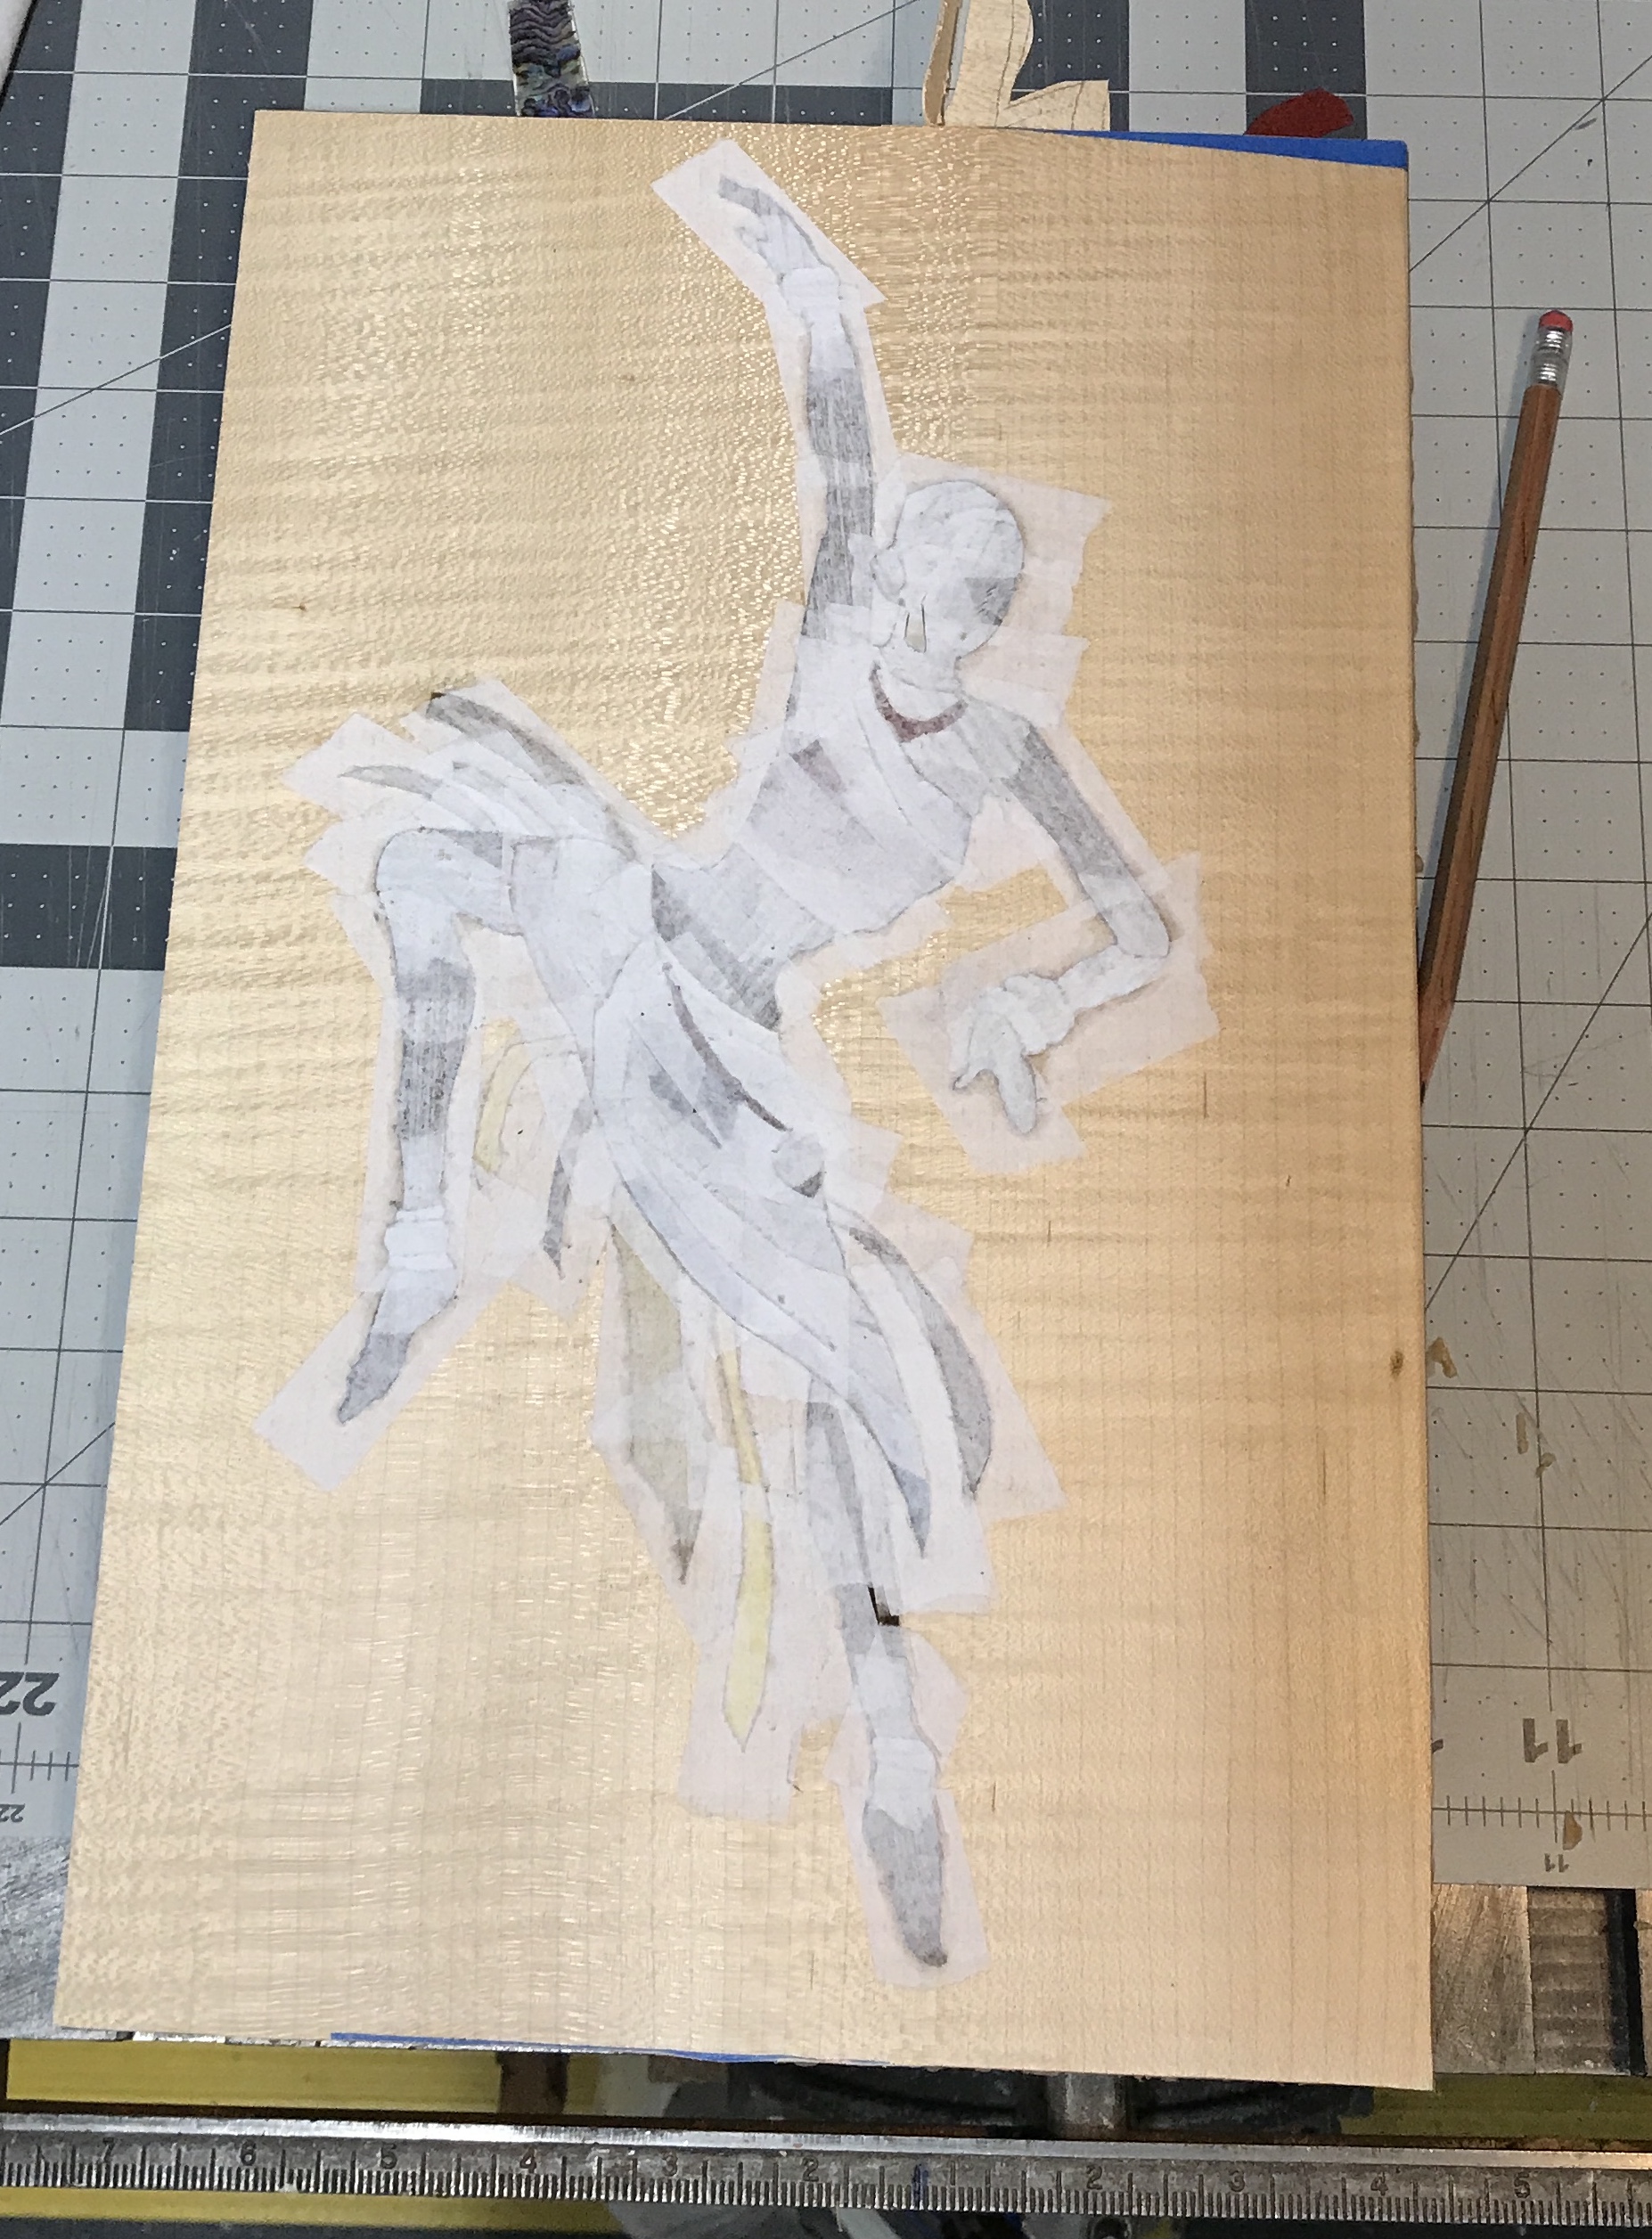
The dancer was traced as seen in the photo below. Looking at the picture and considering the challenges of cutting entailed, I might do a larger image. The dancer was opened in Preview and its size doubled. The majority of the new view was saved via a copied selection as Dancer top with the remainder saved as Dancer bottom. These will be printed separately, but traced as a whole.
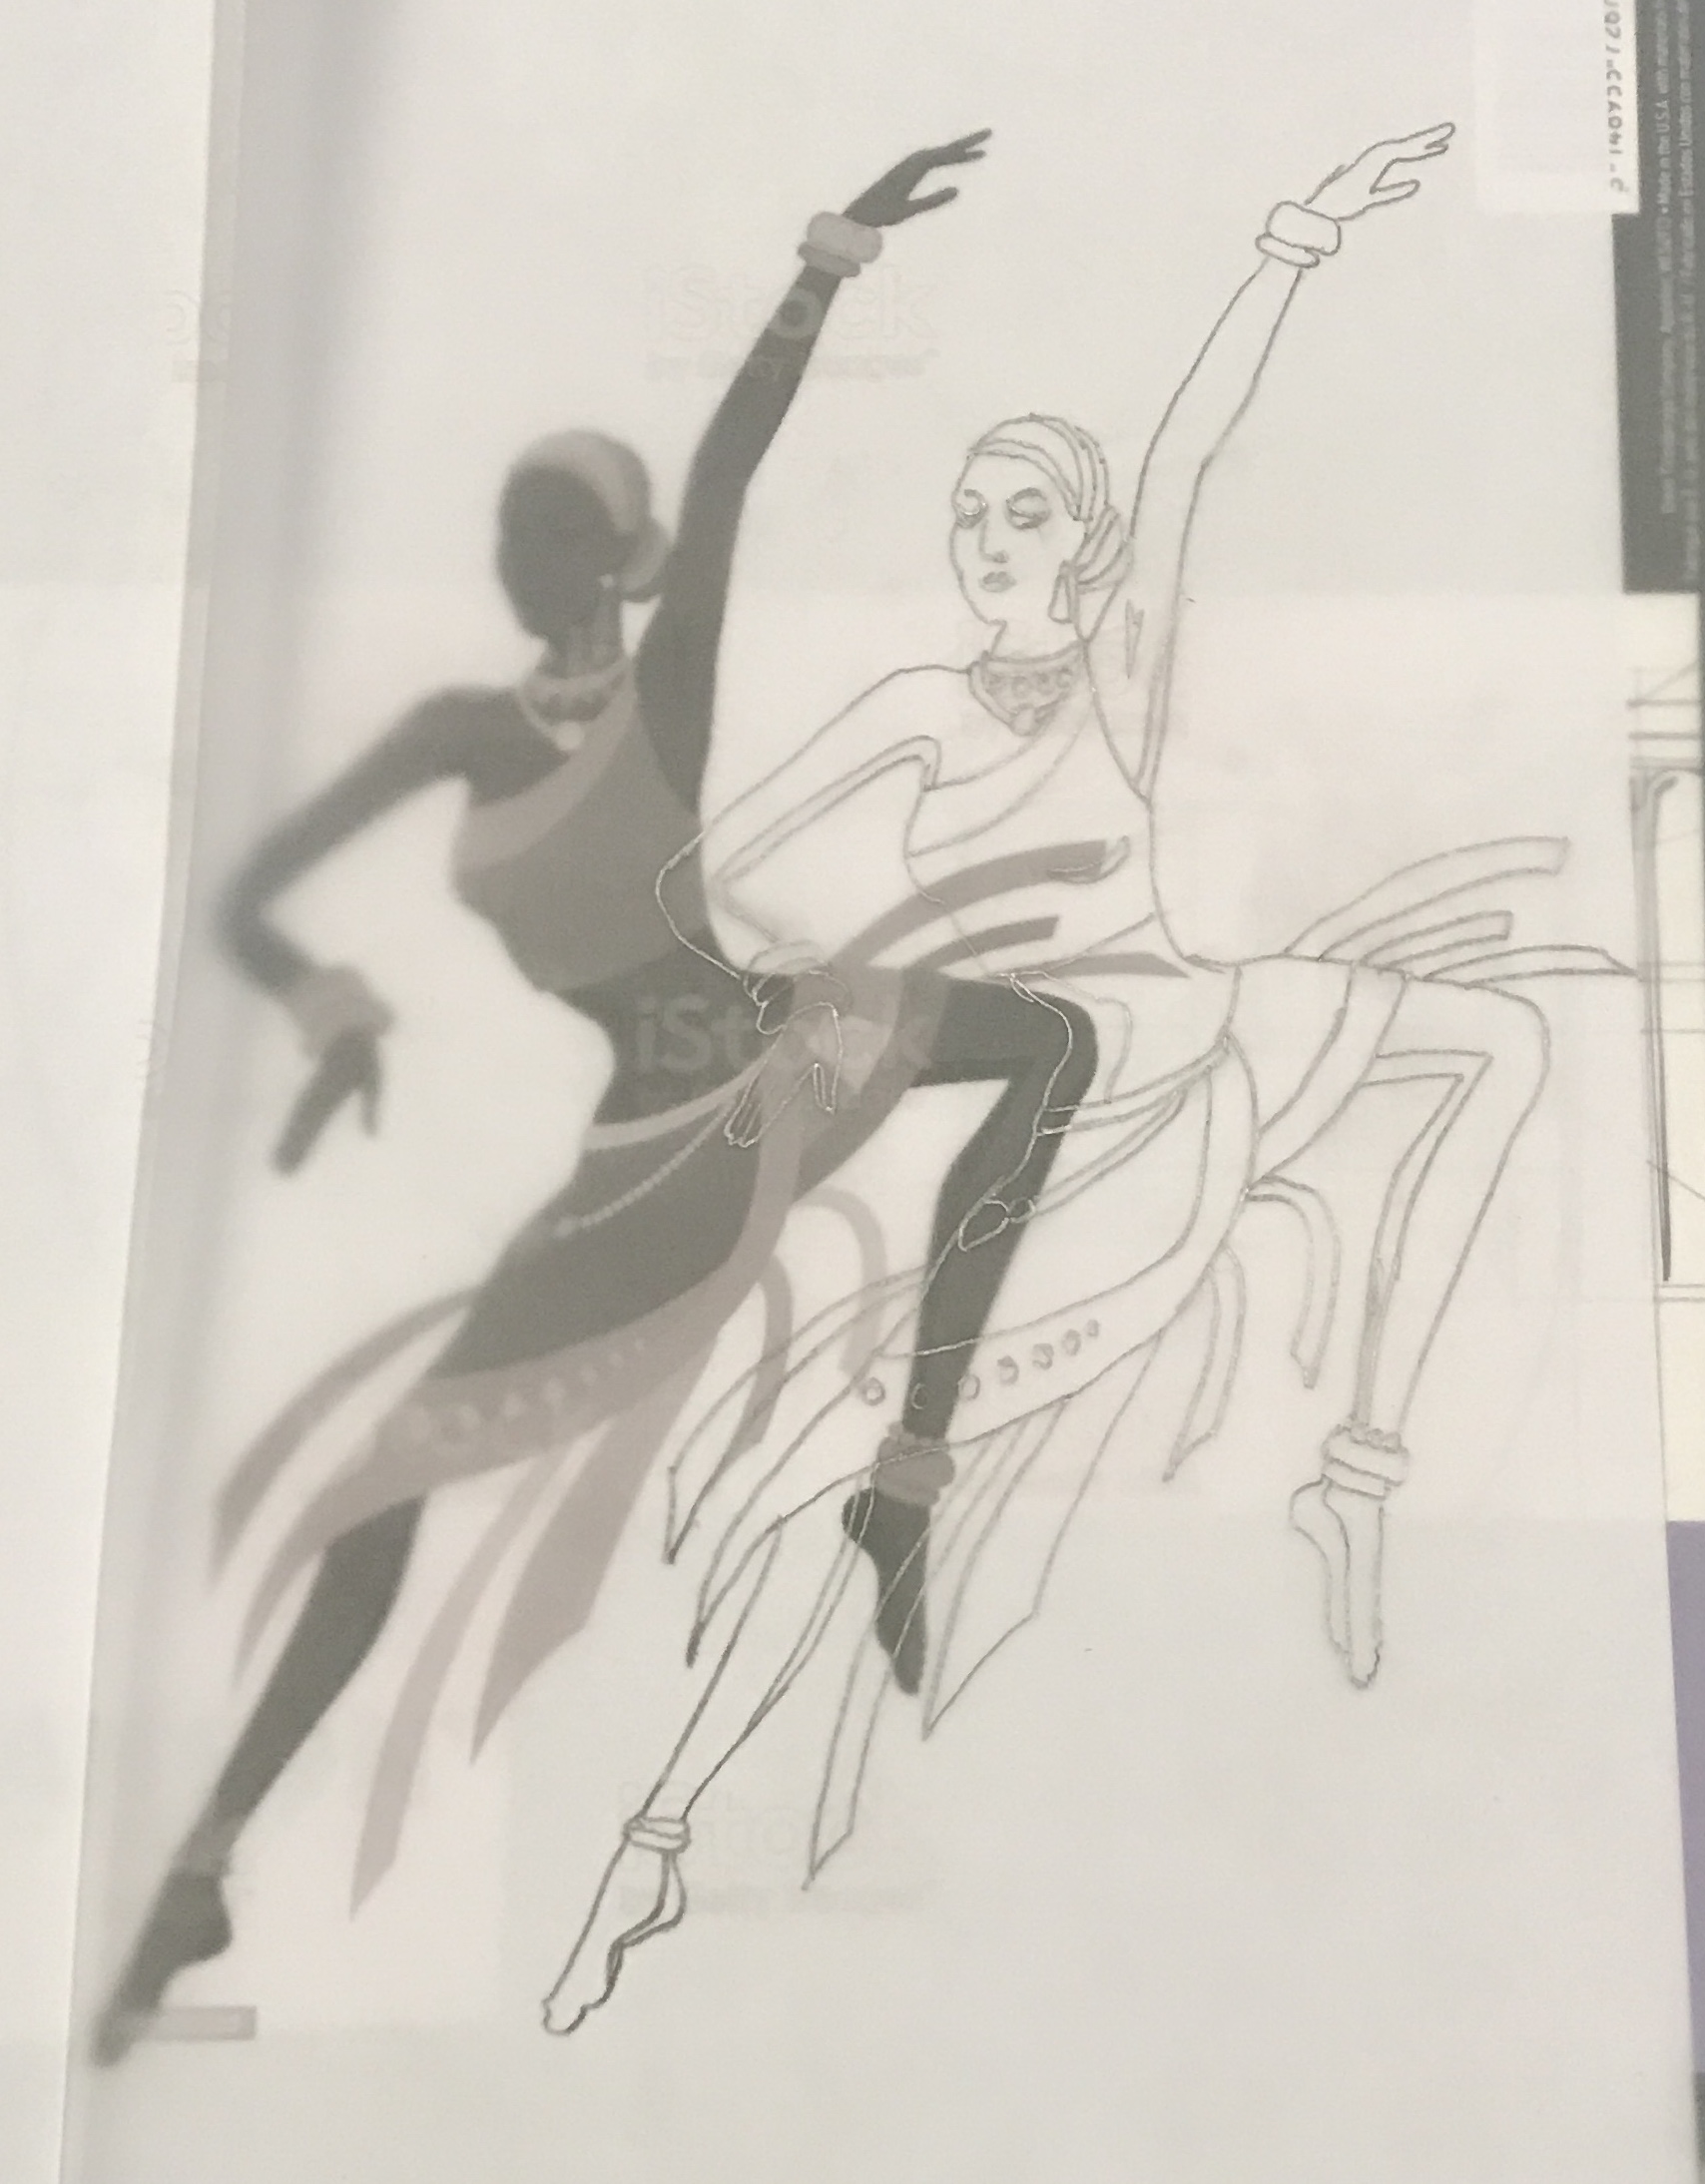
This was done producing a much larger image. In order to fit it on a page of tracing paper it had to be rotated slightly (12°). This rotation will need to be undone when putting the image in the background. The photo below shows the enlarged tracing. The picture when oriented vertically is about 13" long, placing a lower limit on the size of the background.
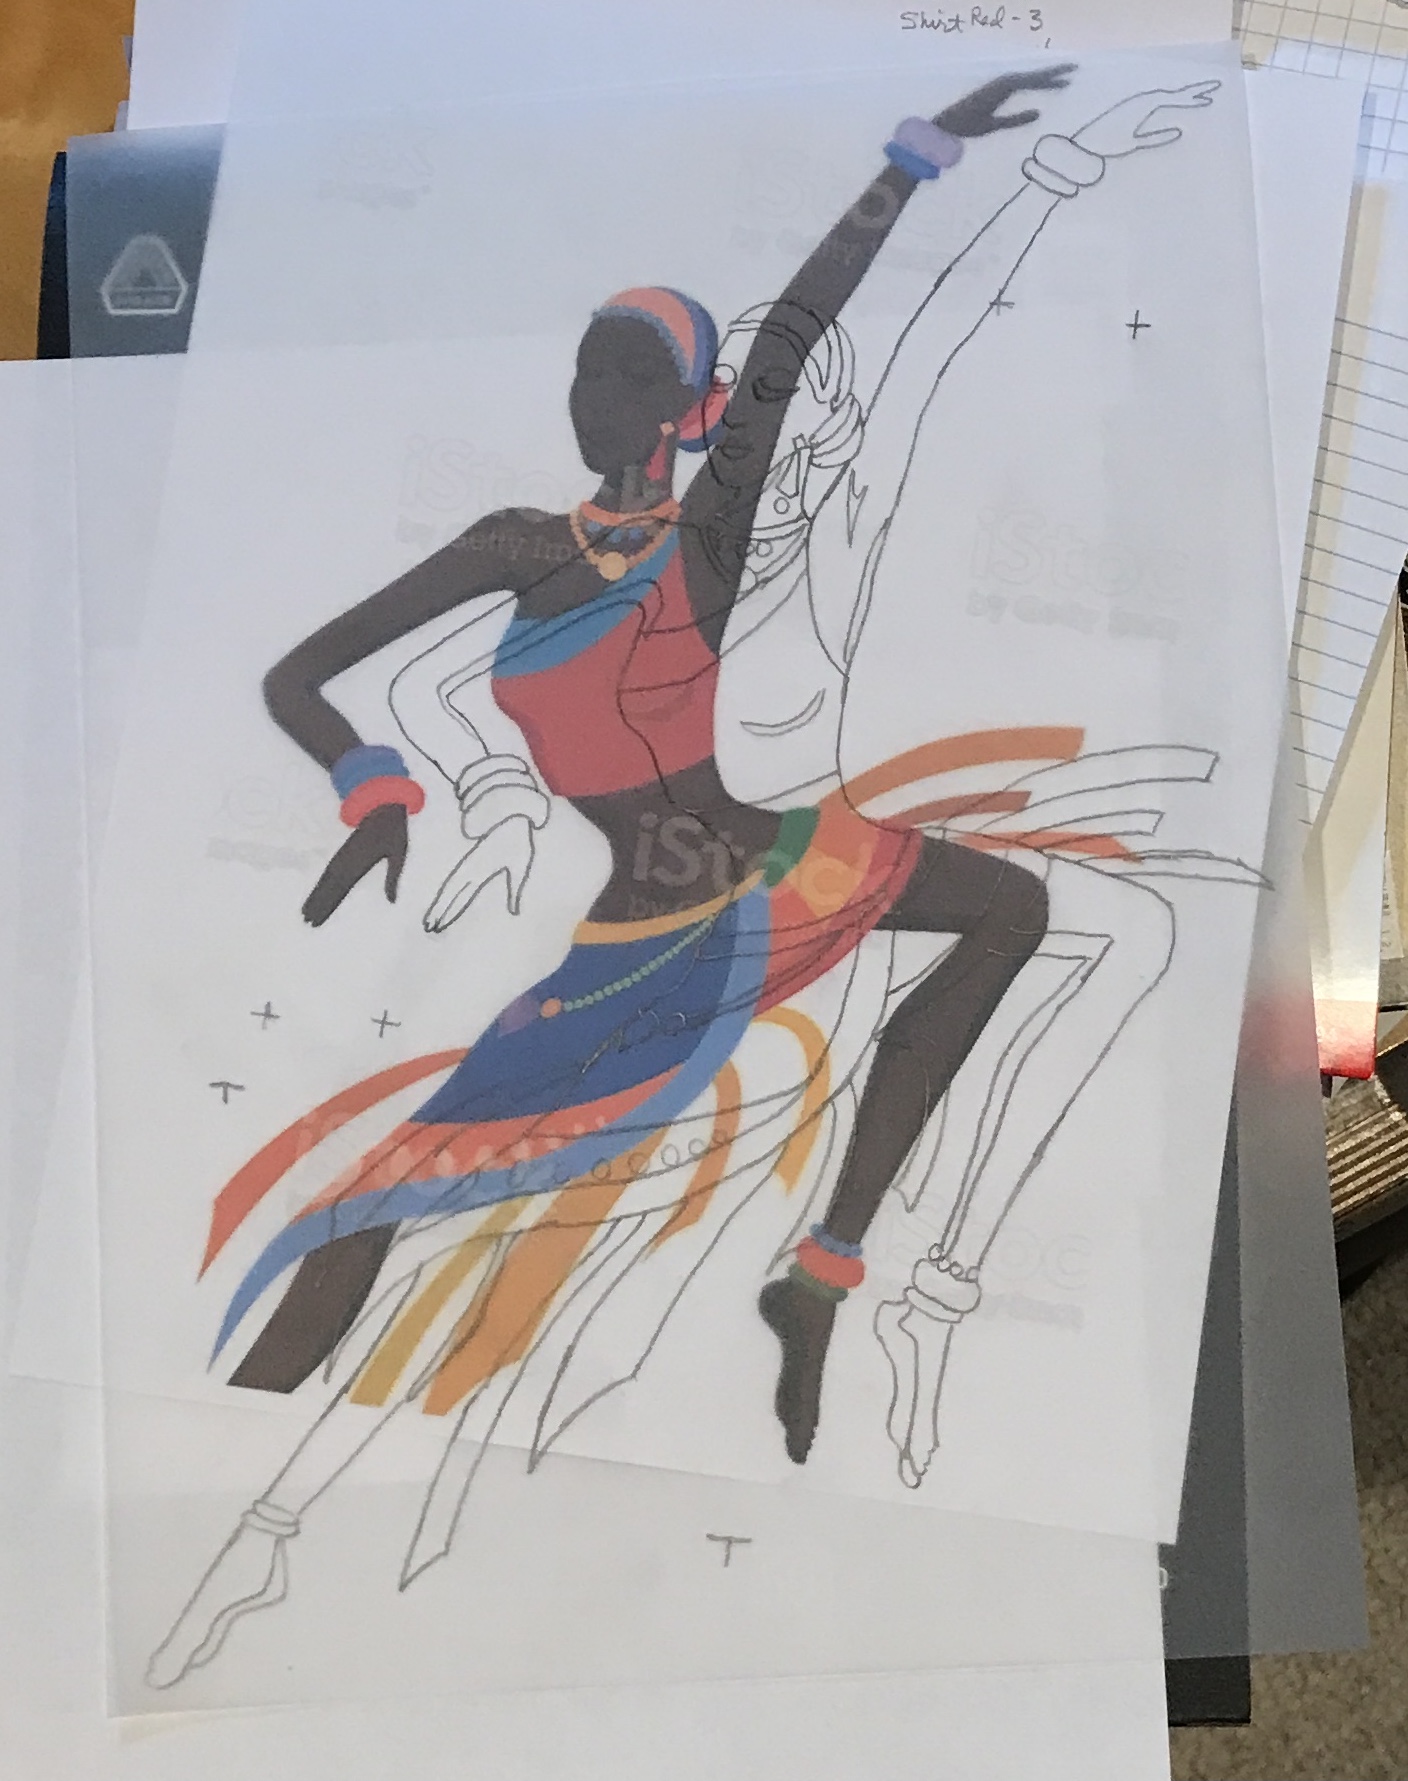
So much for getting an early start. It is now the middle of April! This morning a copy of the traced image was made. The let foot is cut off, but that can be easily fixed when transferring the image for the left leg packet. I am first going to assign veneer to each of the parts and then experiment with wood burning. Burning will be substantially easier for the shadows on the legs and arms and a necessity for the facial features. The table below shows the veneer assignments at this point.
| Packet | Part | Veneer |
|---|---|---|
| Left leg | Thigh | striped dark brown |
| Left leg | Calf | striped dark brown |
| Left leg | Foot | striped dark brown |
| Left leg | Orange bracelet | red |
| Left leg | Green bracelet | dyed |
| Left leg | Blue bracelet | Abalam |
| Right leg | Calf | striped dark brown |
| Right leg | Foot | striped dark brown |
| Right leg | Blue bracelet | Abalam |
| Right leg | Red bracelet | red |
| Left arm | Hand | striped dark brown |
| Left arm | Arm | striped dark brown |
| Left arm | Violet bracelet | ? |
| Left arm | Blue bracelet | Abalam |
| Right arm | Hand | striped dark brown |
| Right arm | Upper arm/chest | striped dark brown |
| Right arm | Lower arm | striped dark brown |
| Right arm | Violet bracelet | ? |
| Right arm | Red bracelet | red |
| Right arm | Light blue bracelet | Abalam or dyed |
| Shirt | Top | Abalam or dyed |
| Shirt | Bottom | red |
| Shirt | Belly | striped dark brown |
| Skirt | Top edge | lightest orange |
| Skirt | Dark blue | Abalam |
| Skirt | Light blue | dyed (light blue) |
| Skirt | Dark orange | spotted brown |
| Skirt | Green | dyed (green) |
| Skirt | Red | red |
| Skirt | Bangle | ? |
| Head & Neck | Face | striped dark brown |
| Head & Neck | Hat beads | dyed (light blue) |
| Head & Neck | Hat orange (X2) | spotted brown |
| Head & Neck | Hat blue (X2) | Abalam |
| Head & Neck | Hat red | red |
| Head & Neck | Earring | red |
| Head & Neck | Orange necklace | spotted brown |
| Head & Neck | Orange beads | plain brown |
| Head & Neck | Blue beads | dyed (light blue) |
| Head & Neck | Medallion | lightest orange veneer |
The streamers are the only parts of this picture that are not part of packets. They will be made from the lightest orange veneer, the spotted brown veneer and the plain brown veneer. Dyes are being considered for light blue and green. There are two violet pieces in the picture. I've not decided how to represent these.
I am reconsidering dyeing wood blue for the jewelry. The shell, Abalam, may be ideal for these parts, if I can cut them. The dye is mixed with water, alcohol or a mix of alcohol and lacquer thinner. It is mixed 2 oz. per half gallon. This translates to 0.75 teaspoons to 2 oz of diluent. Alcohol or alcohol mix is recommended to minimize grain raising. The mixture is recommended to maximize penetration, but it is still a surface dye.
The wood burning was amazingly straightforward. The iron was set to a temperature of 425° C. After warming it darkened the wood with a touch. The only challenge is orienting the tip of the tool to cover the wood appropriately. The photo below shows three burned edges of a scrap of veneer.
A few days later and I had acquired the paraphernalia to test some dyes. One ounce of denatured ethanol and one ounce of lacquer thinner were combined in a jar. 3/4 of a teaspoon of dye was added to the solvent mix. This process was followed for the yellow dye and the blue dye. The third sample was a mixture of the dyes, ~3/8 of a teaspoon of both yellow and blue. A strip of the background veneer was dipped in each of the three jars of dye. After one to two minutes the strips were removed. The second photo below shows the results. The yellow is a little faint, the blue is outstanding, and the green is also a little faint. But all should work for my needs.

Half of the dark blue stain was diluted in one ounce of 1:1 ethanol:thinner for light blue. Four pieces of veneer were cut from the background sheet. The smallest piece was dyed green. One was dyed yellow, one light blue and one dark blue. The diluted dye was applied with a brush on both sides, though the dye seemed to rapidly penetrate completely through the veneer. The veneer was pressed between two sheets of paper towel to dry.
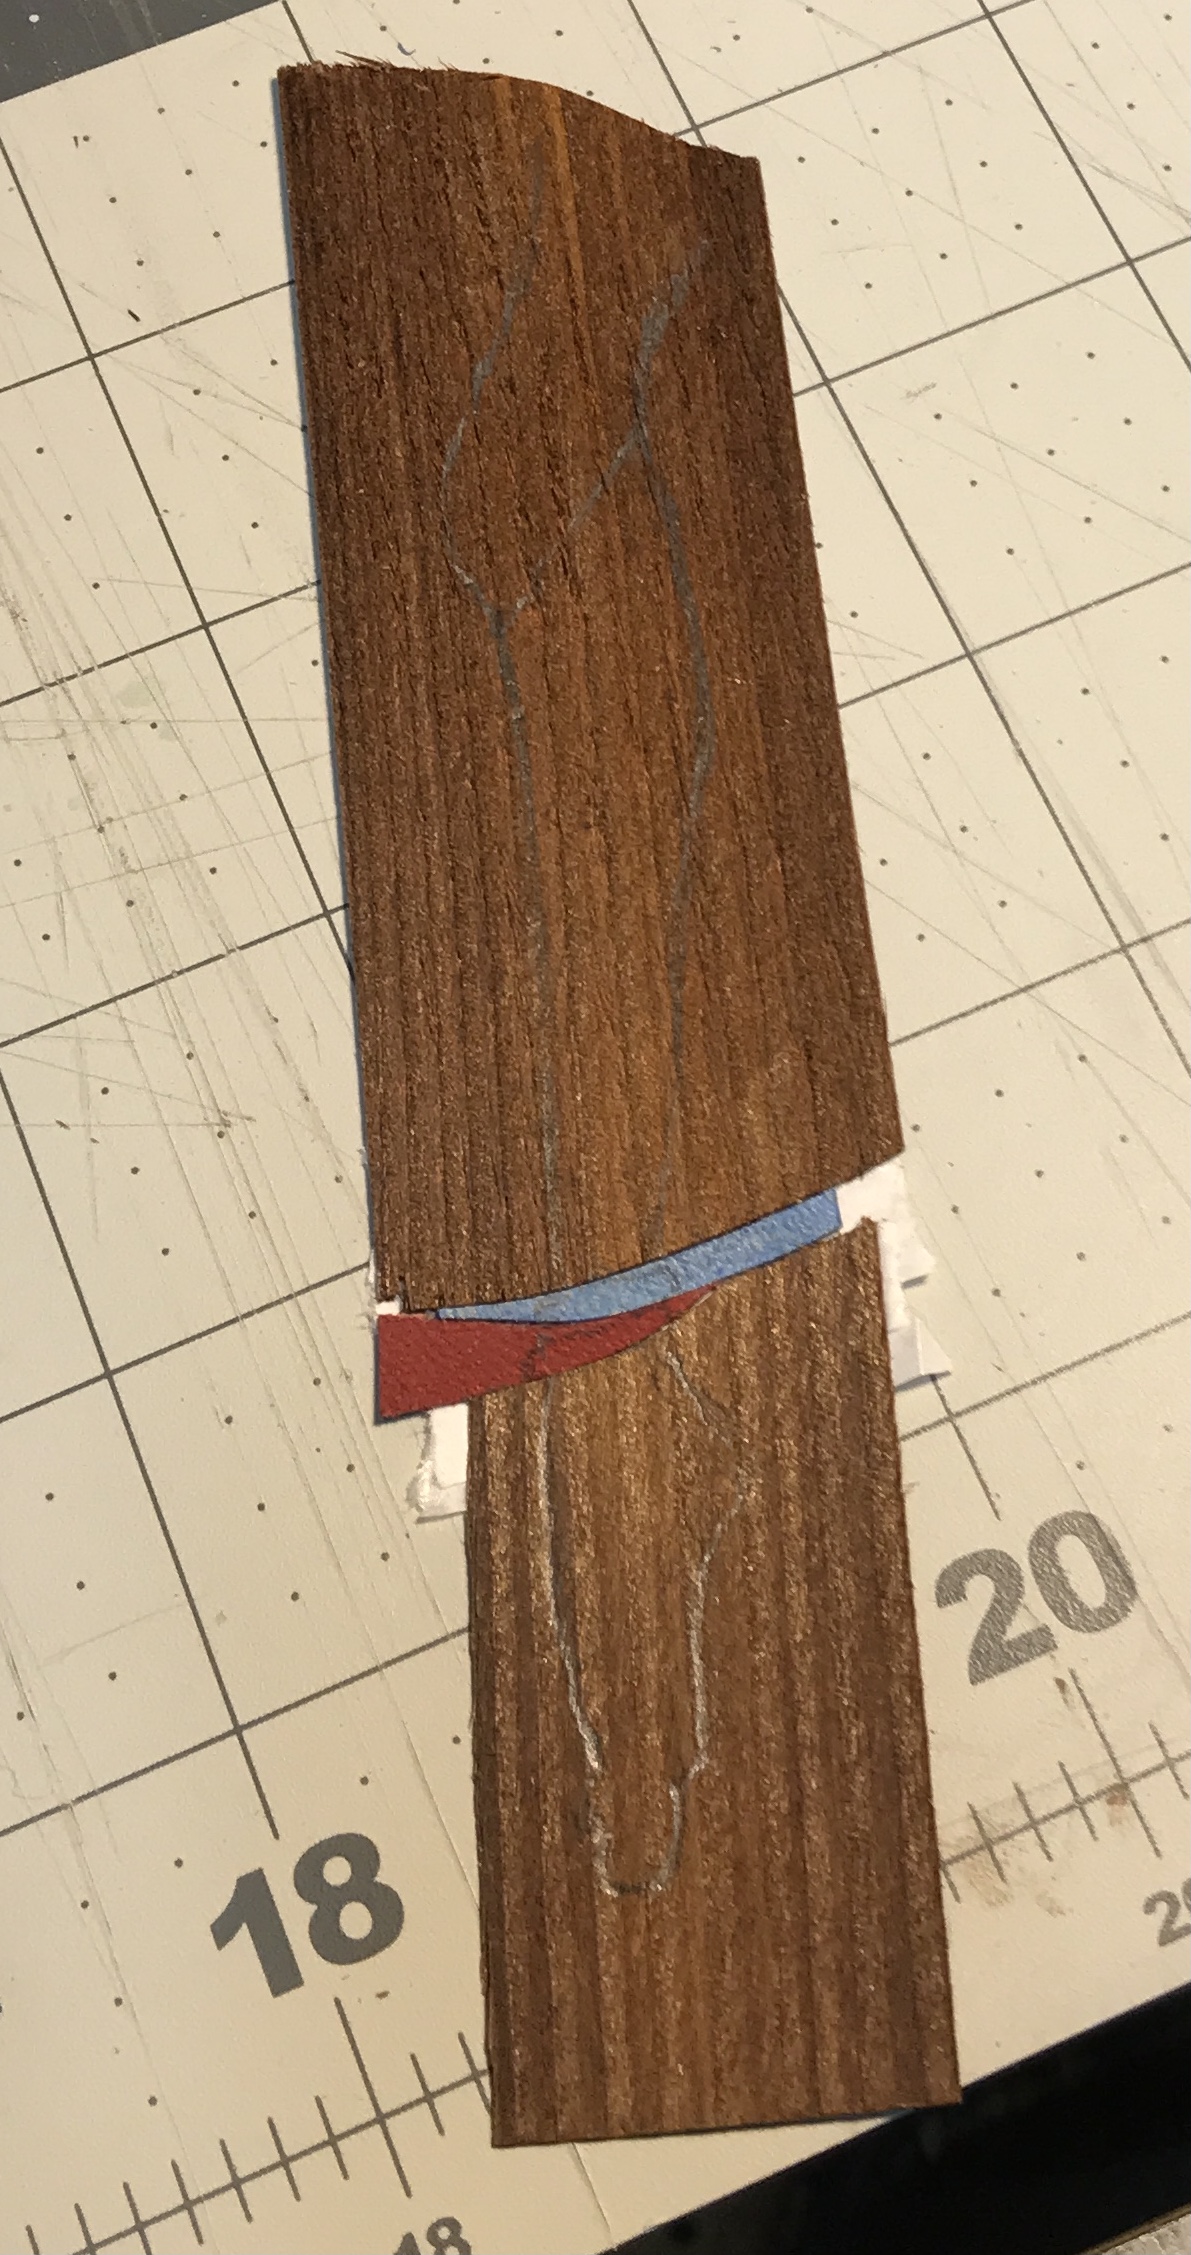
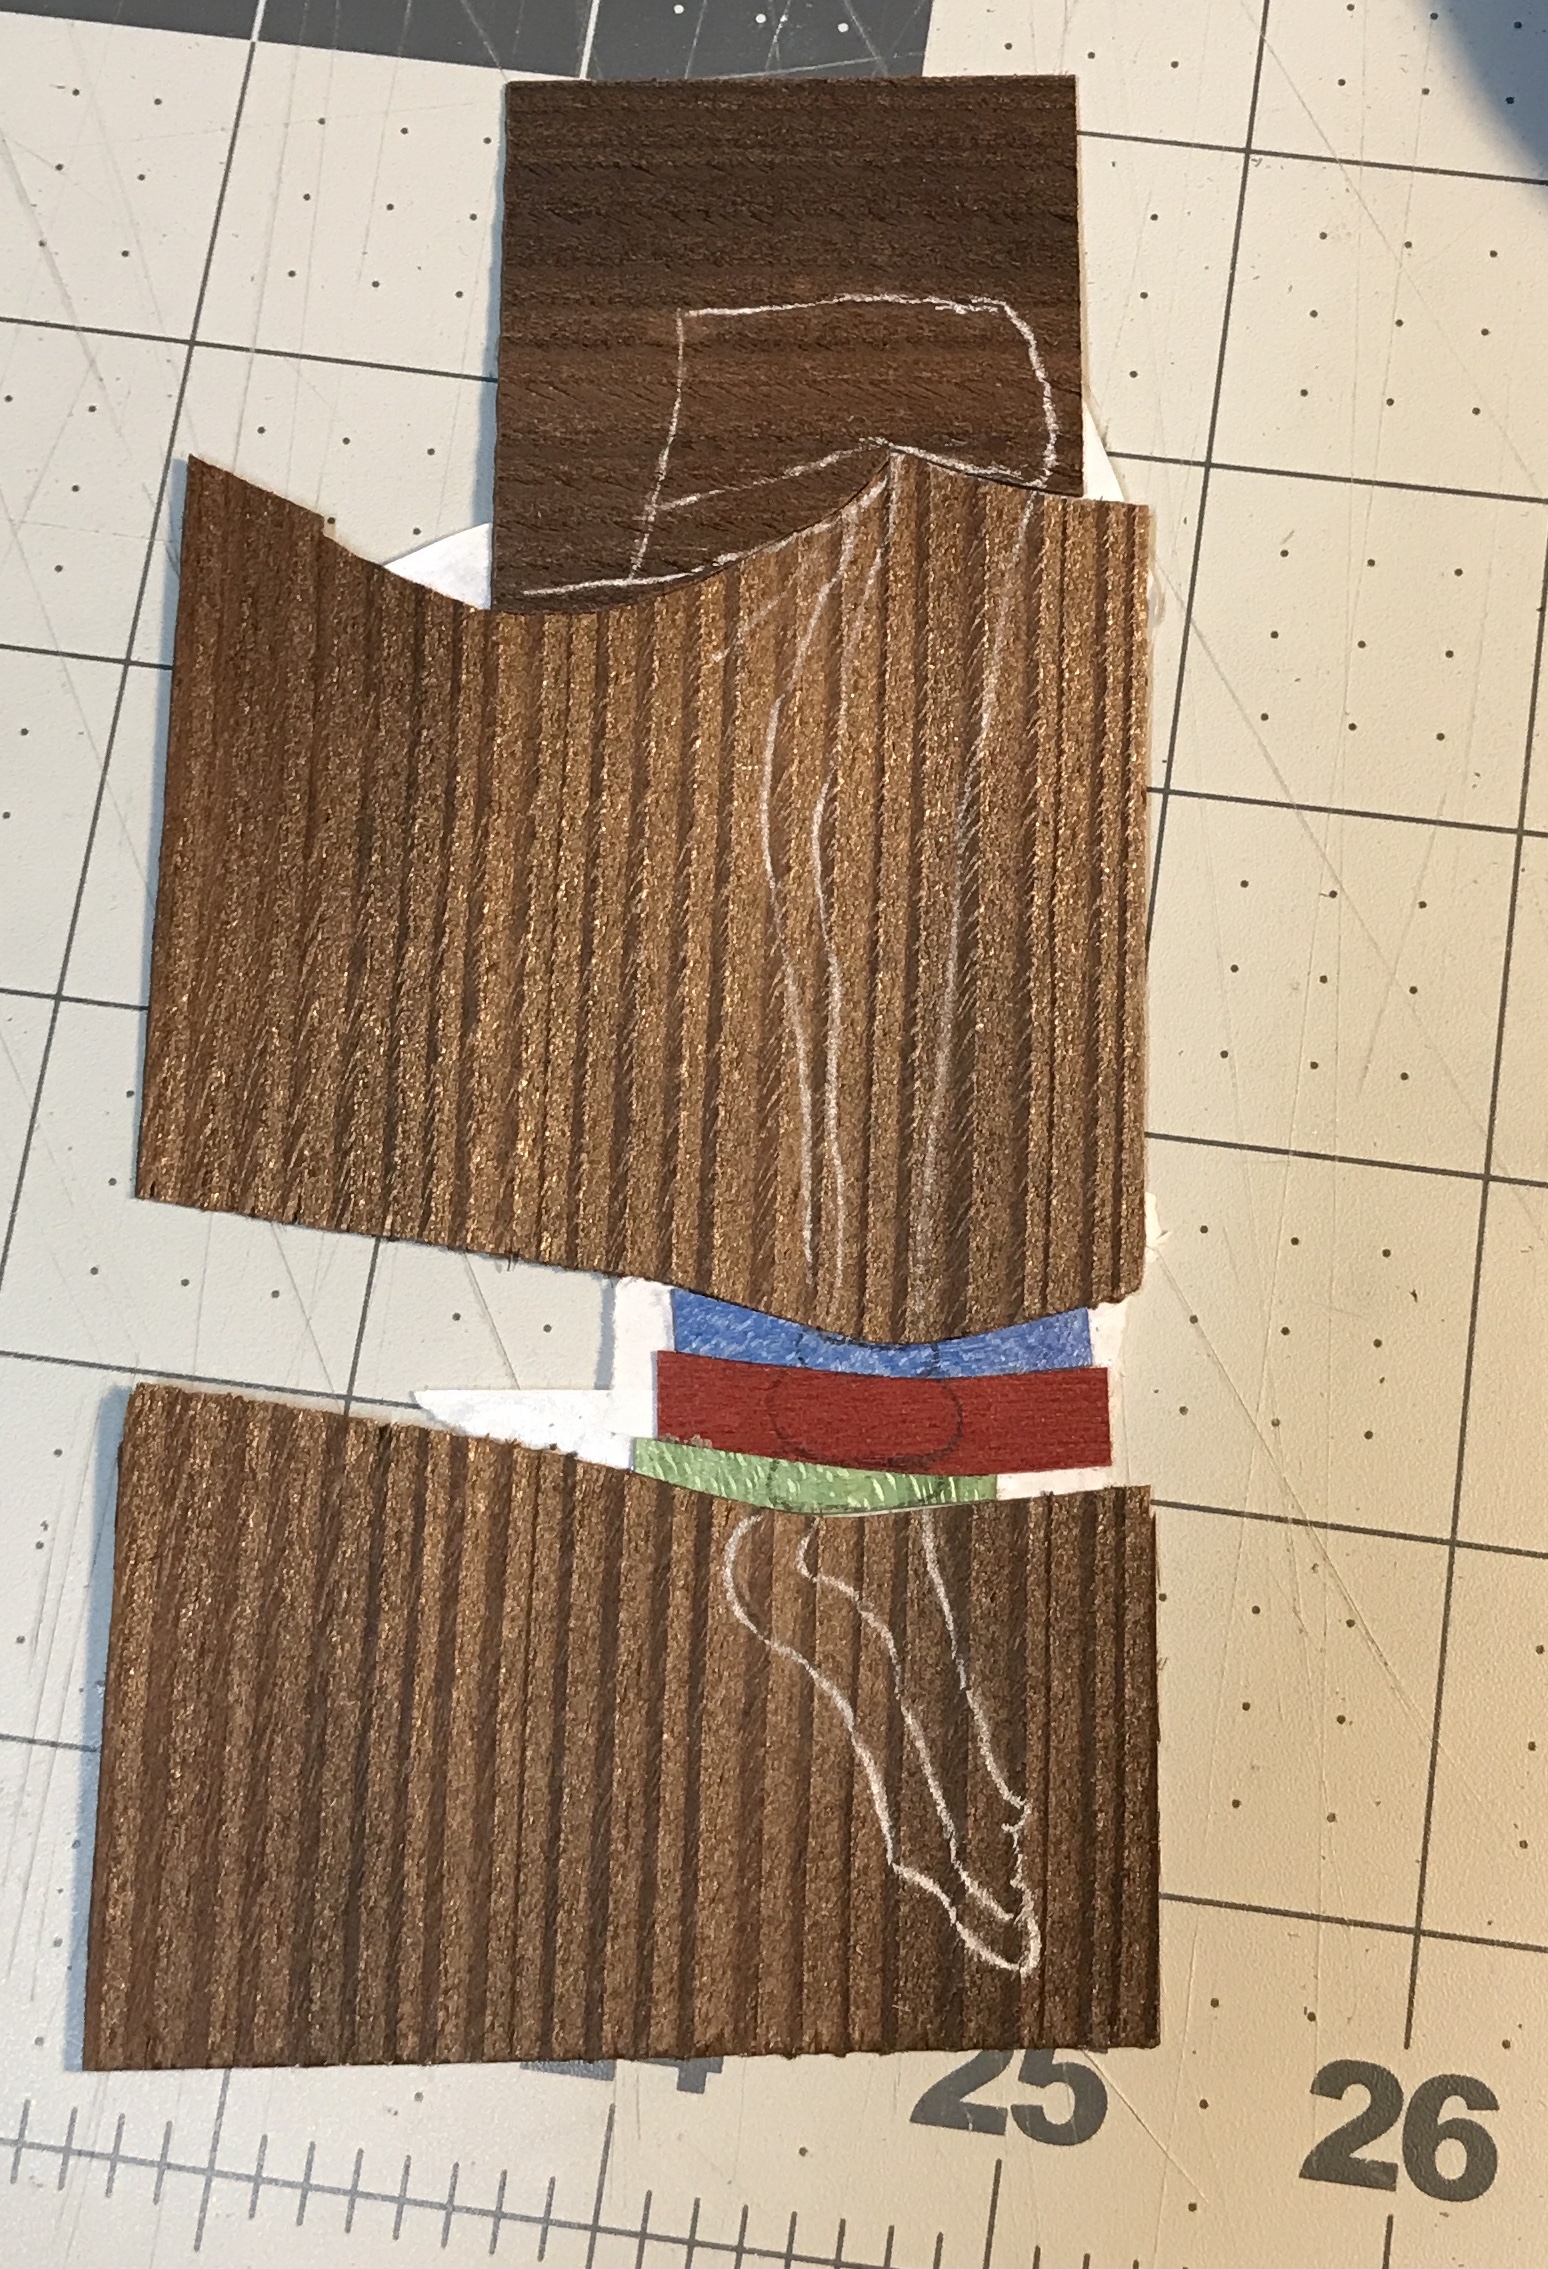
Off to the races this Monday morning after the whirlwind dulcimer class this past weekend. A simple packet was chosen for the first, the right leg. A 5" X 1" rectangle of the dark brown skin veneer was cut with the knife. The leg was drawn on this veneer by tracing over copy paper. It was very difficult to see the image so it was gone over with the pencil. Should probably switch to white copy paper when using this veneer in the future. A piece of red veneer was cut and blue taped to the brown. The image was drawn on the red veneer. A cut was made through the junction of the two colors. The table was tilted down 7.5° to the left and the red piece was kept to the left of the blade. The parts were untaped, assembled and retaped with white veneer tape. This process was repeated with the blue veneer for the blue bracelet and for the brown veneer for the remainder of the leg. The photo below shows the completed packet.
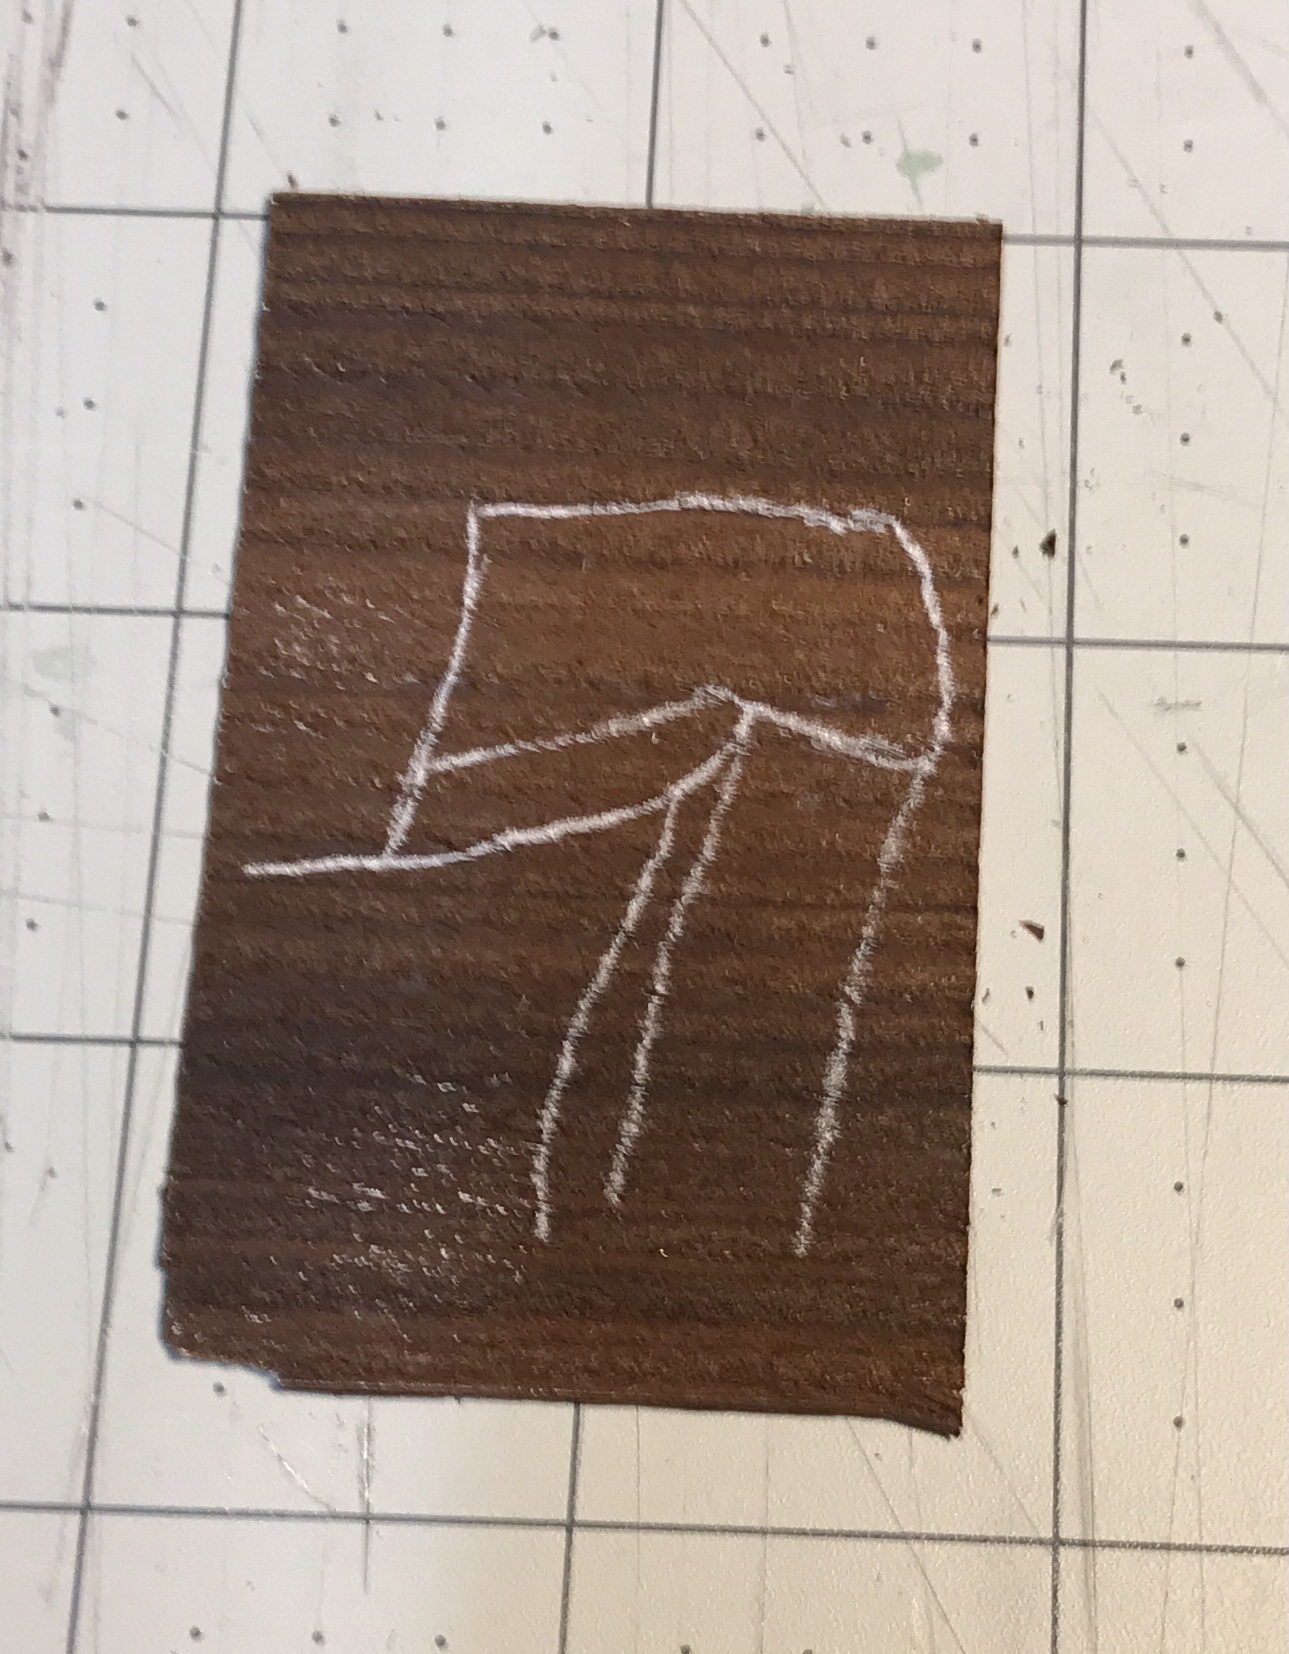
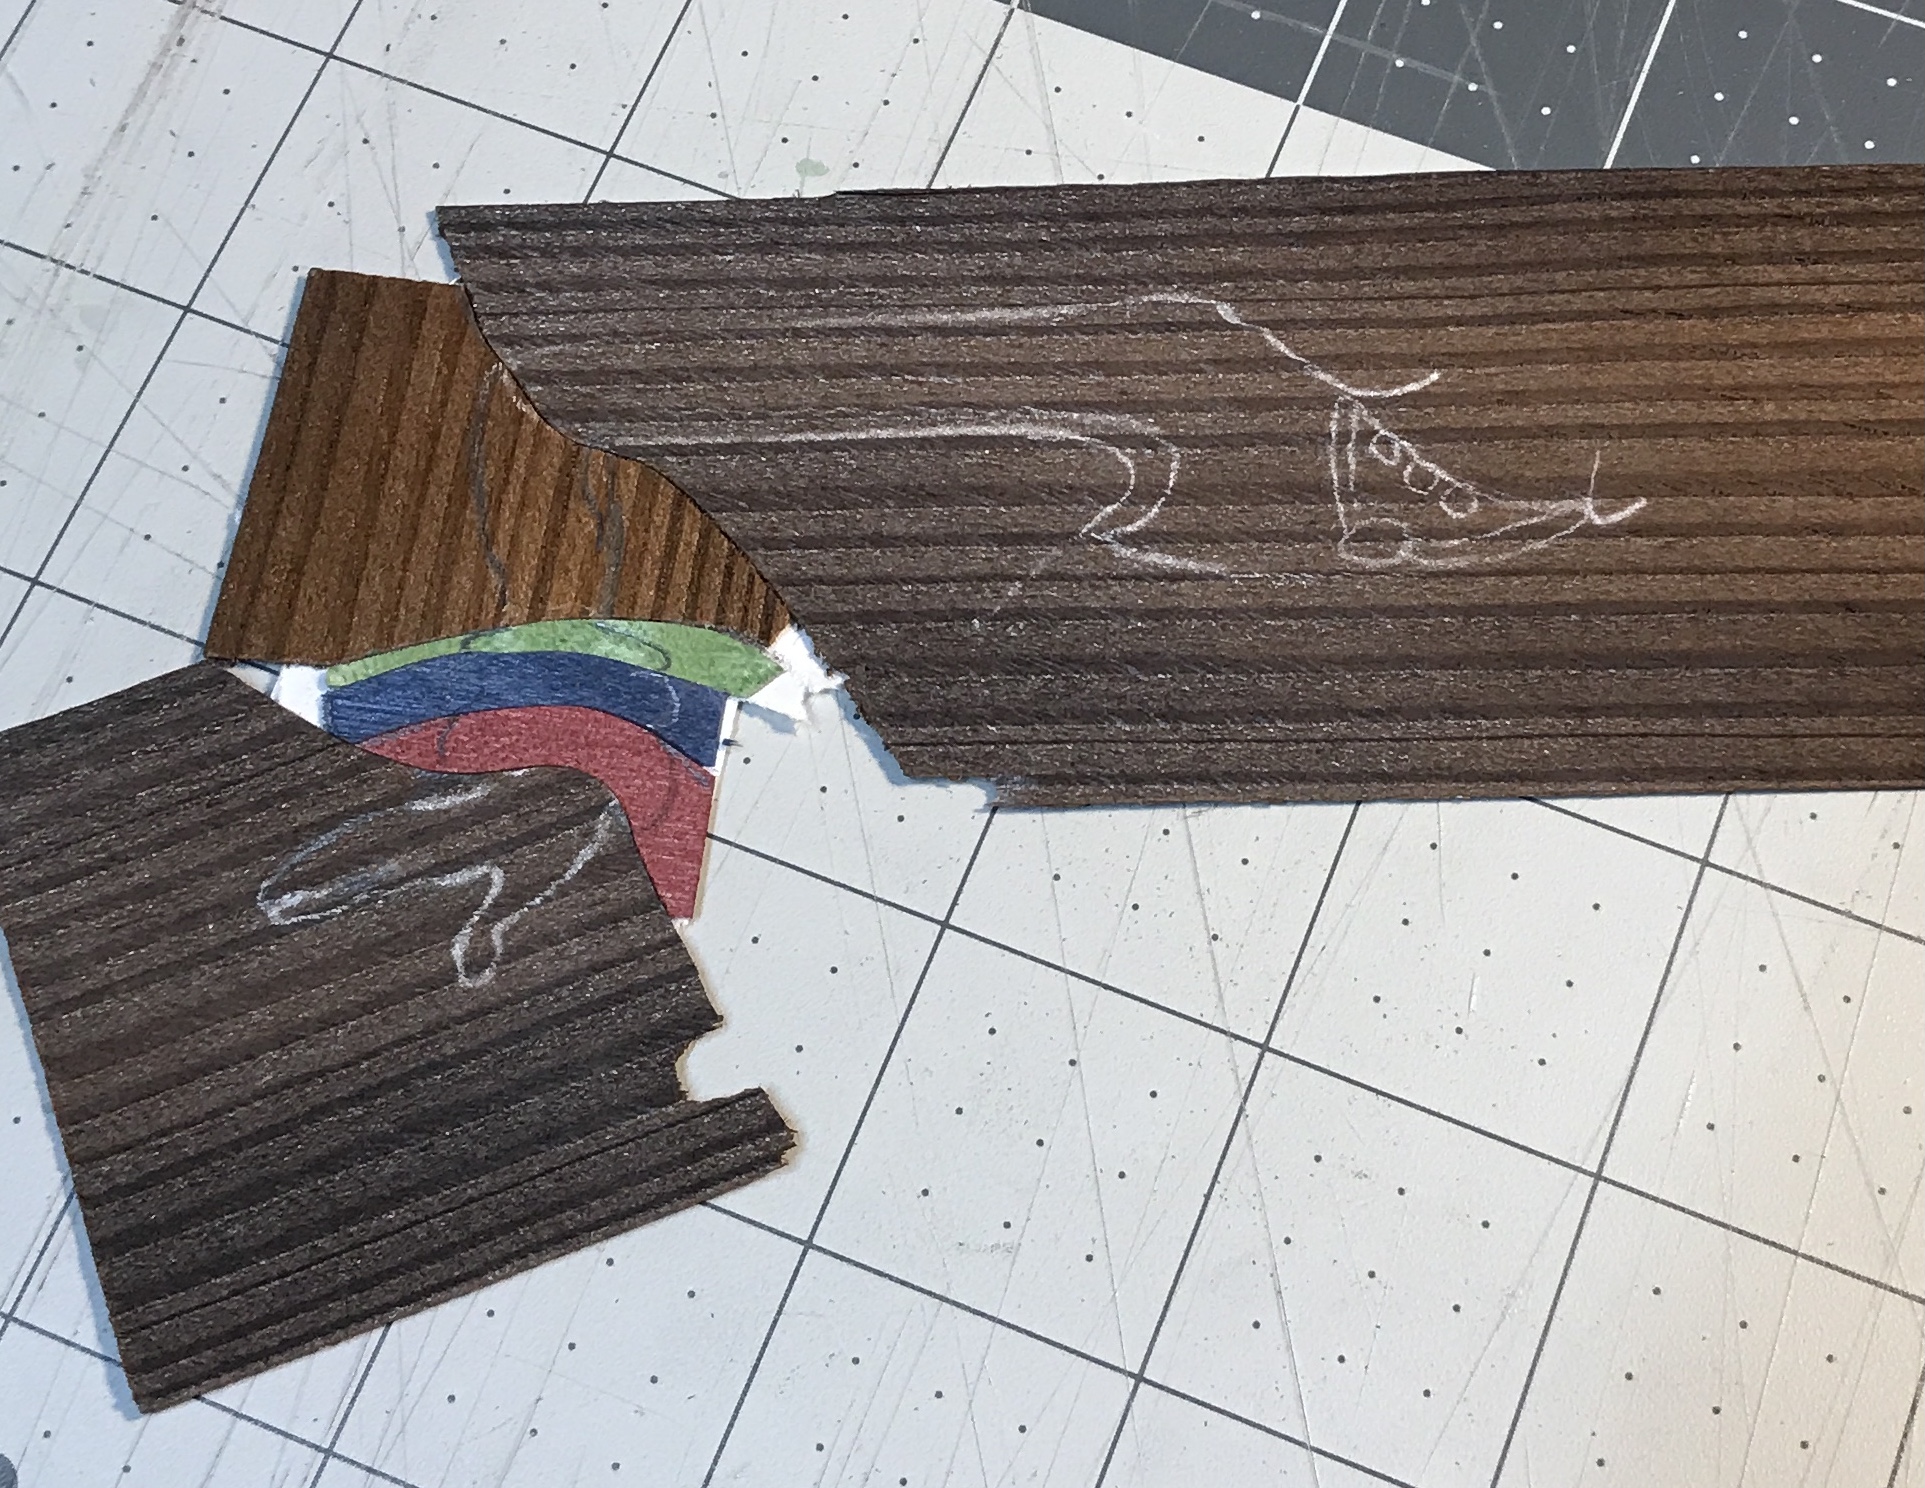
The second packet tackled is the left leg shown in the photo below. The leg is "broken" at the knee so the grain will be correctly oriented. This break is seen in the second photo. So the first cut was between the thigh and the calf. There were three cuts for each bracelet and a final cut for the foot. The completed packet is shown the the third photo.
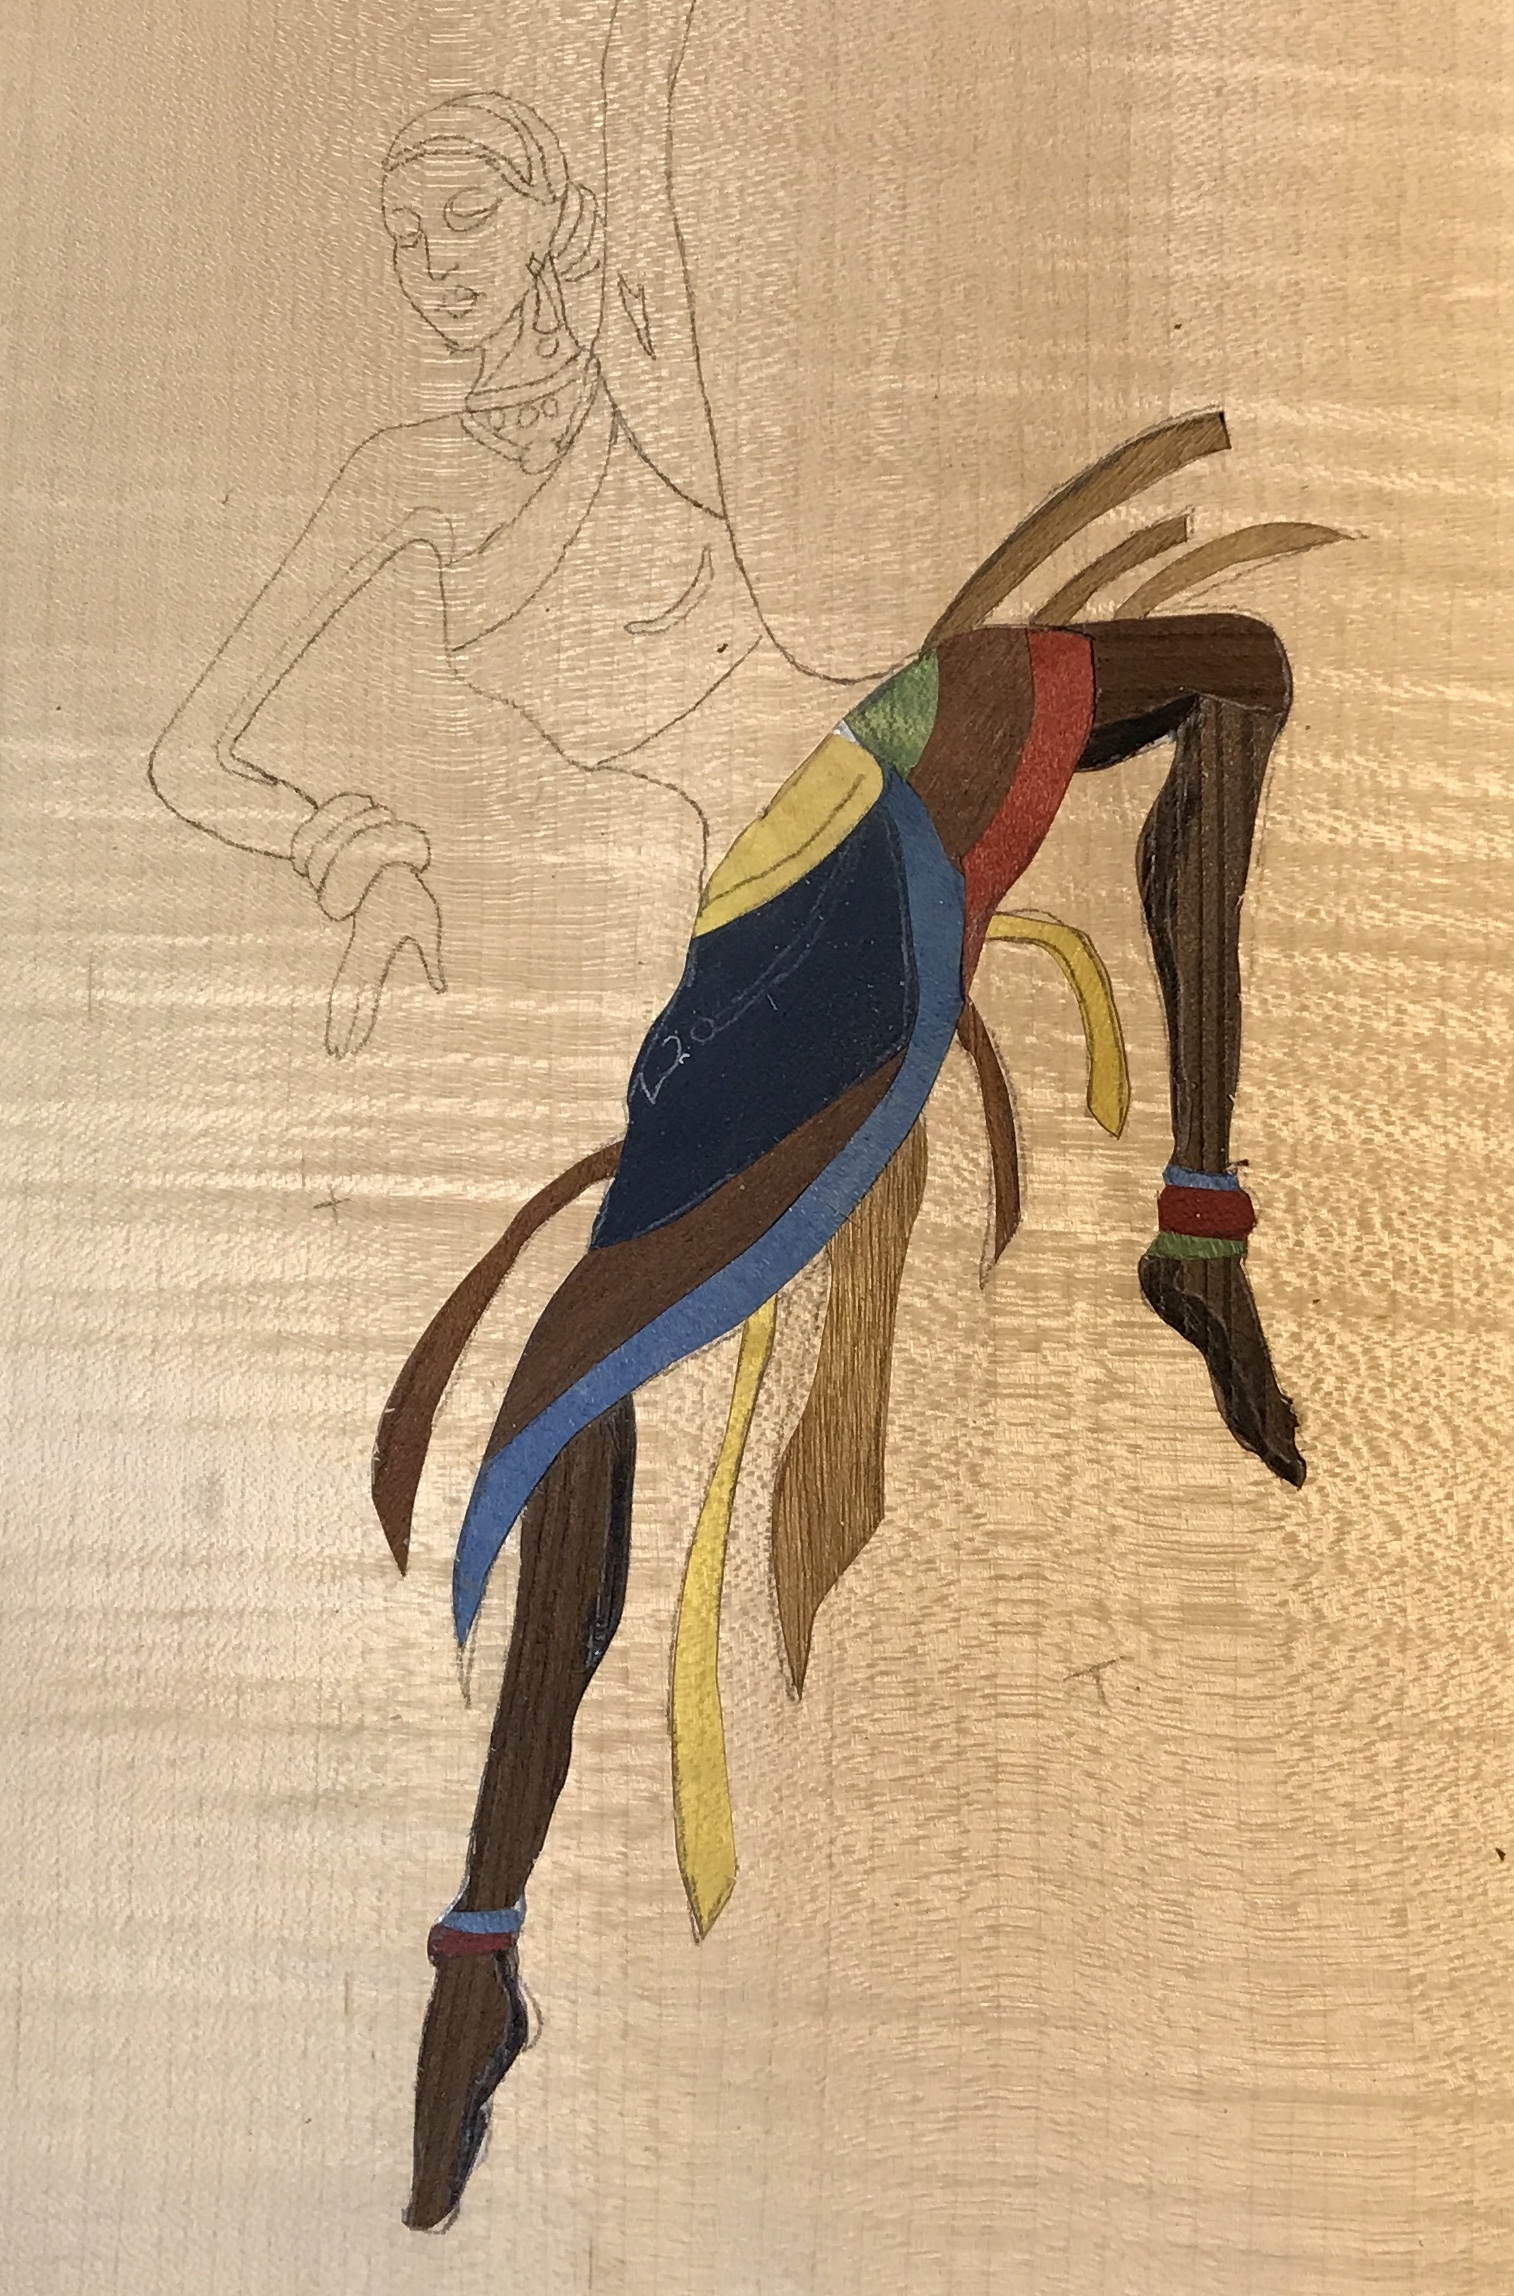
Went looking for the Abalam this morning and discovered the blue veneer purchased from MASW. This was used for the major blue portion of the skirt. The long light blue part of the skirt was made from my blue dyed veneer. Three packets were built this morning: the left arm, the shirt and the skirt. The skirt was complex and took a bit of planning to get it right. The photo below shows the three completed packets.

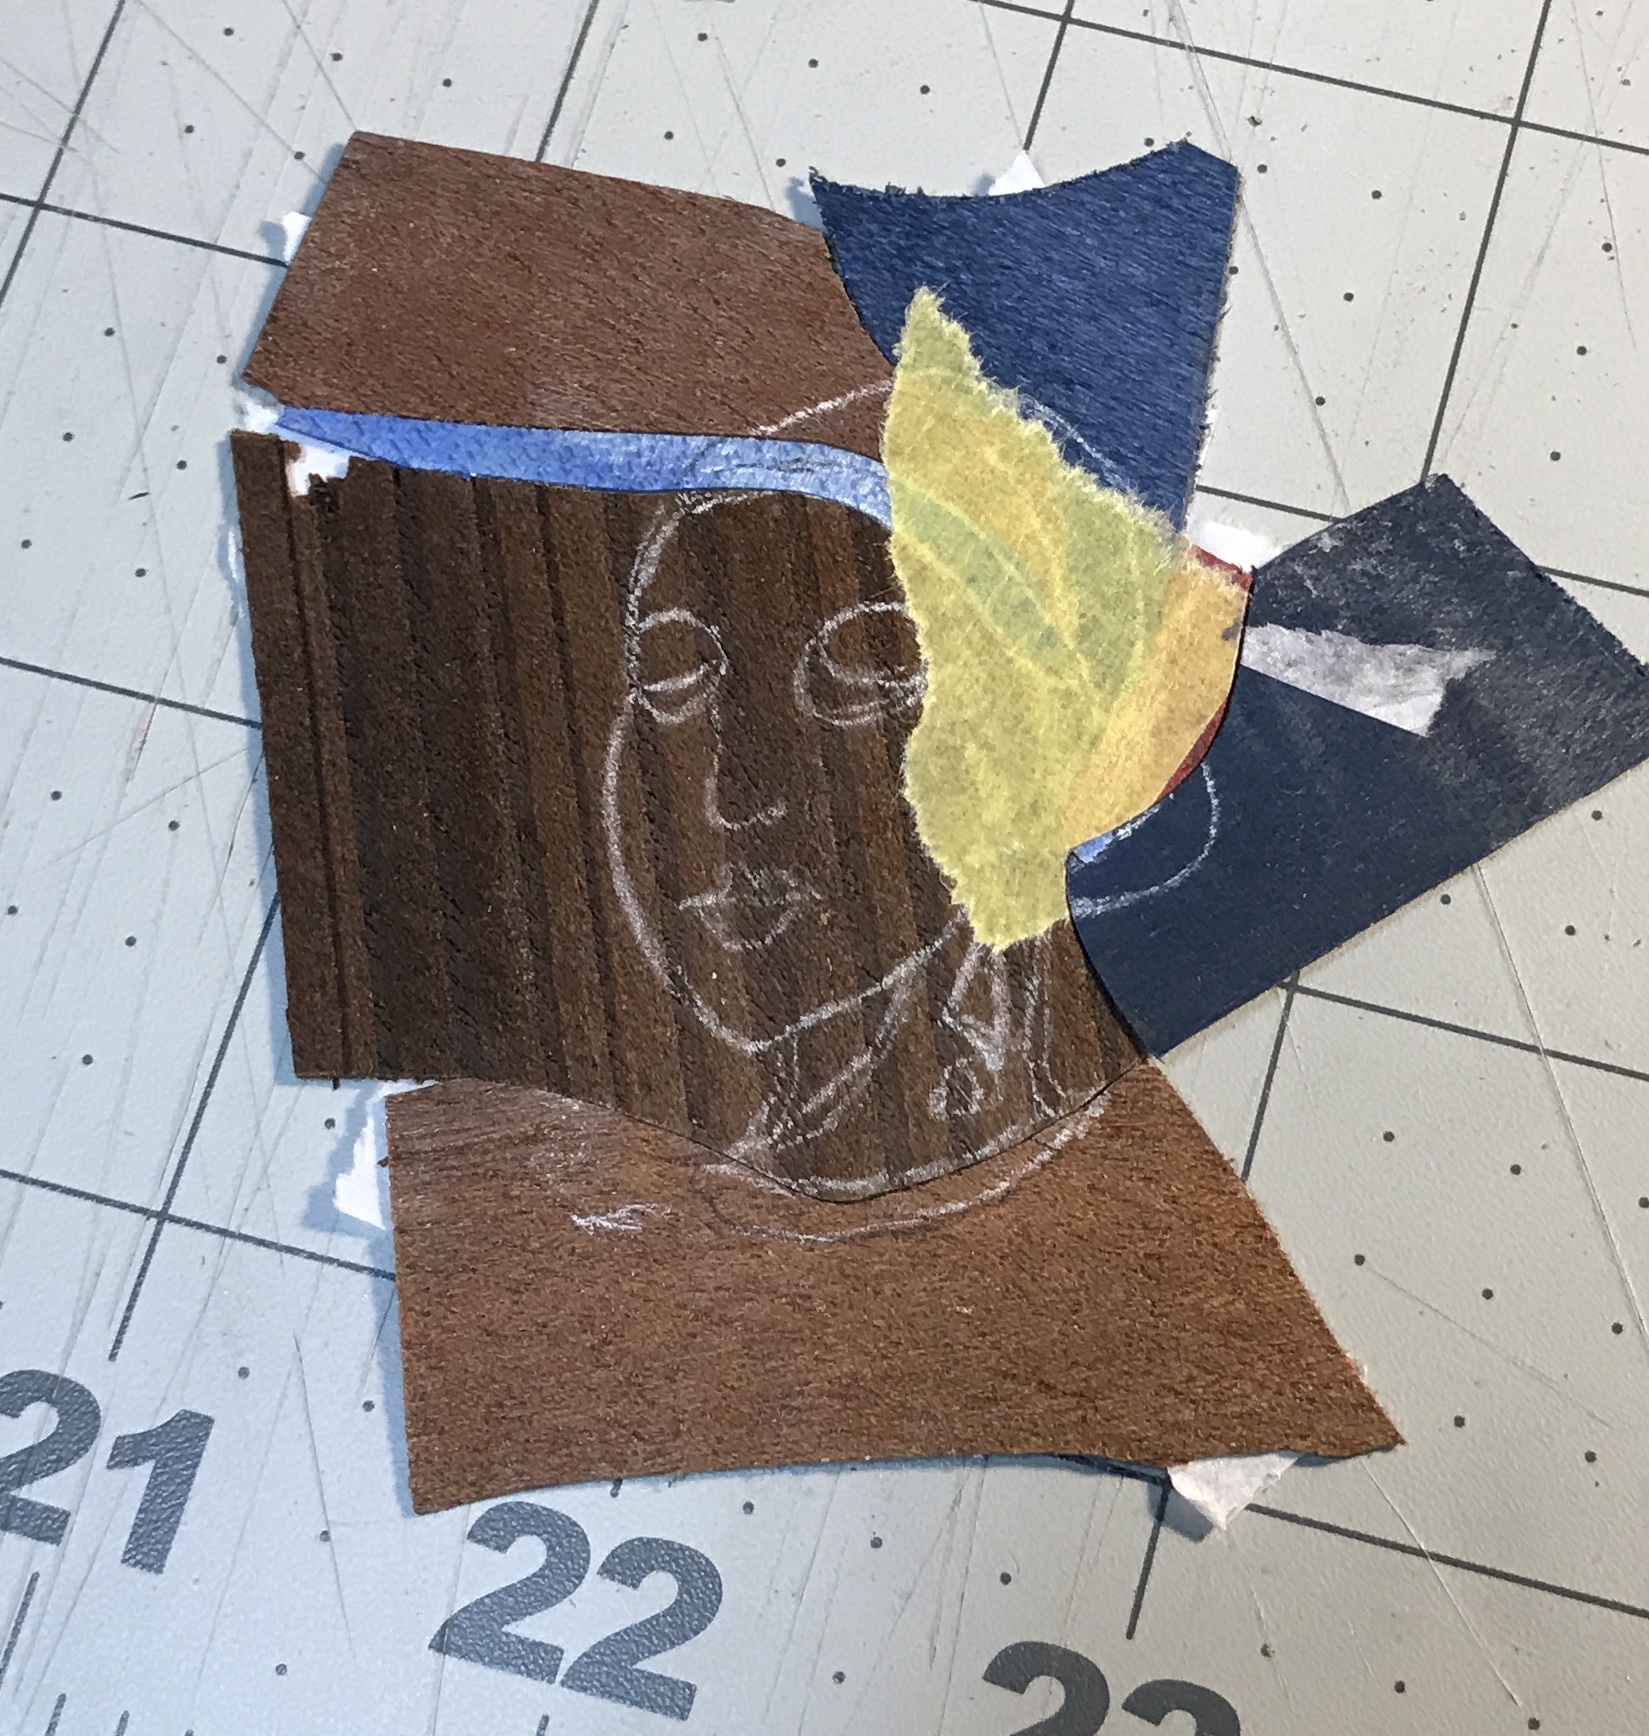
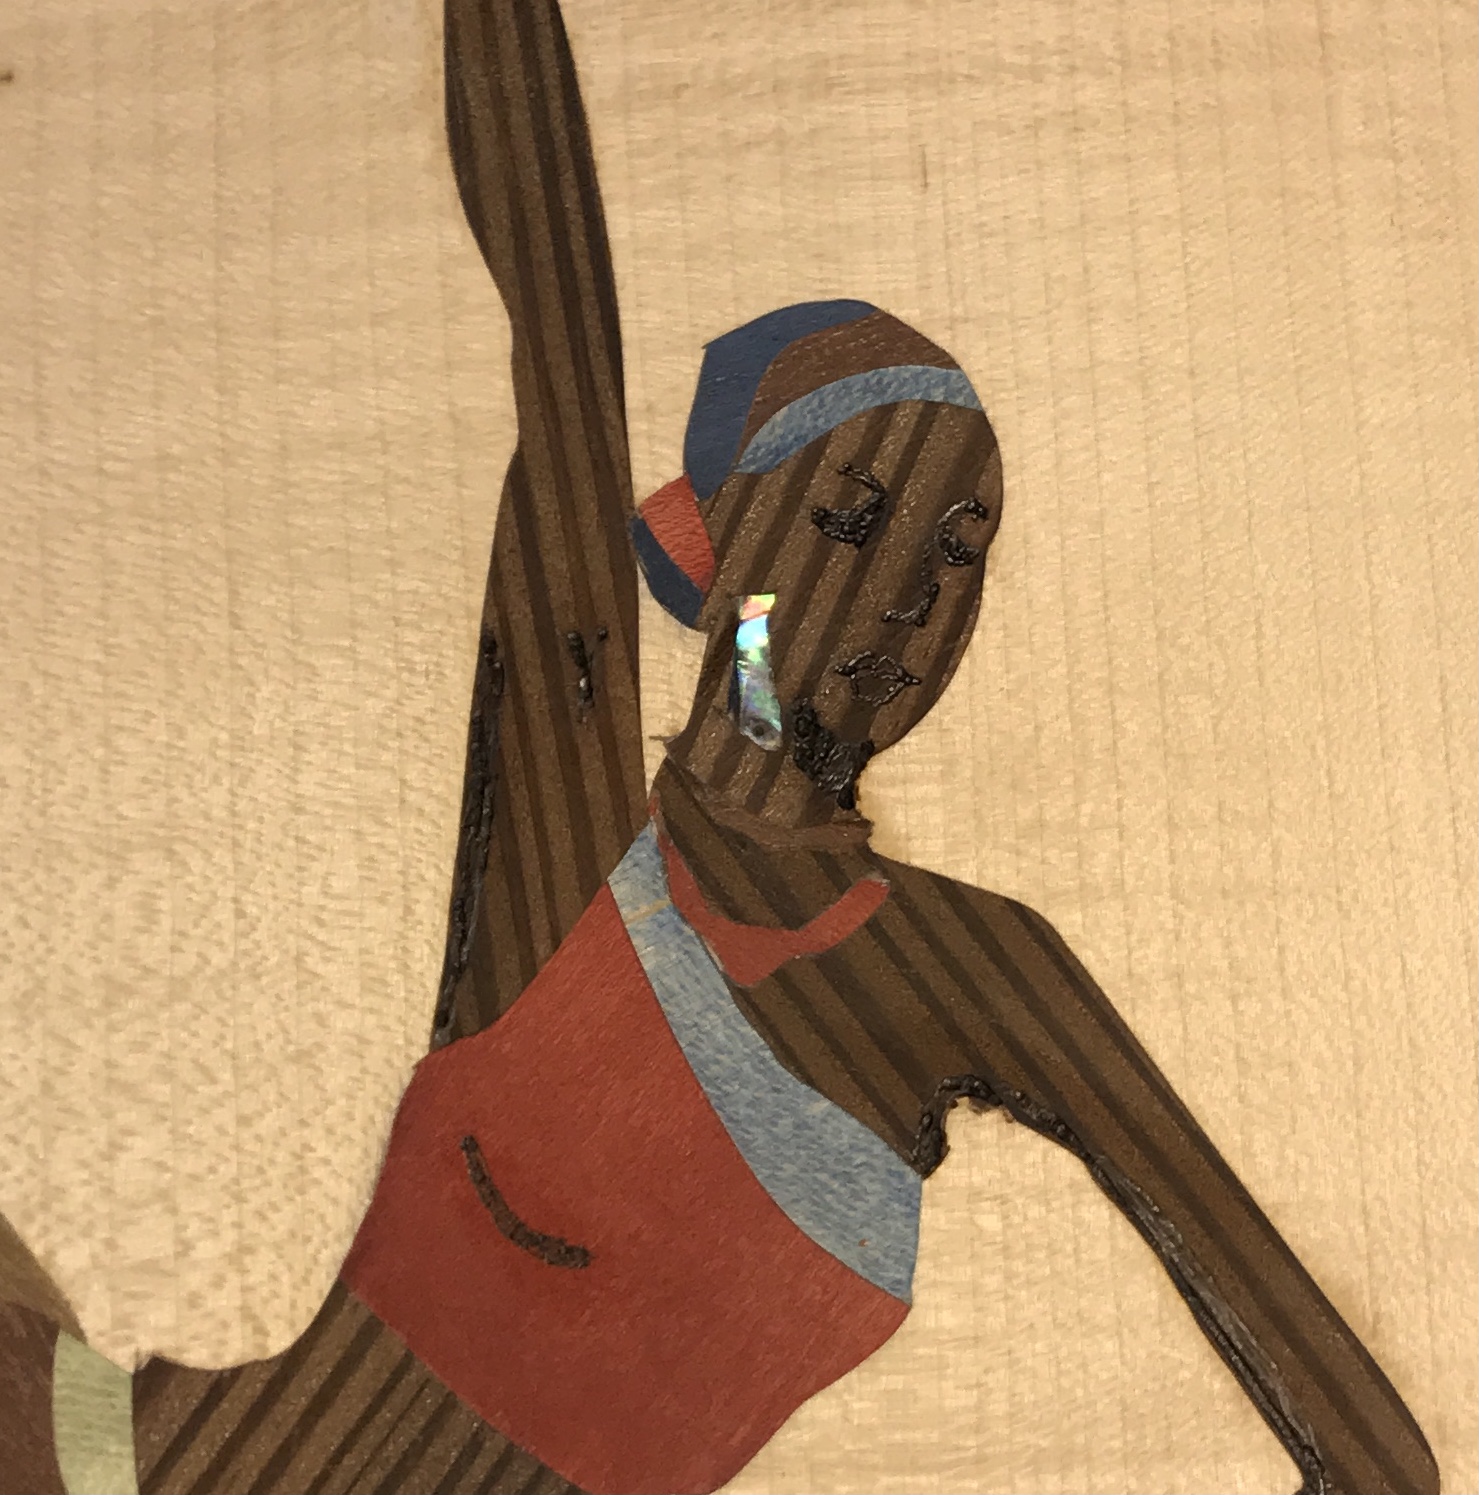
The right arm was reasonably straightforward. Like the bent leg this arm was broken into two parts at the elbow. The first photo shows the completed right arm packet. The head (hat) was very complicated and consequently was simplified. The right side of the hat and the left side of the bun share common lines among multiple pieces so some double cutting was necessitated. The second photo shows the finished head packet. The yellow tape was needed as the veneer tape was not holding all of the pieces well.
It is time to cut the body into the background. There are two choices at this point. The first is cutting each of the packets in. This means there will be double cutting at the junctures of some of the packets. The alternative is assembling all of the packets into one large packet. This single packet can then be cut into the background. The alternative sounds best, but comes with added hurdle of one long continuous cut around the entire packet. On the other hand the way the skirt tassels will be cut in might serve as an viable approach. The tassels will be longer than pictured and cut into the background before the skirt. That way when the skirt is added the tassels are automatically in place. The key to making this work is that the tassel is narrower than the skirt and can extend into the area of the future skirt. Is this possible with the body parts?
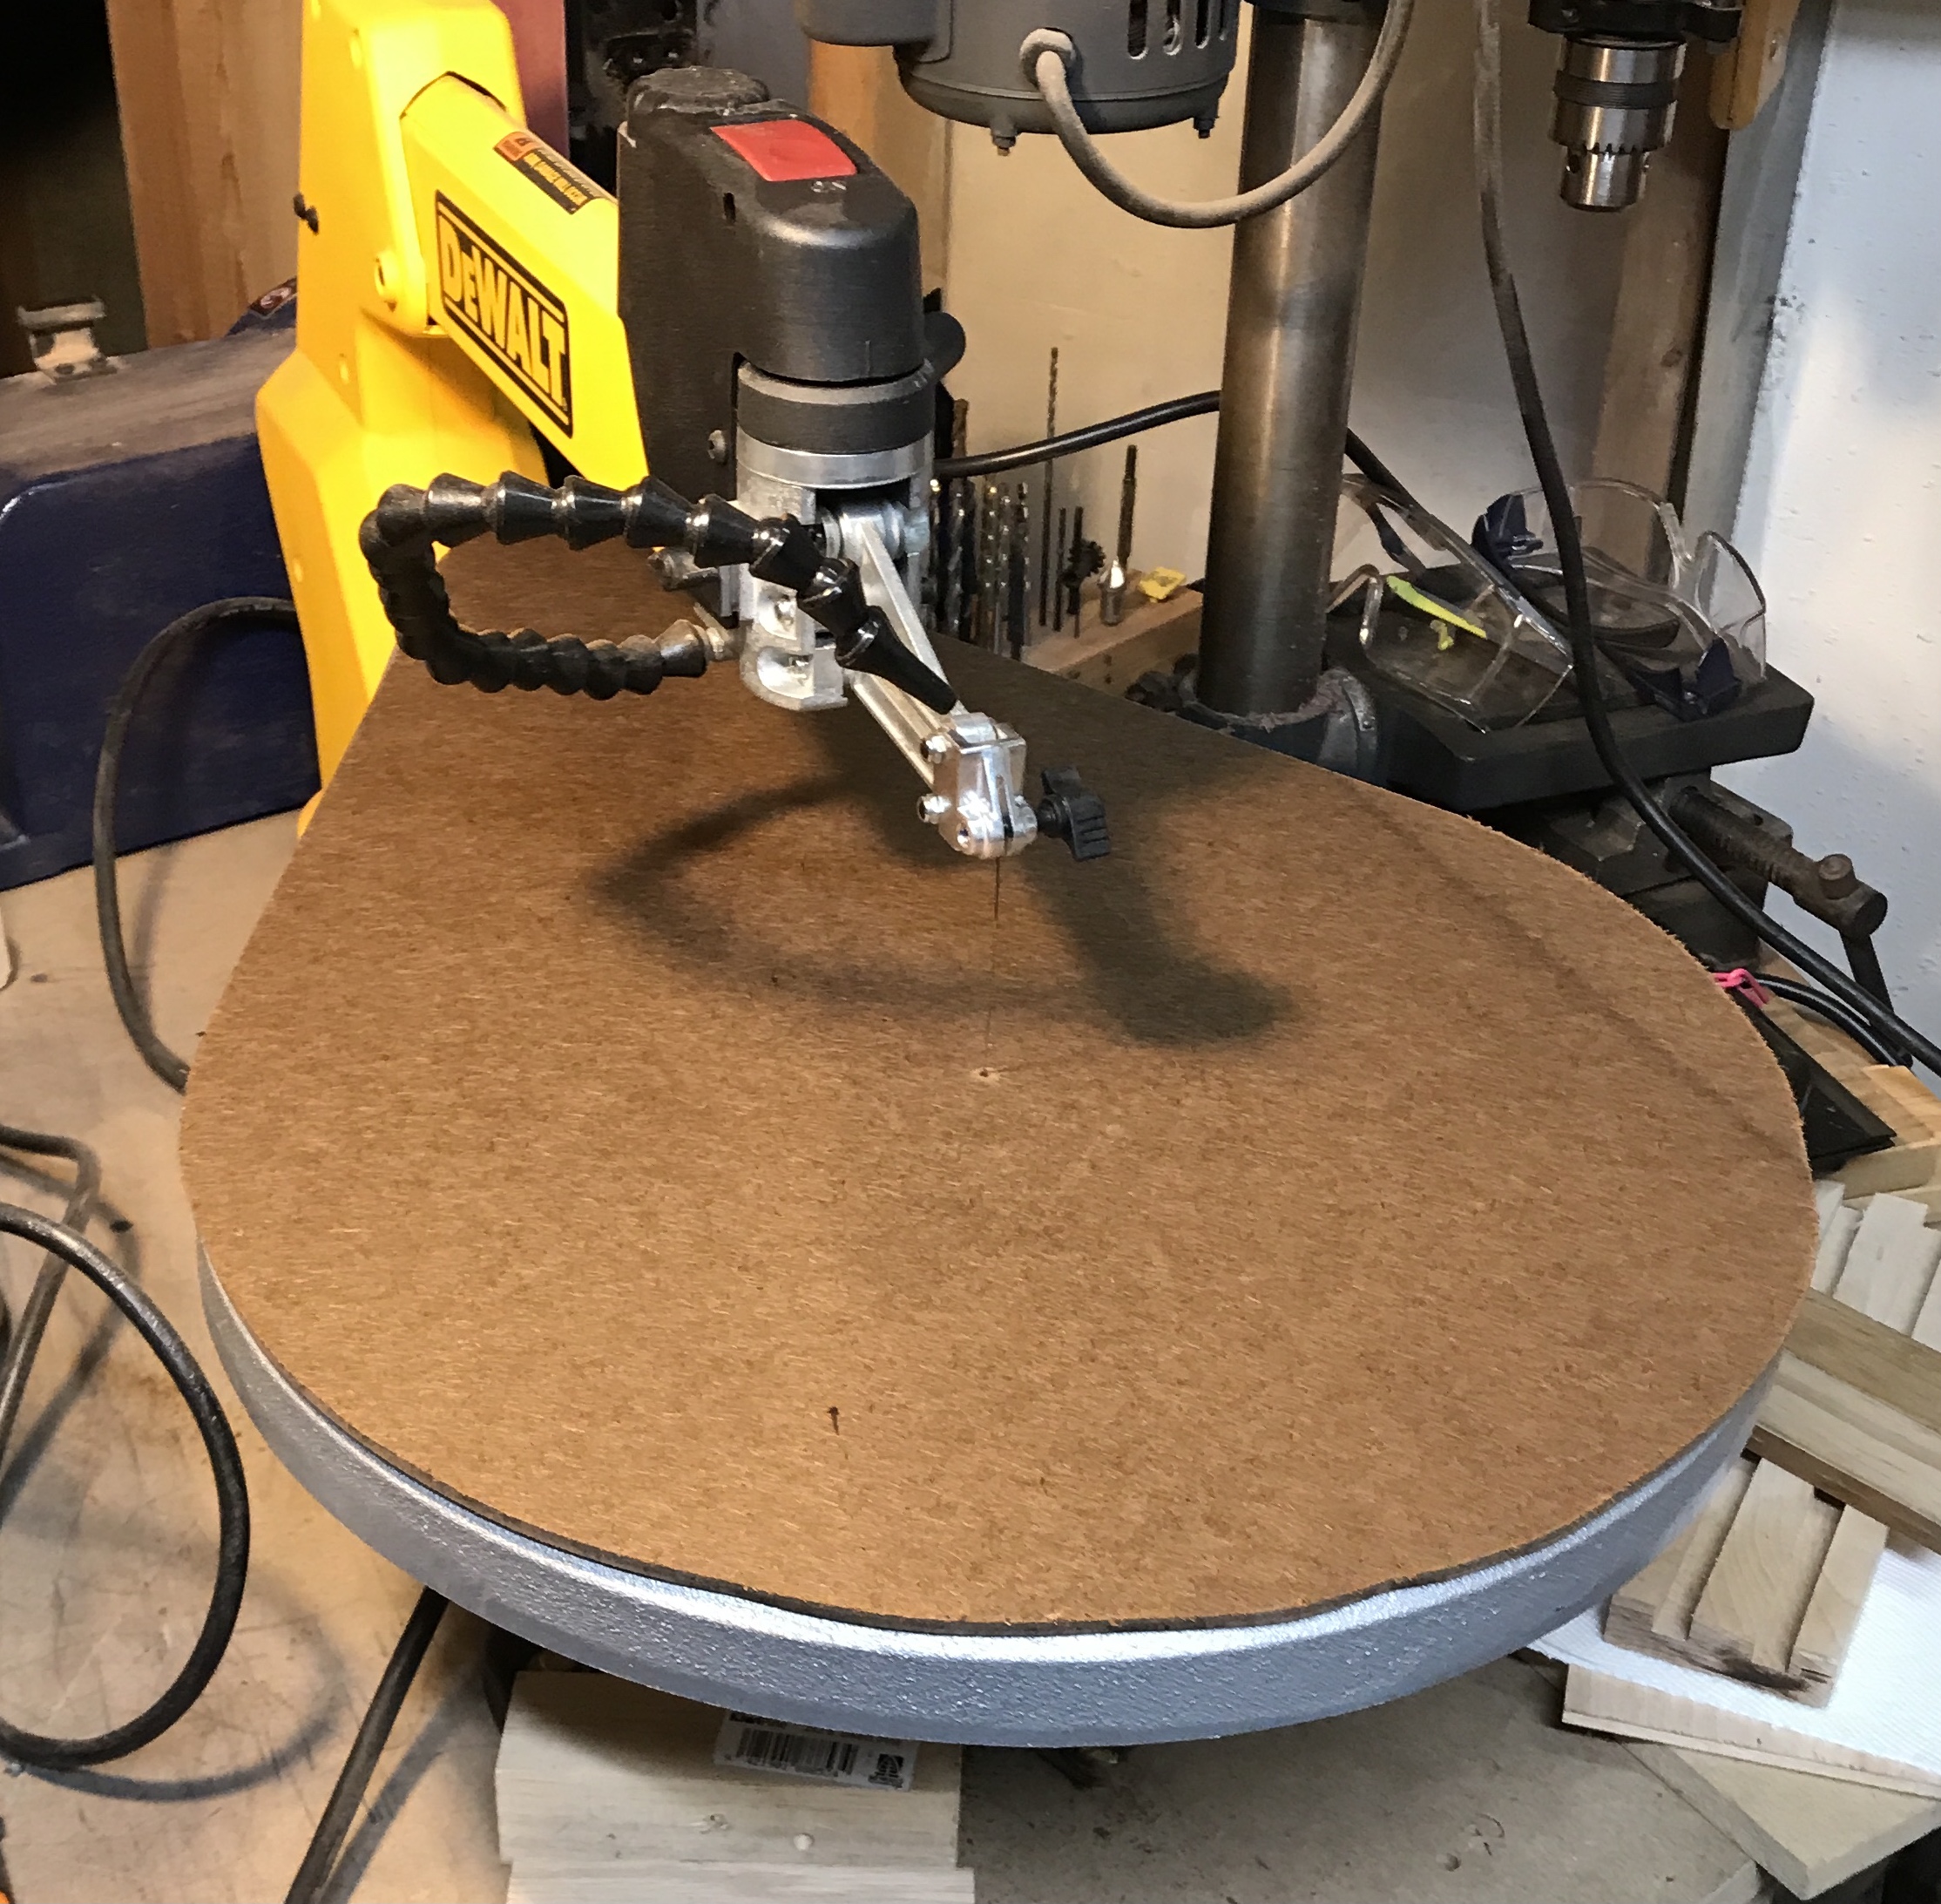
Before starting on cutting the packets into the background the scroll saw needed an upgrade. A 2' X 4' length of 3/16" thick hard board was purchased from Menards. The shape of the scroll saw table is approximately a 16" diameter circle extended at the back to a total length of 2'. A circle was drawn on the hard board. Extensions were drawn to the back leaving 3" between their ends and tangent to the circle. With the crosscut sled the large amount of excess board was cut off. The piece with the scroll saw shape marked out was cut at angles on both sides using the bevel gauge to produce the two tangent lines. The circle was cut with the scroll saw. A 1/8" hole was drilled in the center of the circle. The zero clearance table top was taped to the scroll saw table proper with double sided carpet tape. The photo shows the zero clearance table in place with a small blade ready for veneer work.
I am convinced the packets can be individually cut in like the tassels will. The legs and the tassels should be cut in first, all extending beyond the skirt's edge. The skirt is behind the shirt as are the left and right arms. The right arm is also behind the head. Consequently, the following order should be followed after transferring the dancer to the background with two crosshairs. The process begins with the left and right legs along with the tassels. Then the skirt is added. The two arms are cut in next followed by the shirt and then the head.
This means the legs and tassels need to be extended somewhat beyond their junctions with the skirt. Similarly, the skirt needs to extend beyond the junction with the shirt, the arms need to be extended beyond the shirt junctions, and the shirt also needs to go beyond the head.
A backboard for the dancer was made this morning. A piece of 1/4" plywood was cut to 9.5" X 15.25". The length was set by the angled dancer and the width was set to the golden ratio using the divider from MASW. A batch of walnut veneer had been purchased from MASW. Two pieces of this that were split multiply were pulled from the veneer box. They were overlapped and a line cut through both to provide straight matching edges. They were trimmed to width. To avoid further splitting the ends were taped with yellow tape before cutting to length. Glue was spread evenly over the plywood sheet, the veneer applied, and the whole was placed in the vacuum box. THe vacuum was released after three hours.
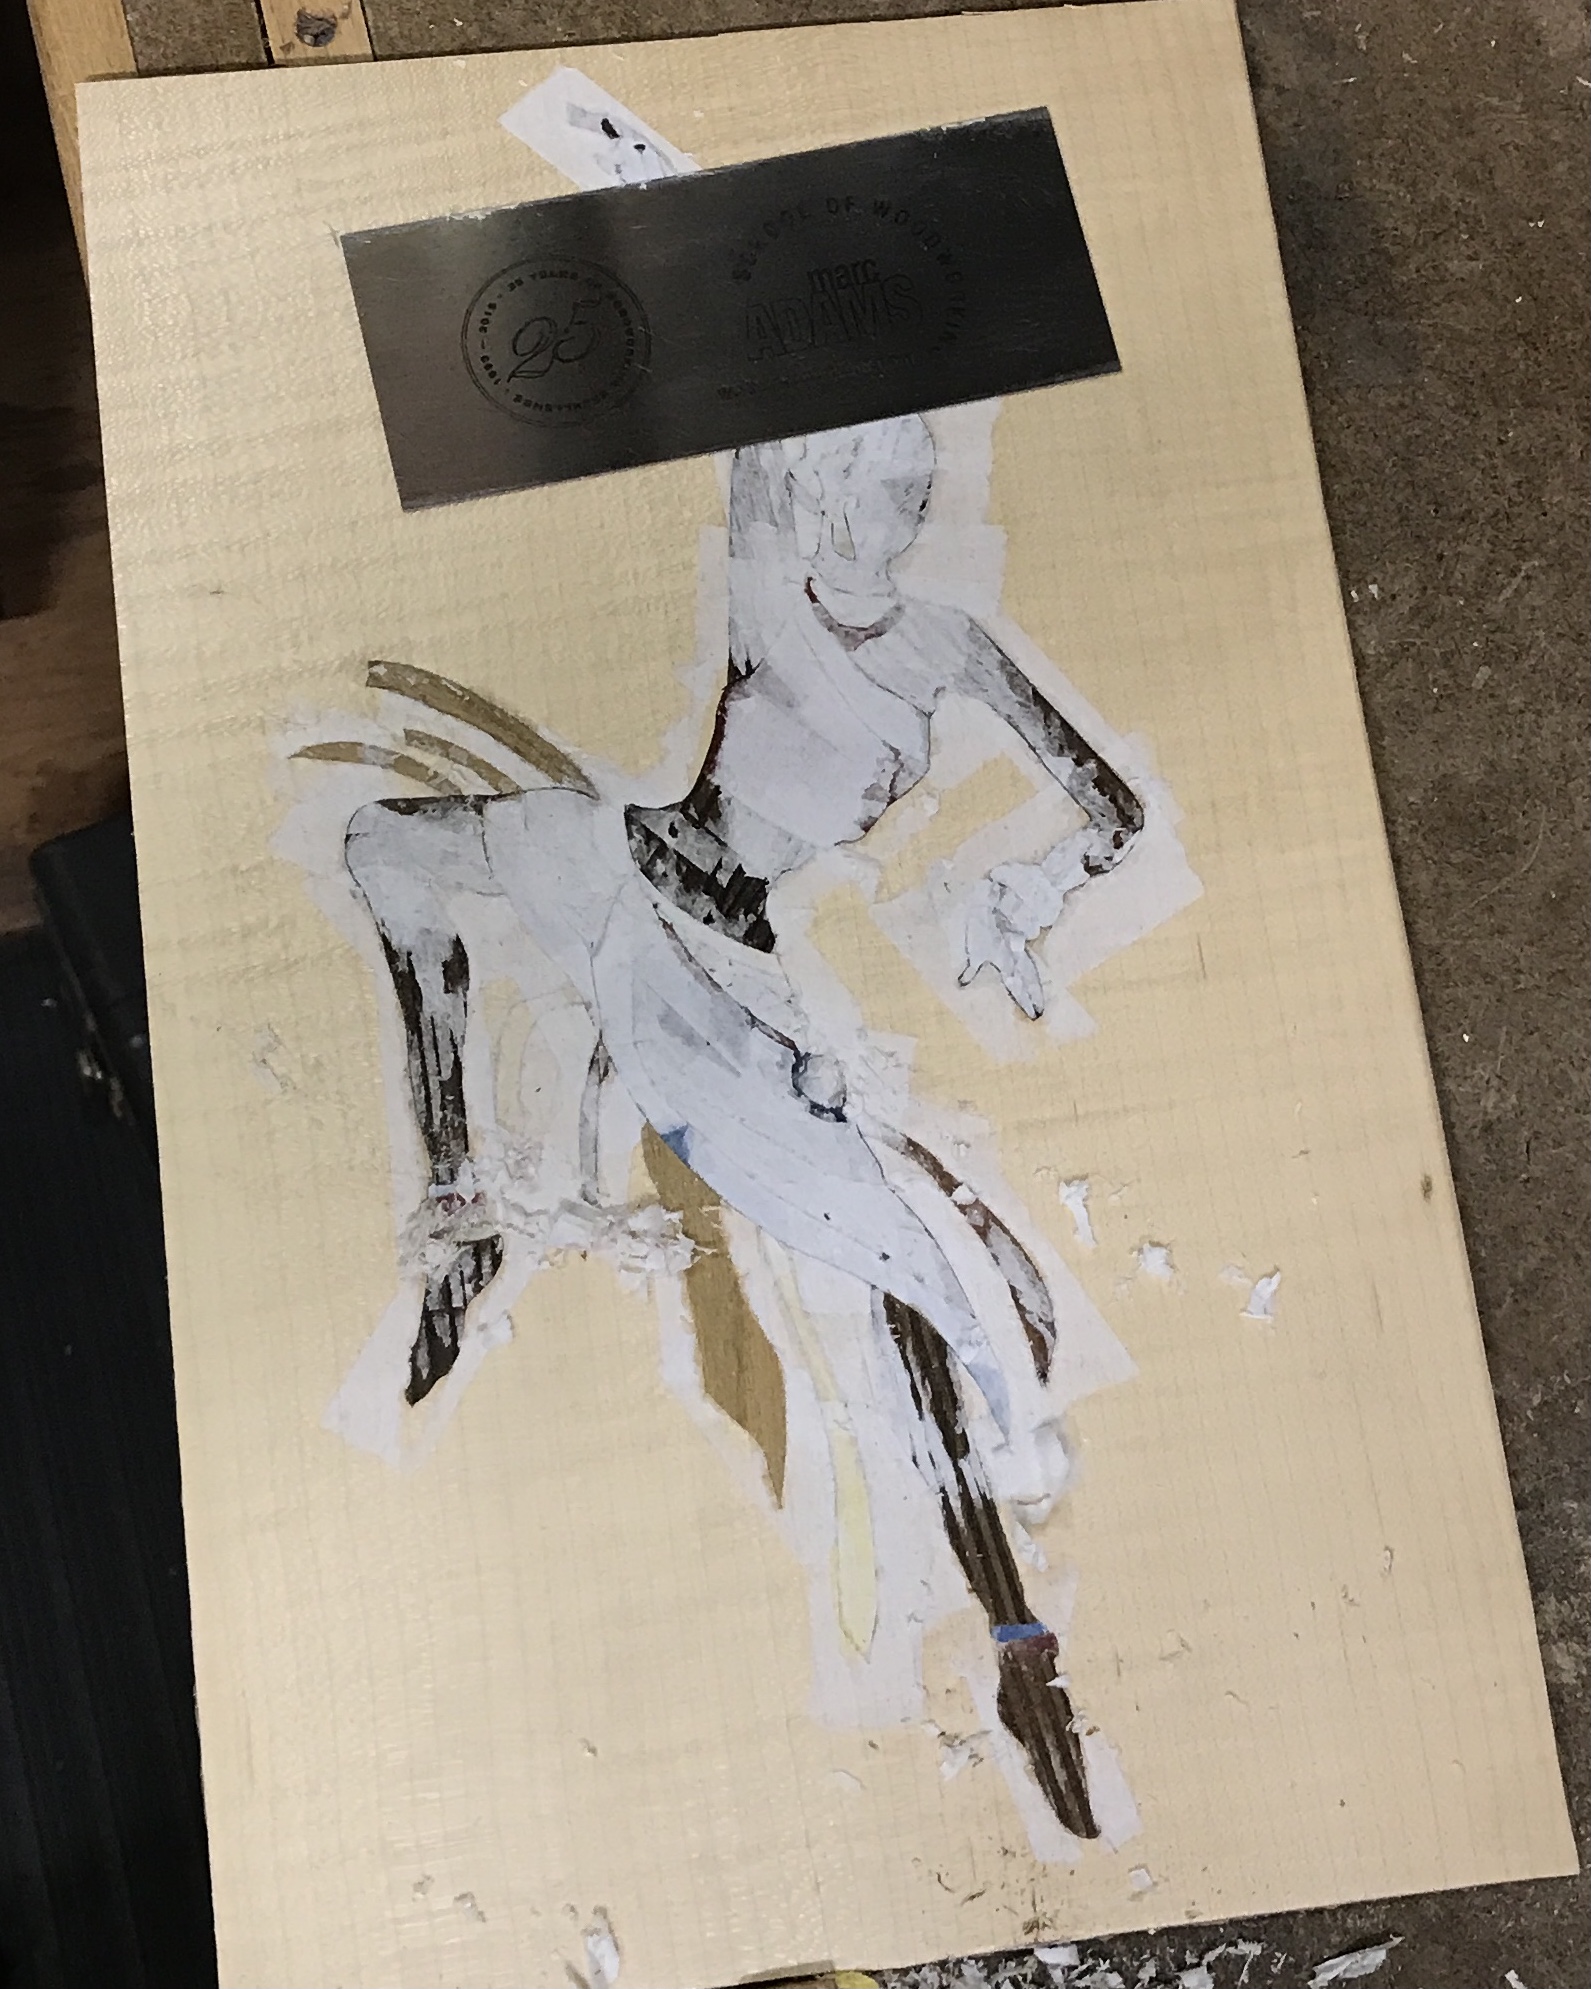
I am now back to the dancer after twelve days of working on the Altoids box. The background was cut oversize using the backing as a guide. The image on tracing paper was transferred to the background along with three crosshairs after setting the image to the appropriate angle. (It was not necessary to transfer the image, but I wanted to see it on the background.) The right leg packet was aligned using the tracing paper. It was taped in place with blue tape. A hole was poked through the hidden part of the leg and the background using the dental tool. The photo shows the packet taped to the background.
I realized that the wood burning needed to be done prior to cutting the packet into the background. All parts were burned as needed with the woodburner set to 300°. The blade was threaded through the leg packet on background and the outline was cut. The cutting went okay. The parts were separated and the backside was taped with white veneer tape. The front side is seen in the photo below.

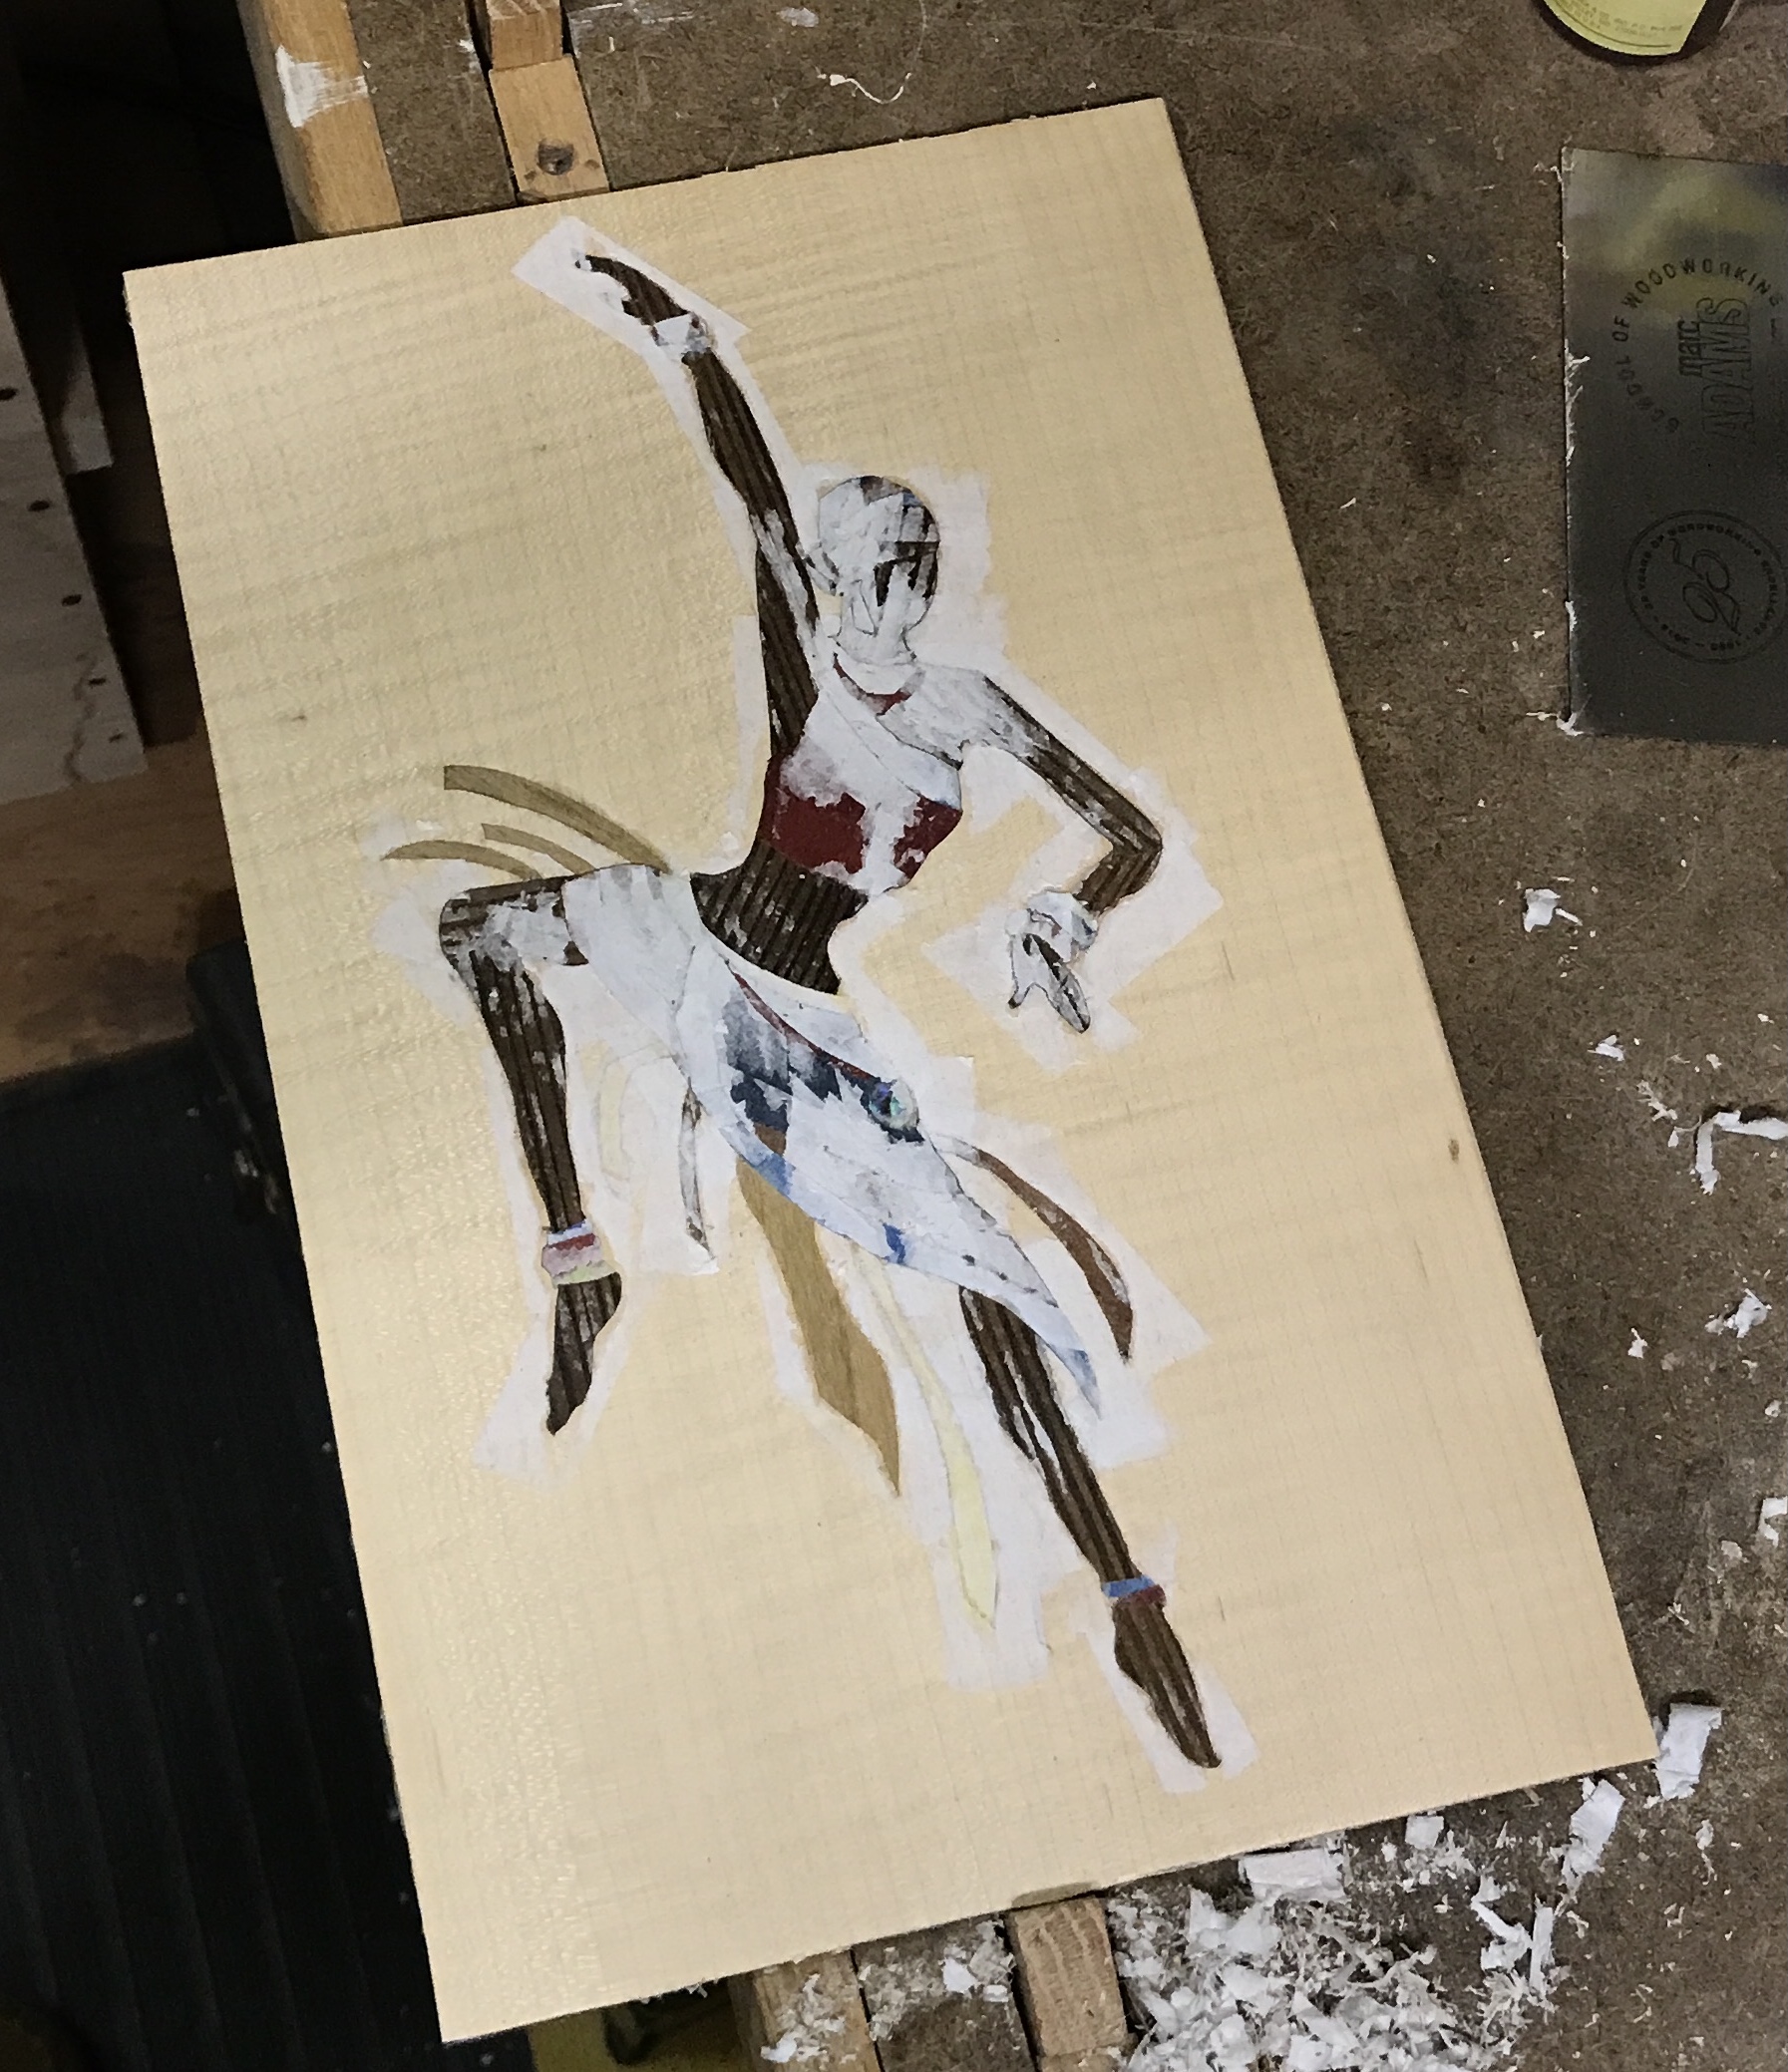
The eight skirt tassels were cut in next. Each was laid out on the appropriate color of veneer. Two were yellow, three light orange veneer, and three were the light brown veneer chosen above. Each of these were laid in the correct position, taped in place, cut in, and taped with veneer tape. Broken pieces of veneer were repaired along the way by placing a drop of glue on the veneer tape and cutting a fragment to fit or using a matching fragment. The picture at this stage is shown below.
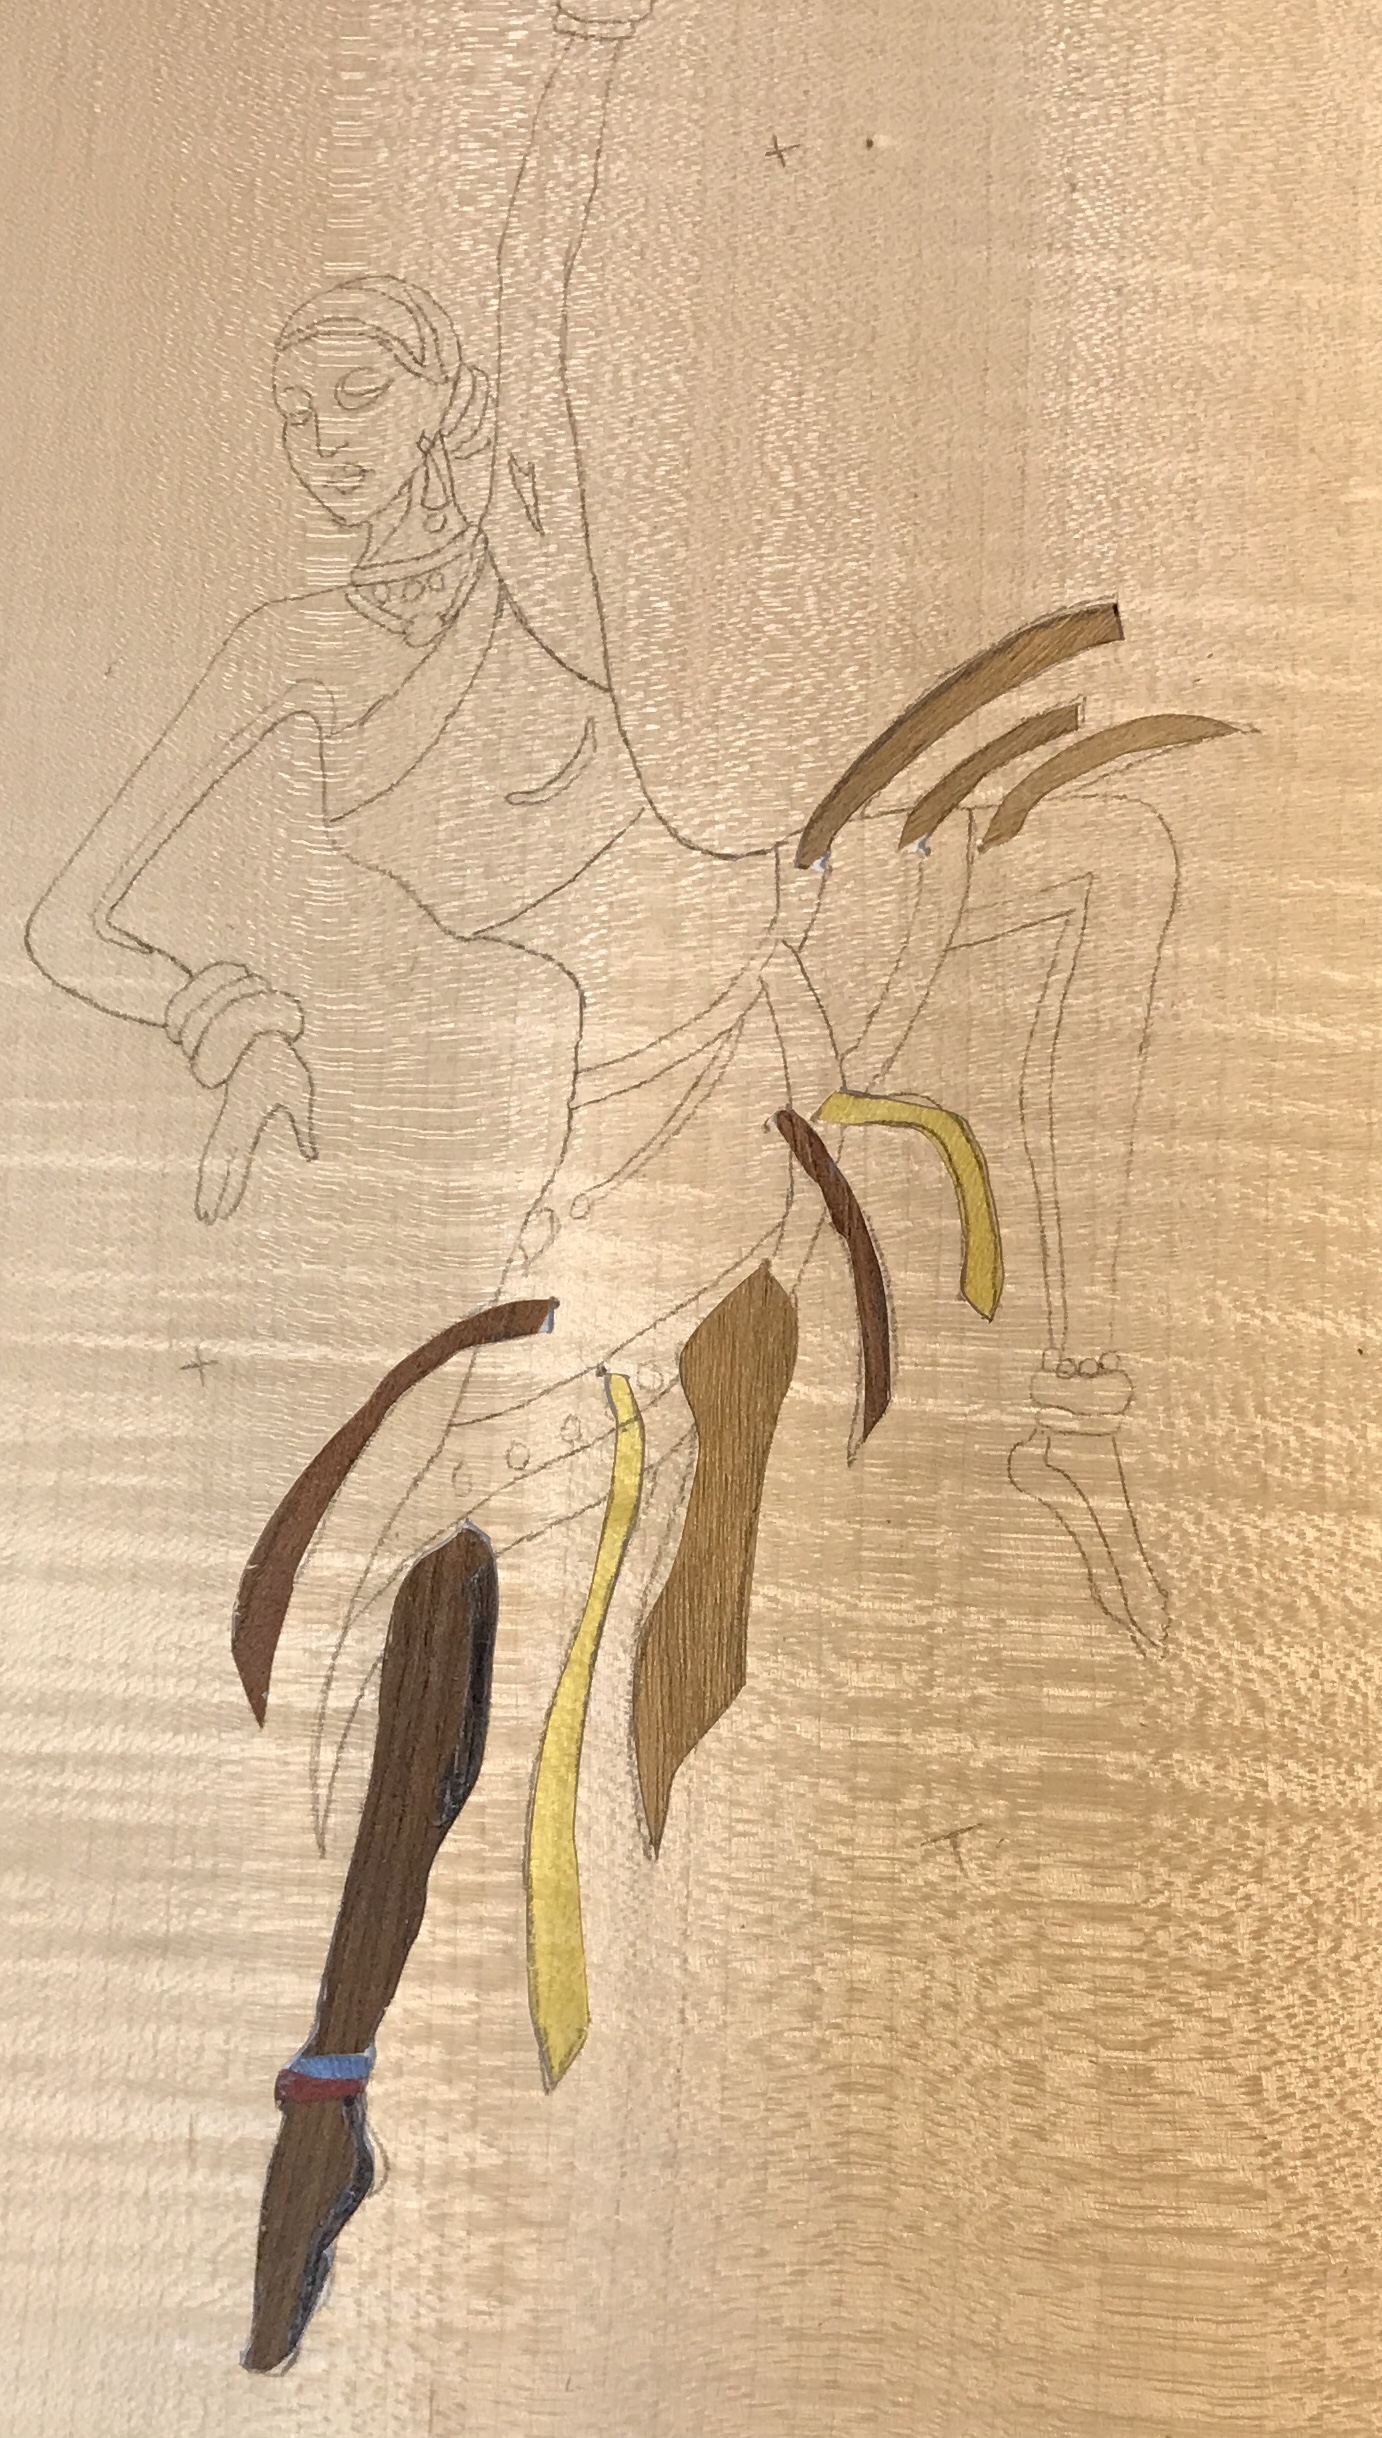
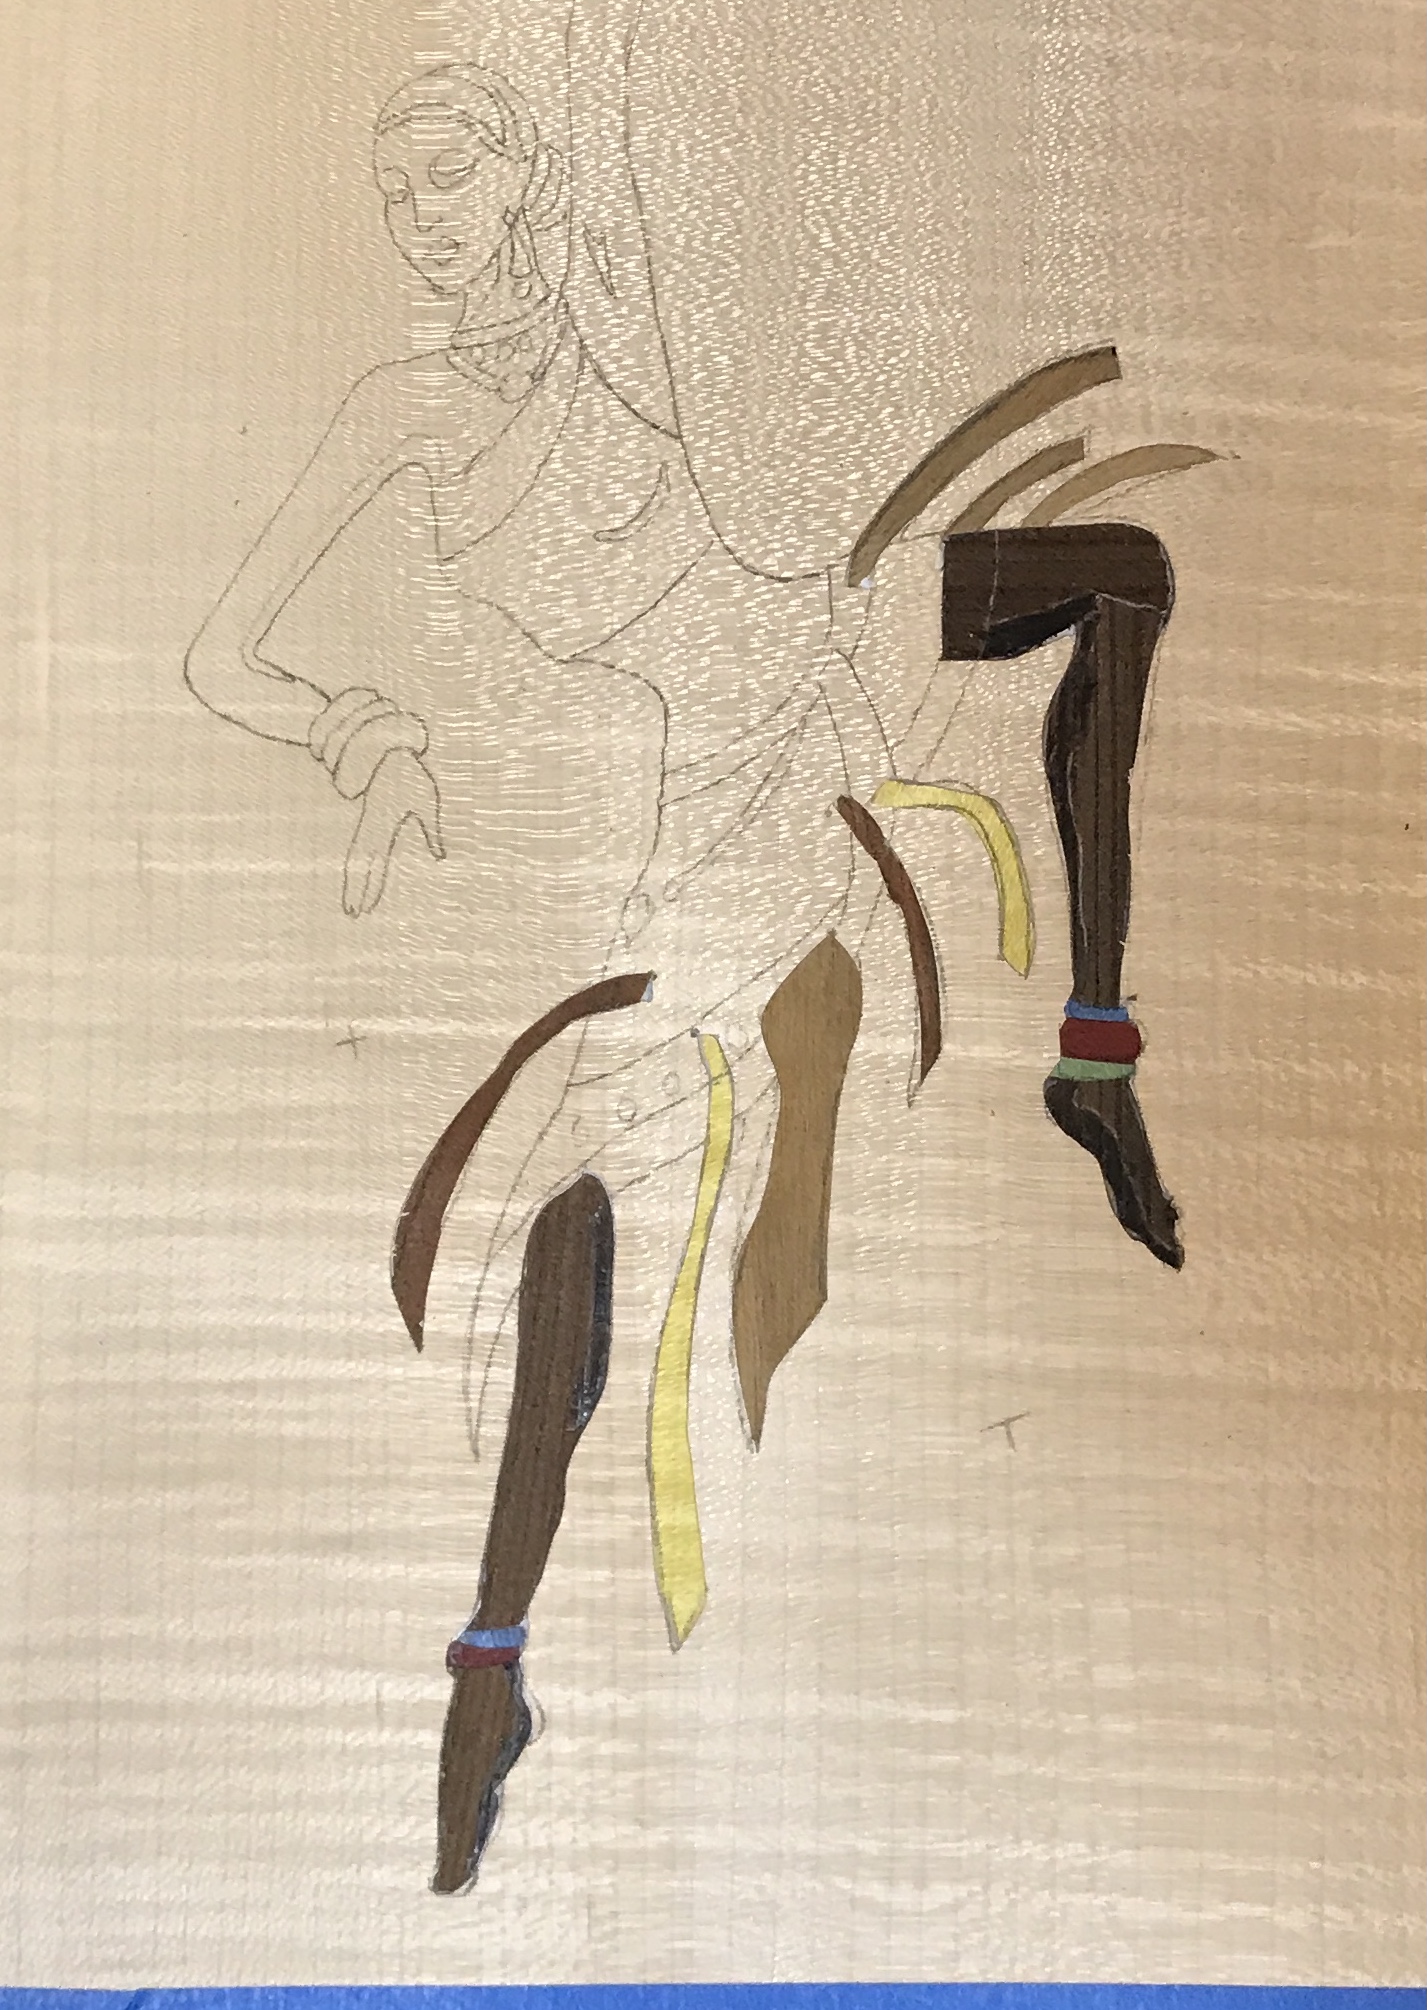
The left leg was cut in this morning. After a walk the skirt was cut in over the two legs and the eight tassels. Both went well. One of the toes needed a repair. In both cases there was a nice 'pop' as the packets were pressed into the background. The two photos below document these two operations.
The left arm was more challenging than the previous packets. Before cutting the packet in the hand was covered with yellow tape. Cutting around the hand went well, but splitting occurred at the shoulder. It was an easy fix, just pop in the piece and tape as usual. There was also a small bit of background that popped loose next to the blue bracelet. This was glued in place. The marquetry was left to dry for an hour. The right arm was then cut in. This was complicated by the fact that both the shirt and head would be cut in over it and it comes close to the left arm.
Coming down the home stretch for the packets. The shirt was cut in. There were a few hiccups, but none that required repairs. The photo shows the outcome.
A mistake came to light this morning. The wood burning has been good for practice, but has been done on the back side of the marquetry!! It will be more challenging to do after the parts are all in place. I will console myself with the realization that I was not happy with some of the wood burning anyway.
The final packet, the head, was cut in with some consternation. Three repairs were necessary to replace two fractures and one piece coming loose. The photo shows the results of this operation.
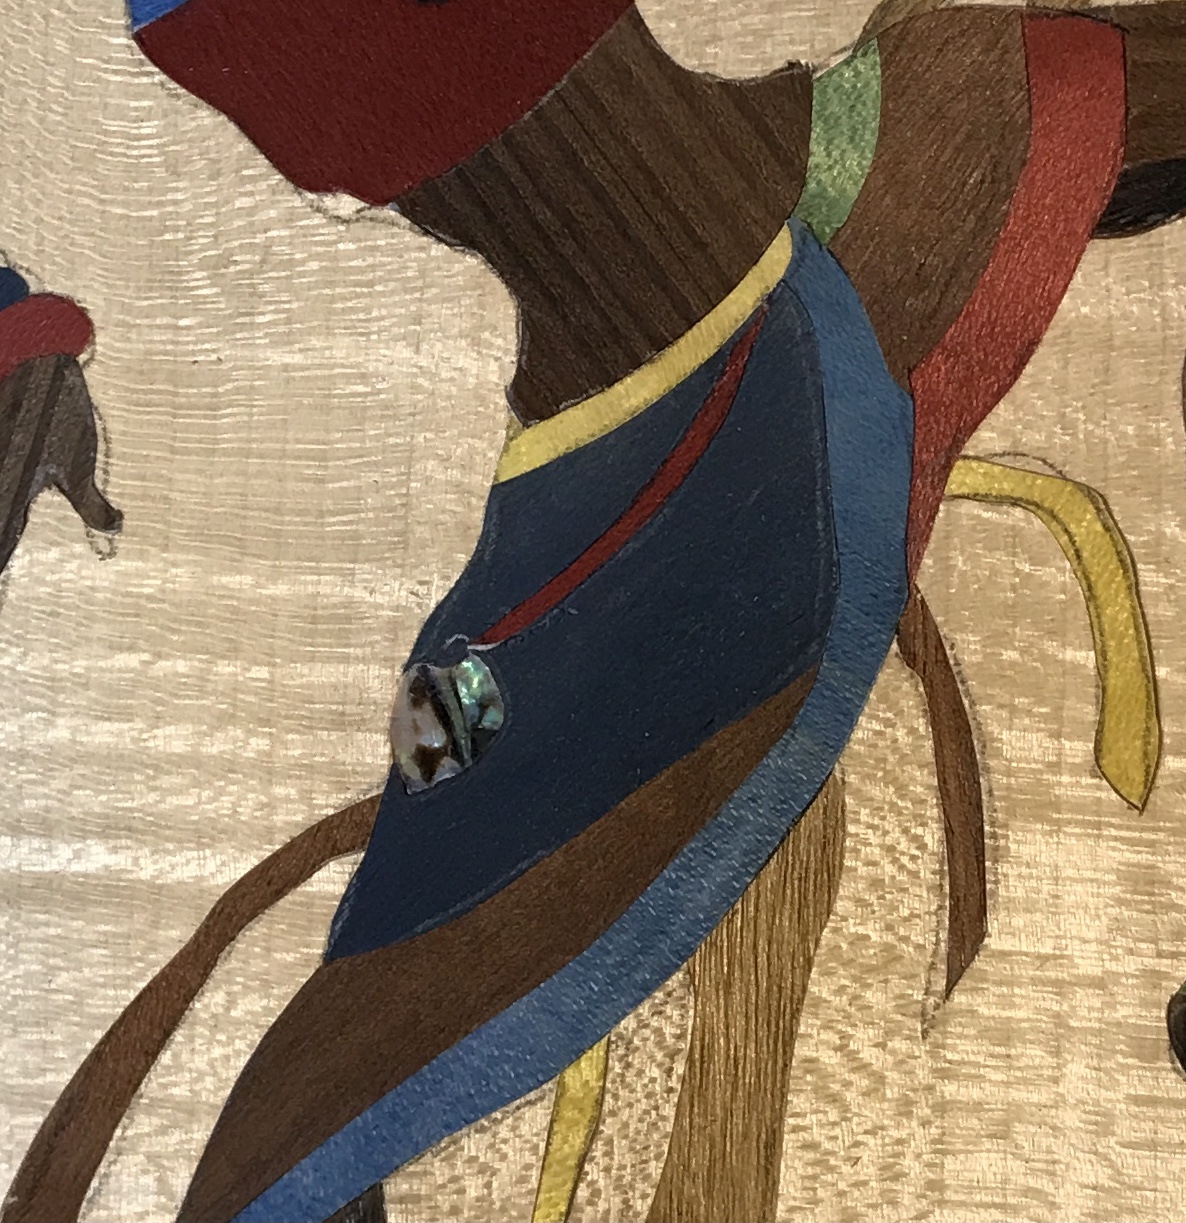
I am not yet sure how to best complete the marquetry. I would like to add an earring, a necklace, and decoration to the skirt. Ideally, some of these decorations will be made from mother of pearl, Abalam. My initial thought is cutting them in with a knife. I will experiment with using the scroll saw to cut Abalam. These results might change my plan. I was able to cut pieces to shape with the scroll saw, but not cut them into veneer. A heart shaped piece was cut from the Abalam. A little sanding produced a nice shape. This was held against the blue part of the skirt and a line was carefully drawn around it. Even more carefully the shape was cut out of the skirt keeping the knife inside the line. Veneer tape was put on the back side, glue was put in the opening, and the heart was pressed into place. It is a nice fit.
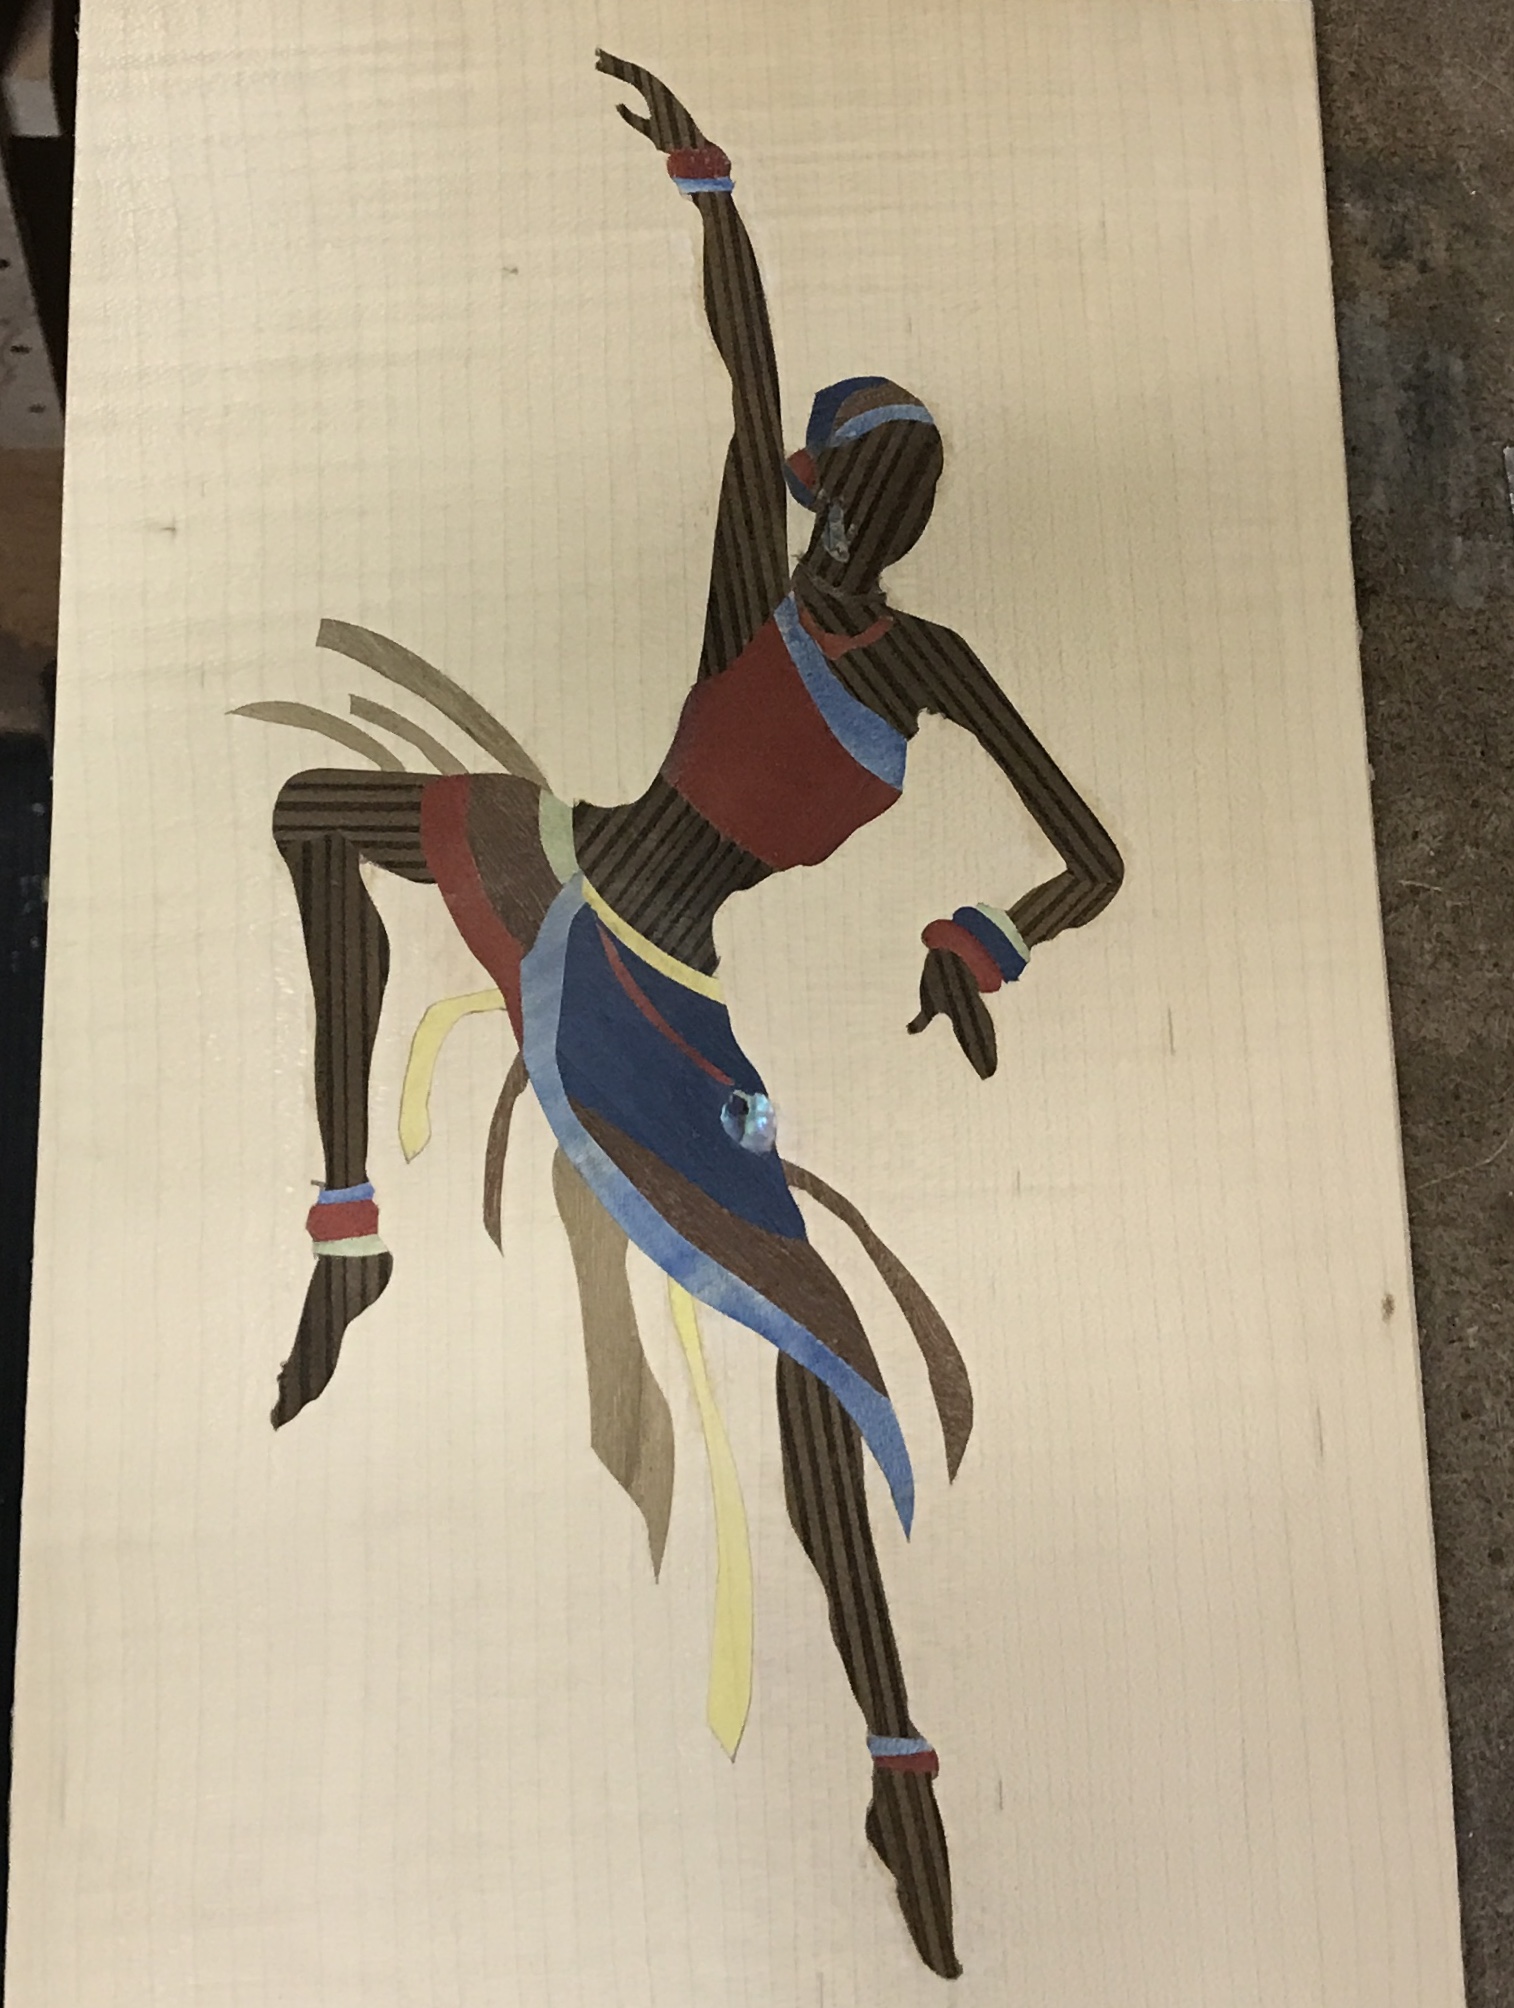
The belt that holds the above jewel was next. It was traced onto a piece of red dyed veneer. This was positioned with the picture and taped in place. A hole was punched in the corner by the waist. The belt was cut out, popped in place, and taped. A small tearout needed repair, which was done with a drop of glue and the recovered fragment. The photo below shows the belt and the jewel in place.
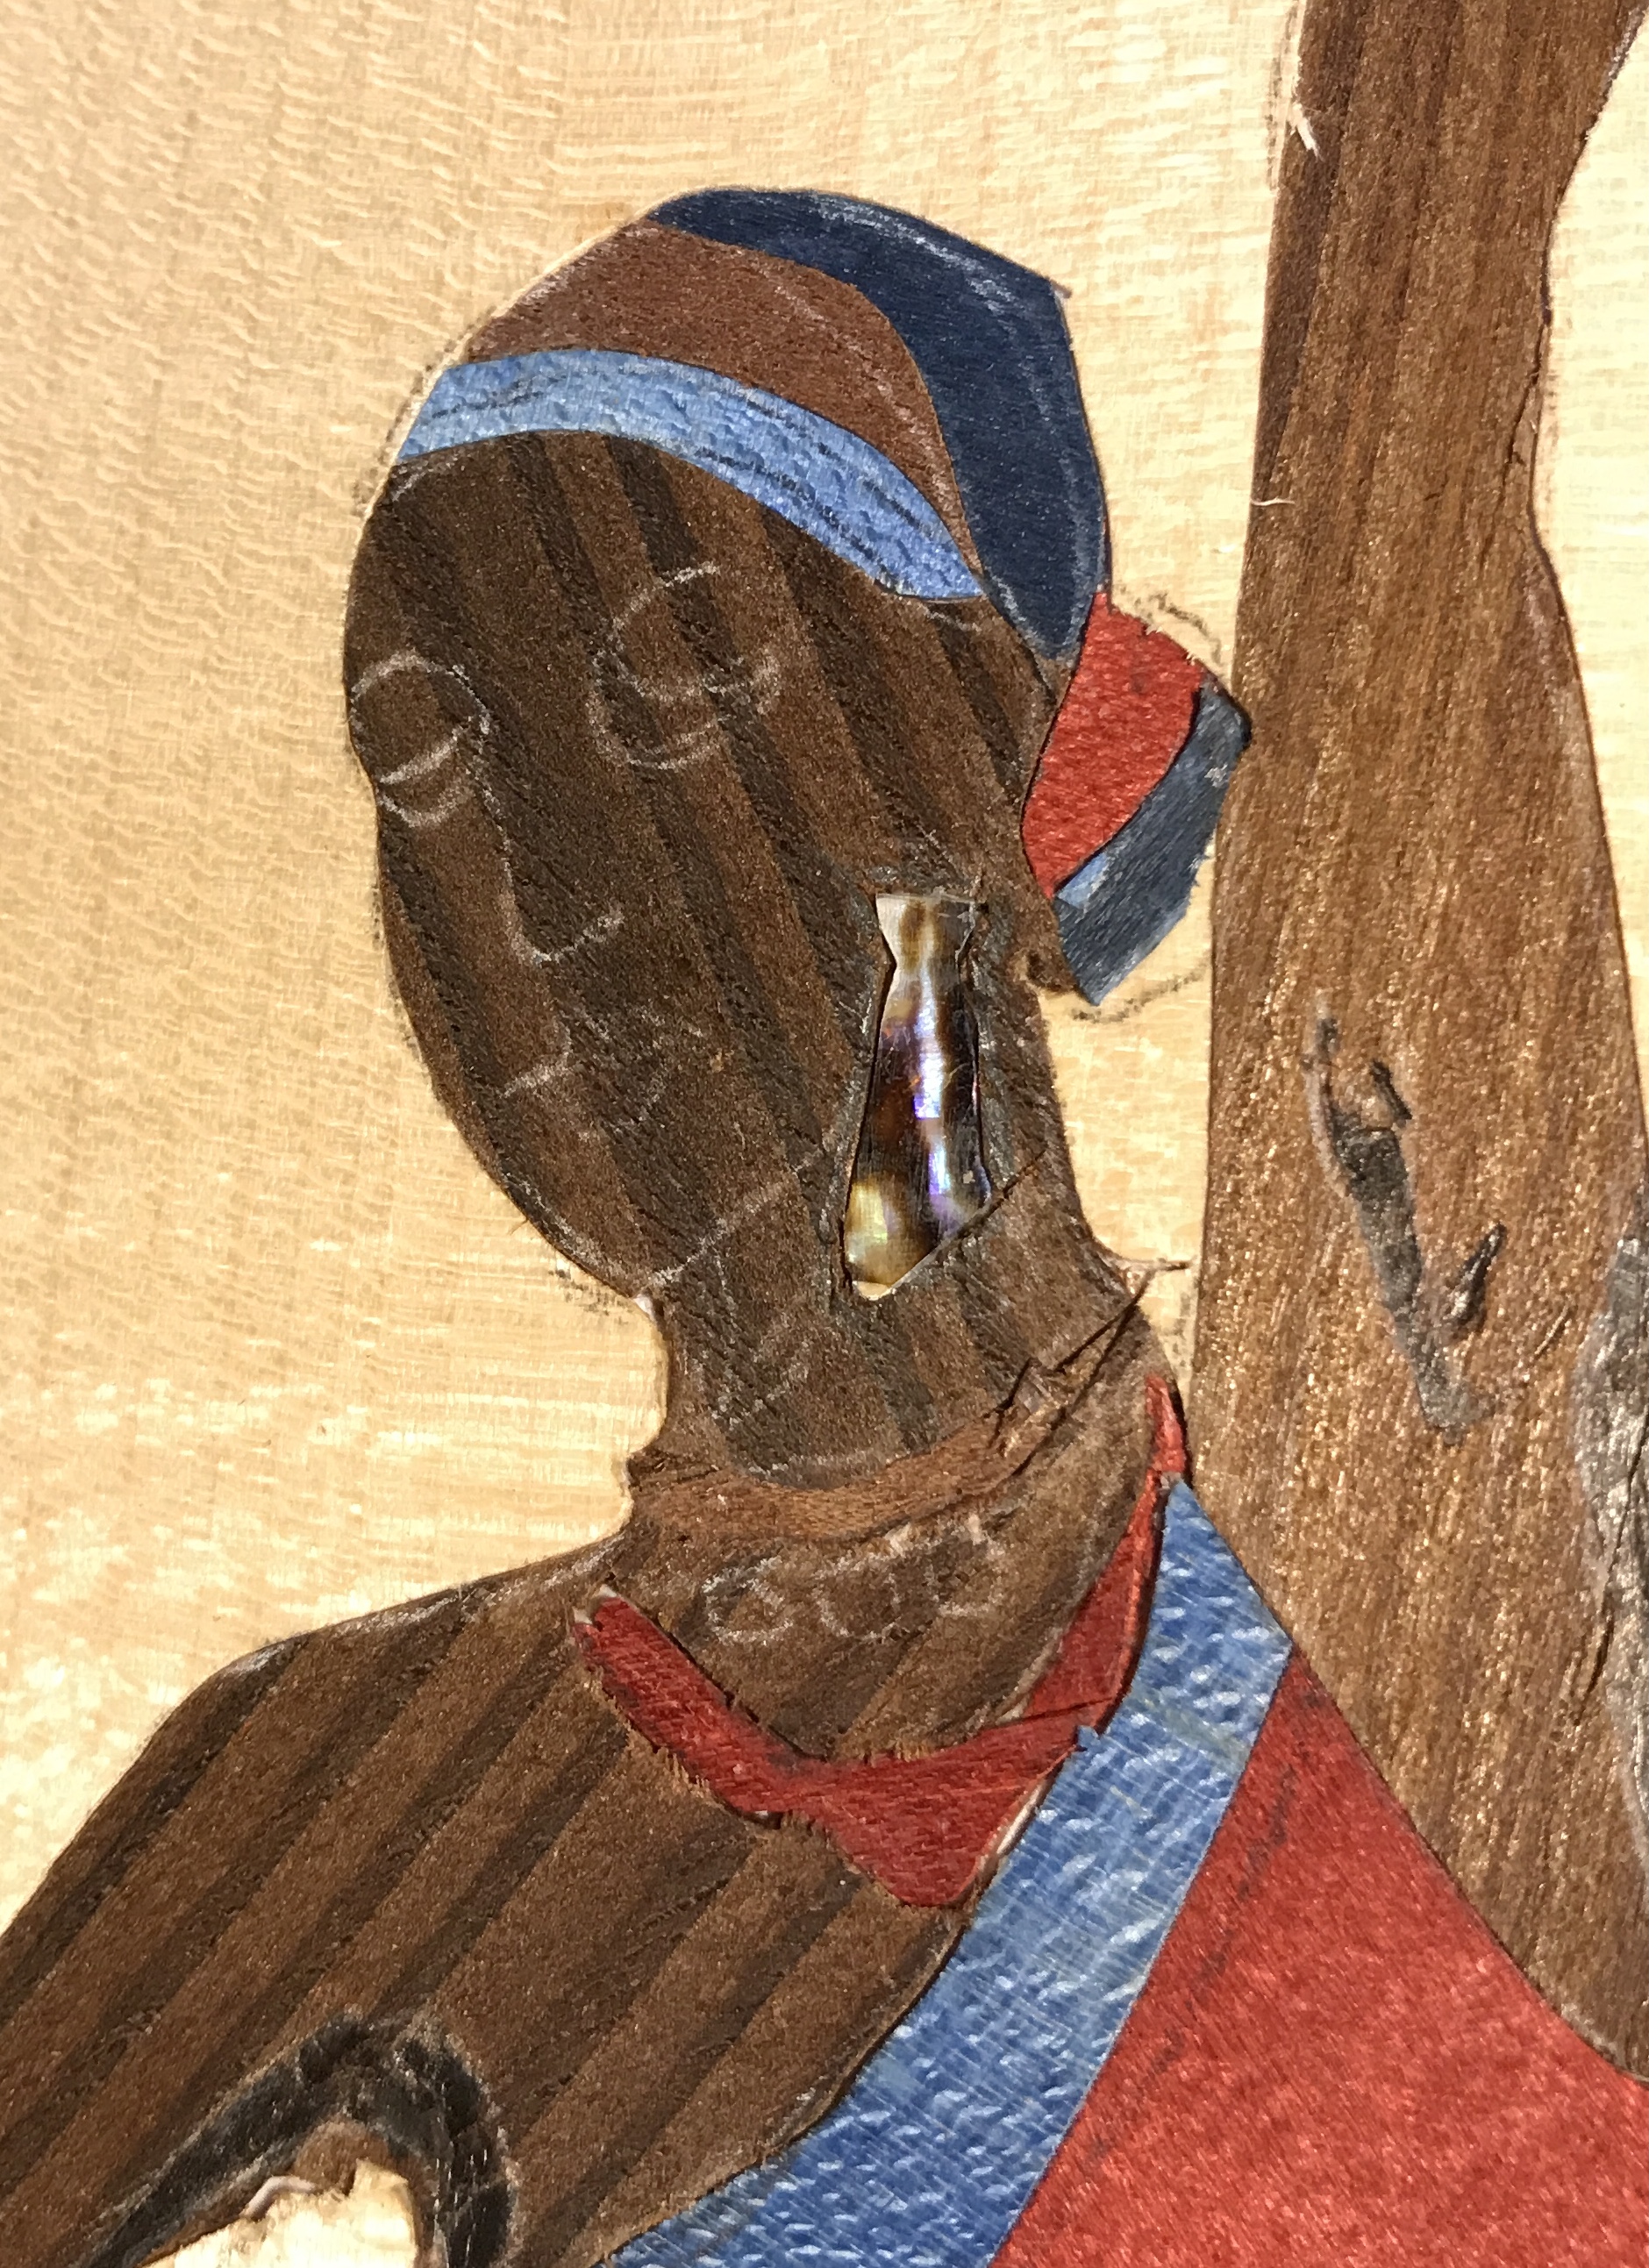
The necklace was not quite so successful. It was glued in place in three fragments. An earring was made from a small cutoff of Abalam. It started as a rectangle and was sanded to shape. Like before it was traced onto the veneer and cut with a knive inside the line. After some cleanup cutting it fit tightly and was glued into place as seen in the photo below. (The nicer side of the Abalam is glued down, so it will show in the final product.) We are ready for glue-up!!
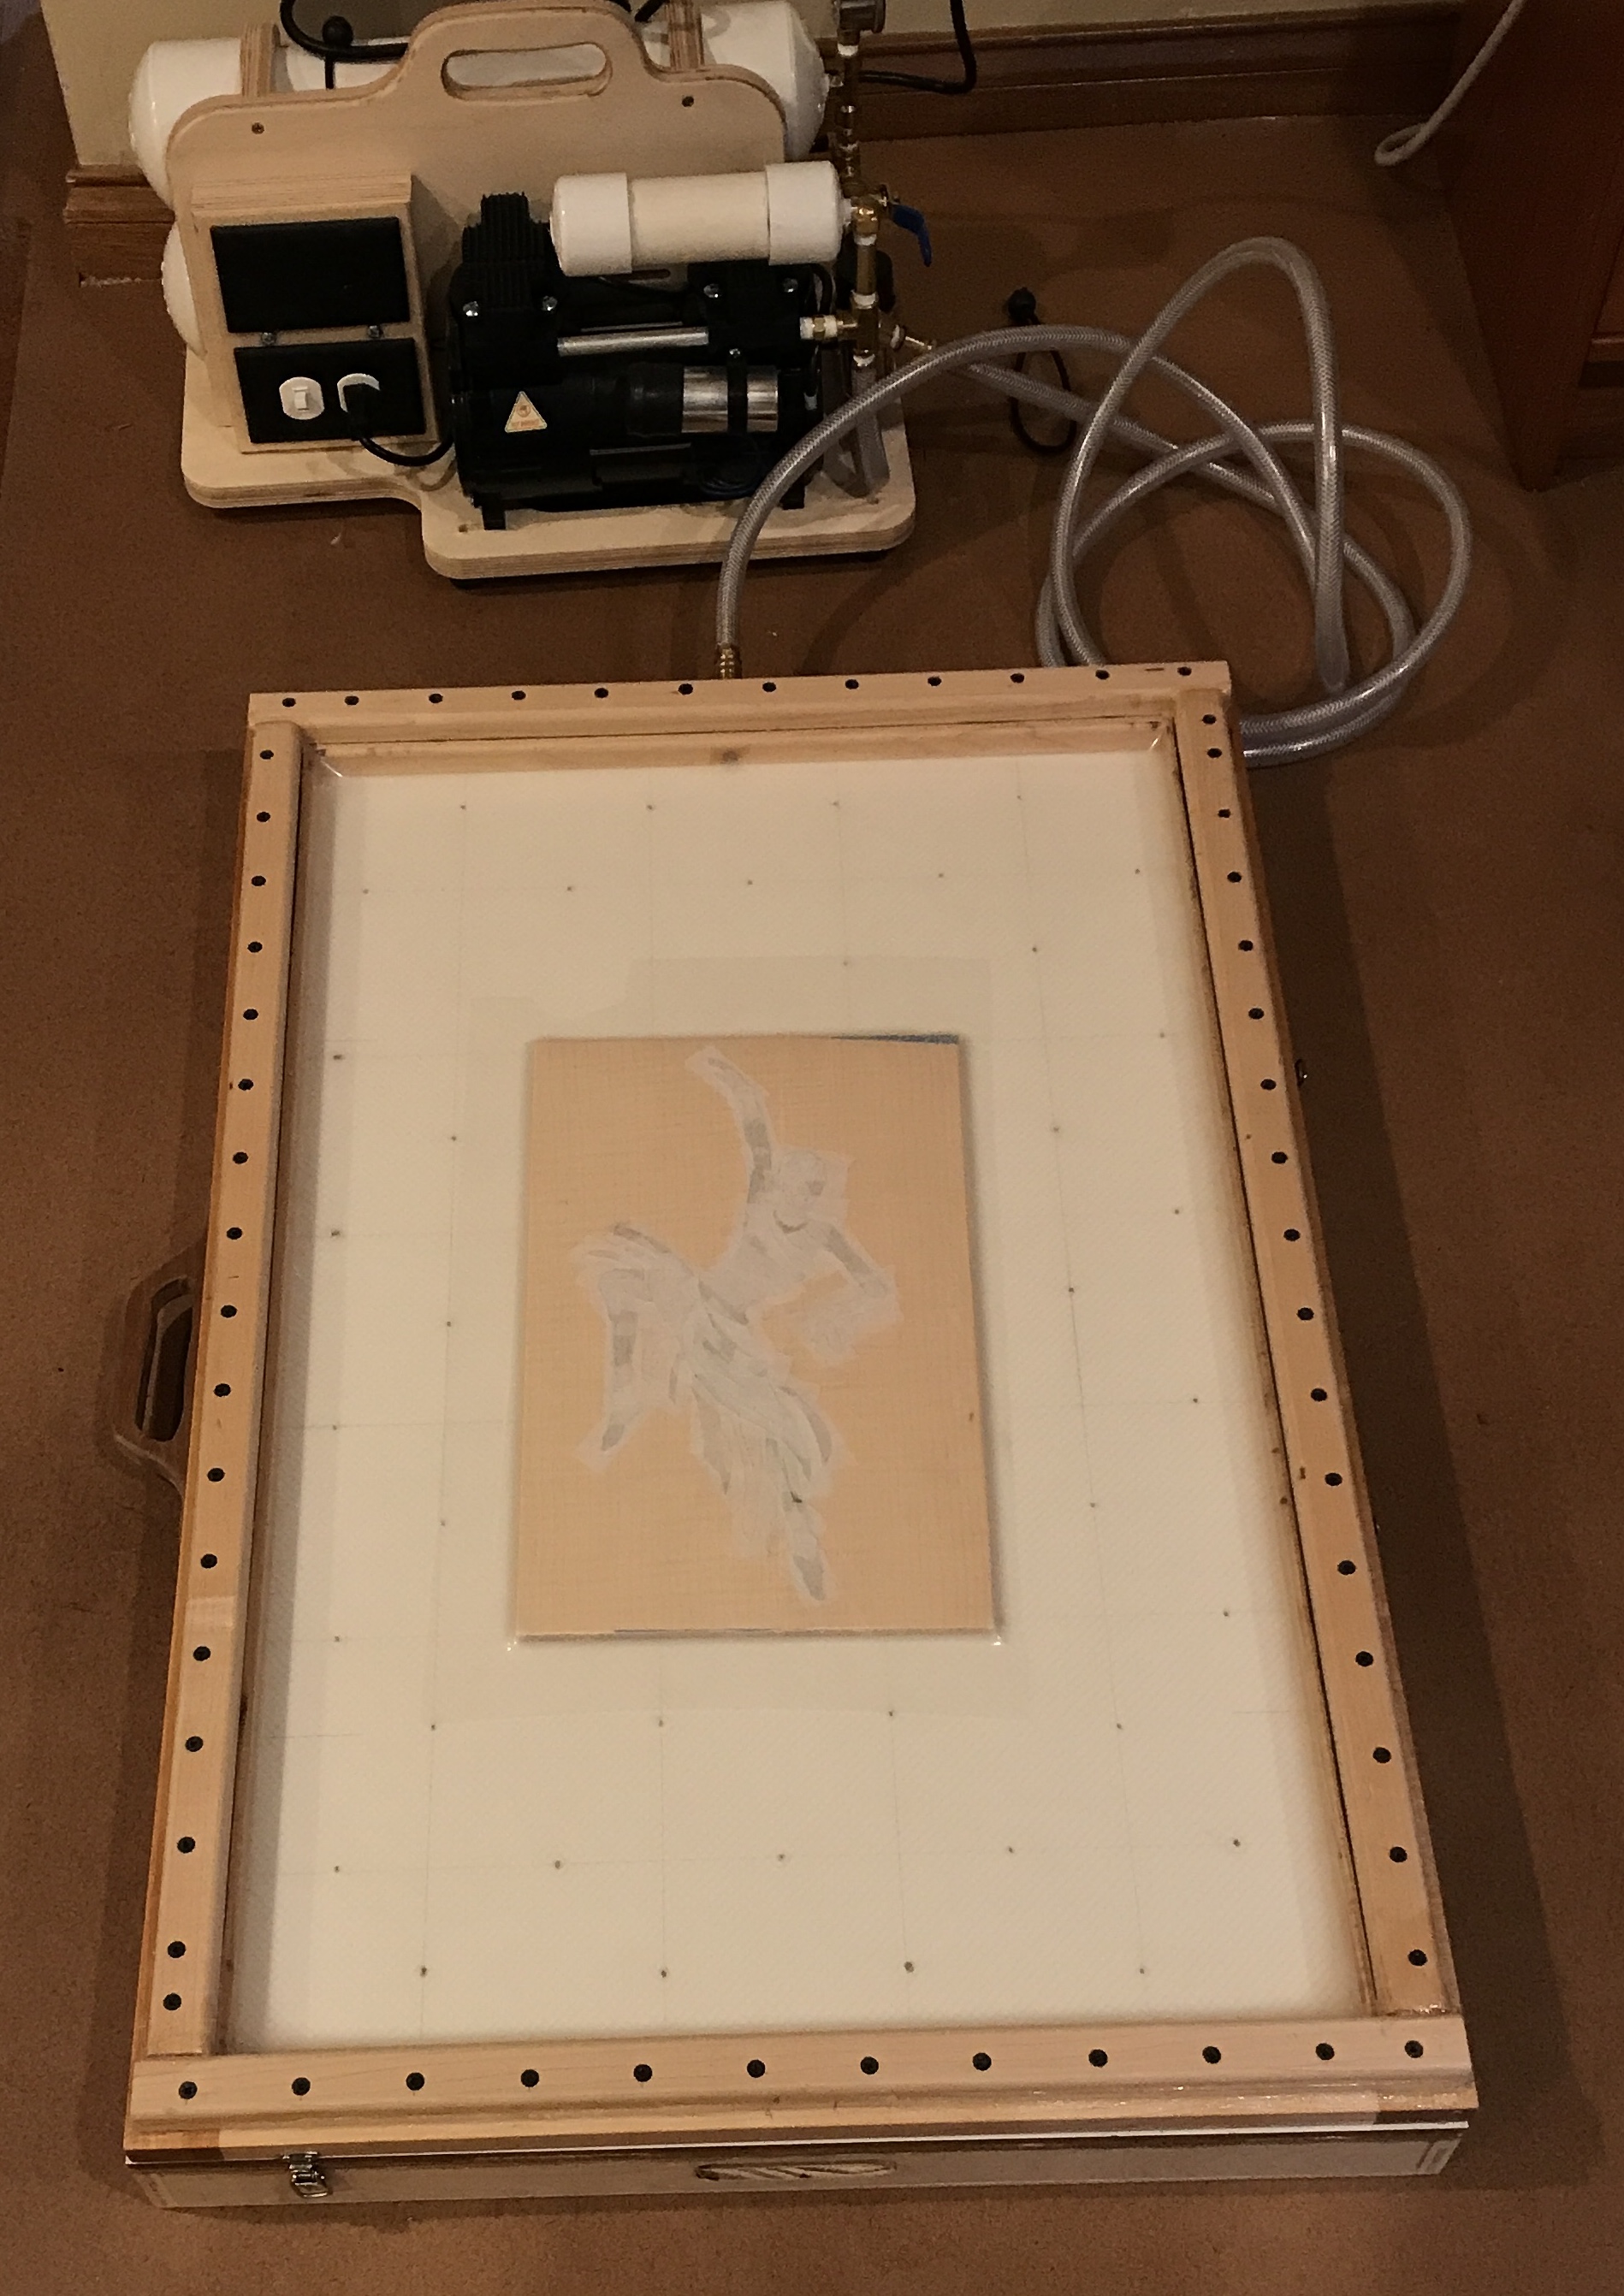
The veneer was cut to fit the backing. Glue was spread on the backing and the marquetry was applied. The whole was put in the vacuum press for two hours as seen in the photo below. Also shown is the taped side after removal from the press.
After allowing the glue to dry overnight the scraper was honed and a burr produced. The scraper was used to remove most of the veneer tape. Then I switched to the orbital sander with 120 grit paper. After removing all of the tape the paper was switched to 220 grit for a final sanding. This process is shown below.
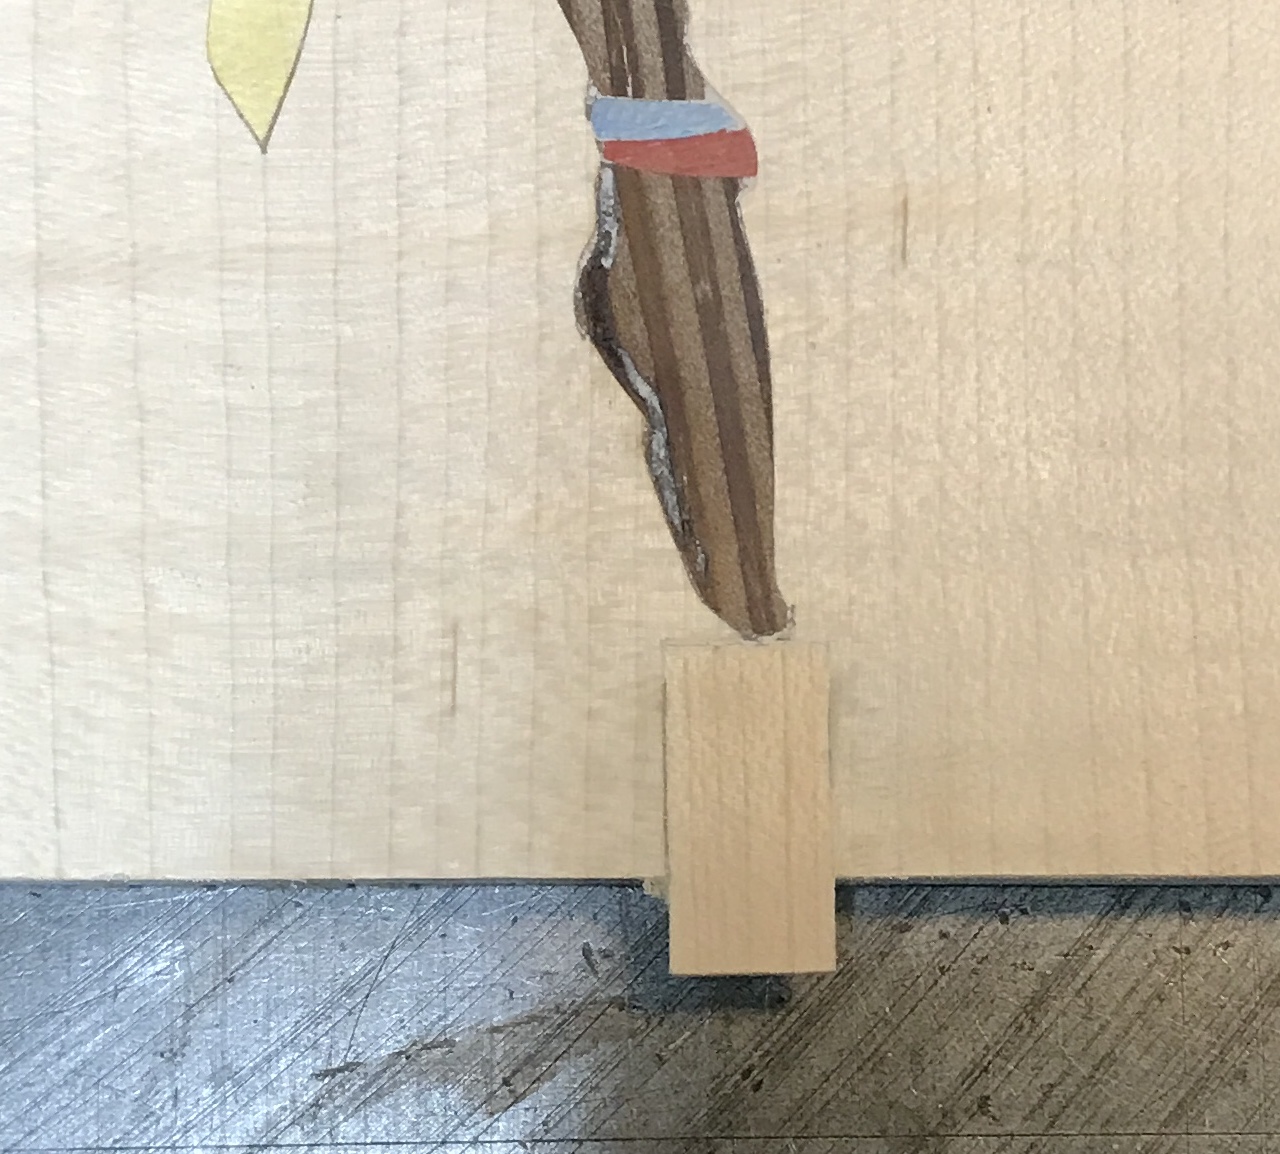
I noticed a problem near the lower foot. It looked like brown sawdust had collected in a depression below the toe. I could feel the depression. I thought I should be able to carefully sand below the toe and remove the sawdust. What I was doing was sanding through the veneer! The photo below shows the damage. I am exploring ways to repair this mistake.

The shadows were drawn on the legs, arms and neck. These were then burned with a round tipped tool in the wood burner. The first photo shows the result. A second finer round tip was used to burn the lines for the eyes, nose and mouth. This is shown in the second photo below.
A scrap of background veneer was sanded until it was very thin in one small spot. This spot was covered with a second piece of the same veneer and the two glued together. After the glue dried the veneer sandwich was sanded. It looked good, so the same procedure was tried on the dancer. A small scrap of veneer was cut to slightly larger than the spot sanded through. It was glued over the sanded area. After drying the veneer was sanded off. Unfortunately, even before reaching the plane of the background veneer the dark underlying plywood became visible. Did the glue pull the color up?
The yellow and green dyed veneers sanded fine and the color was not sanded off, even though the dye does not penetrate completely through the veneer. My lucky day!
The three pieces from class were finished with brushed on lacquer. That will be used here as well. Before doing that a repair was implemented. The offending spot below the foot was cut out, first by outlining with a knife and then scraping the veneer out with a chisel. A mating piece was carefully cut and glued in place. This was clamped and left for a few hours. The photo shows the patch after a bit of sanding.
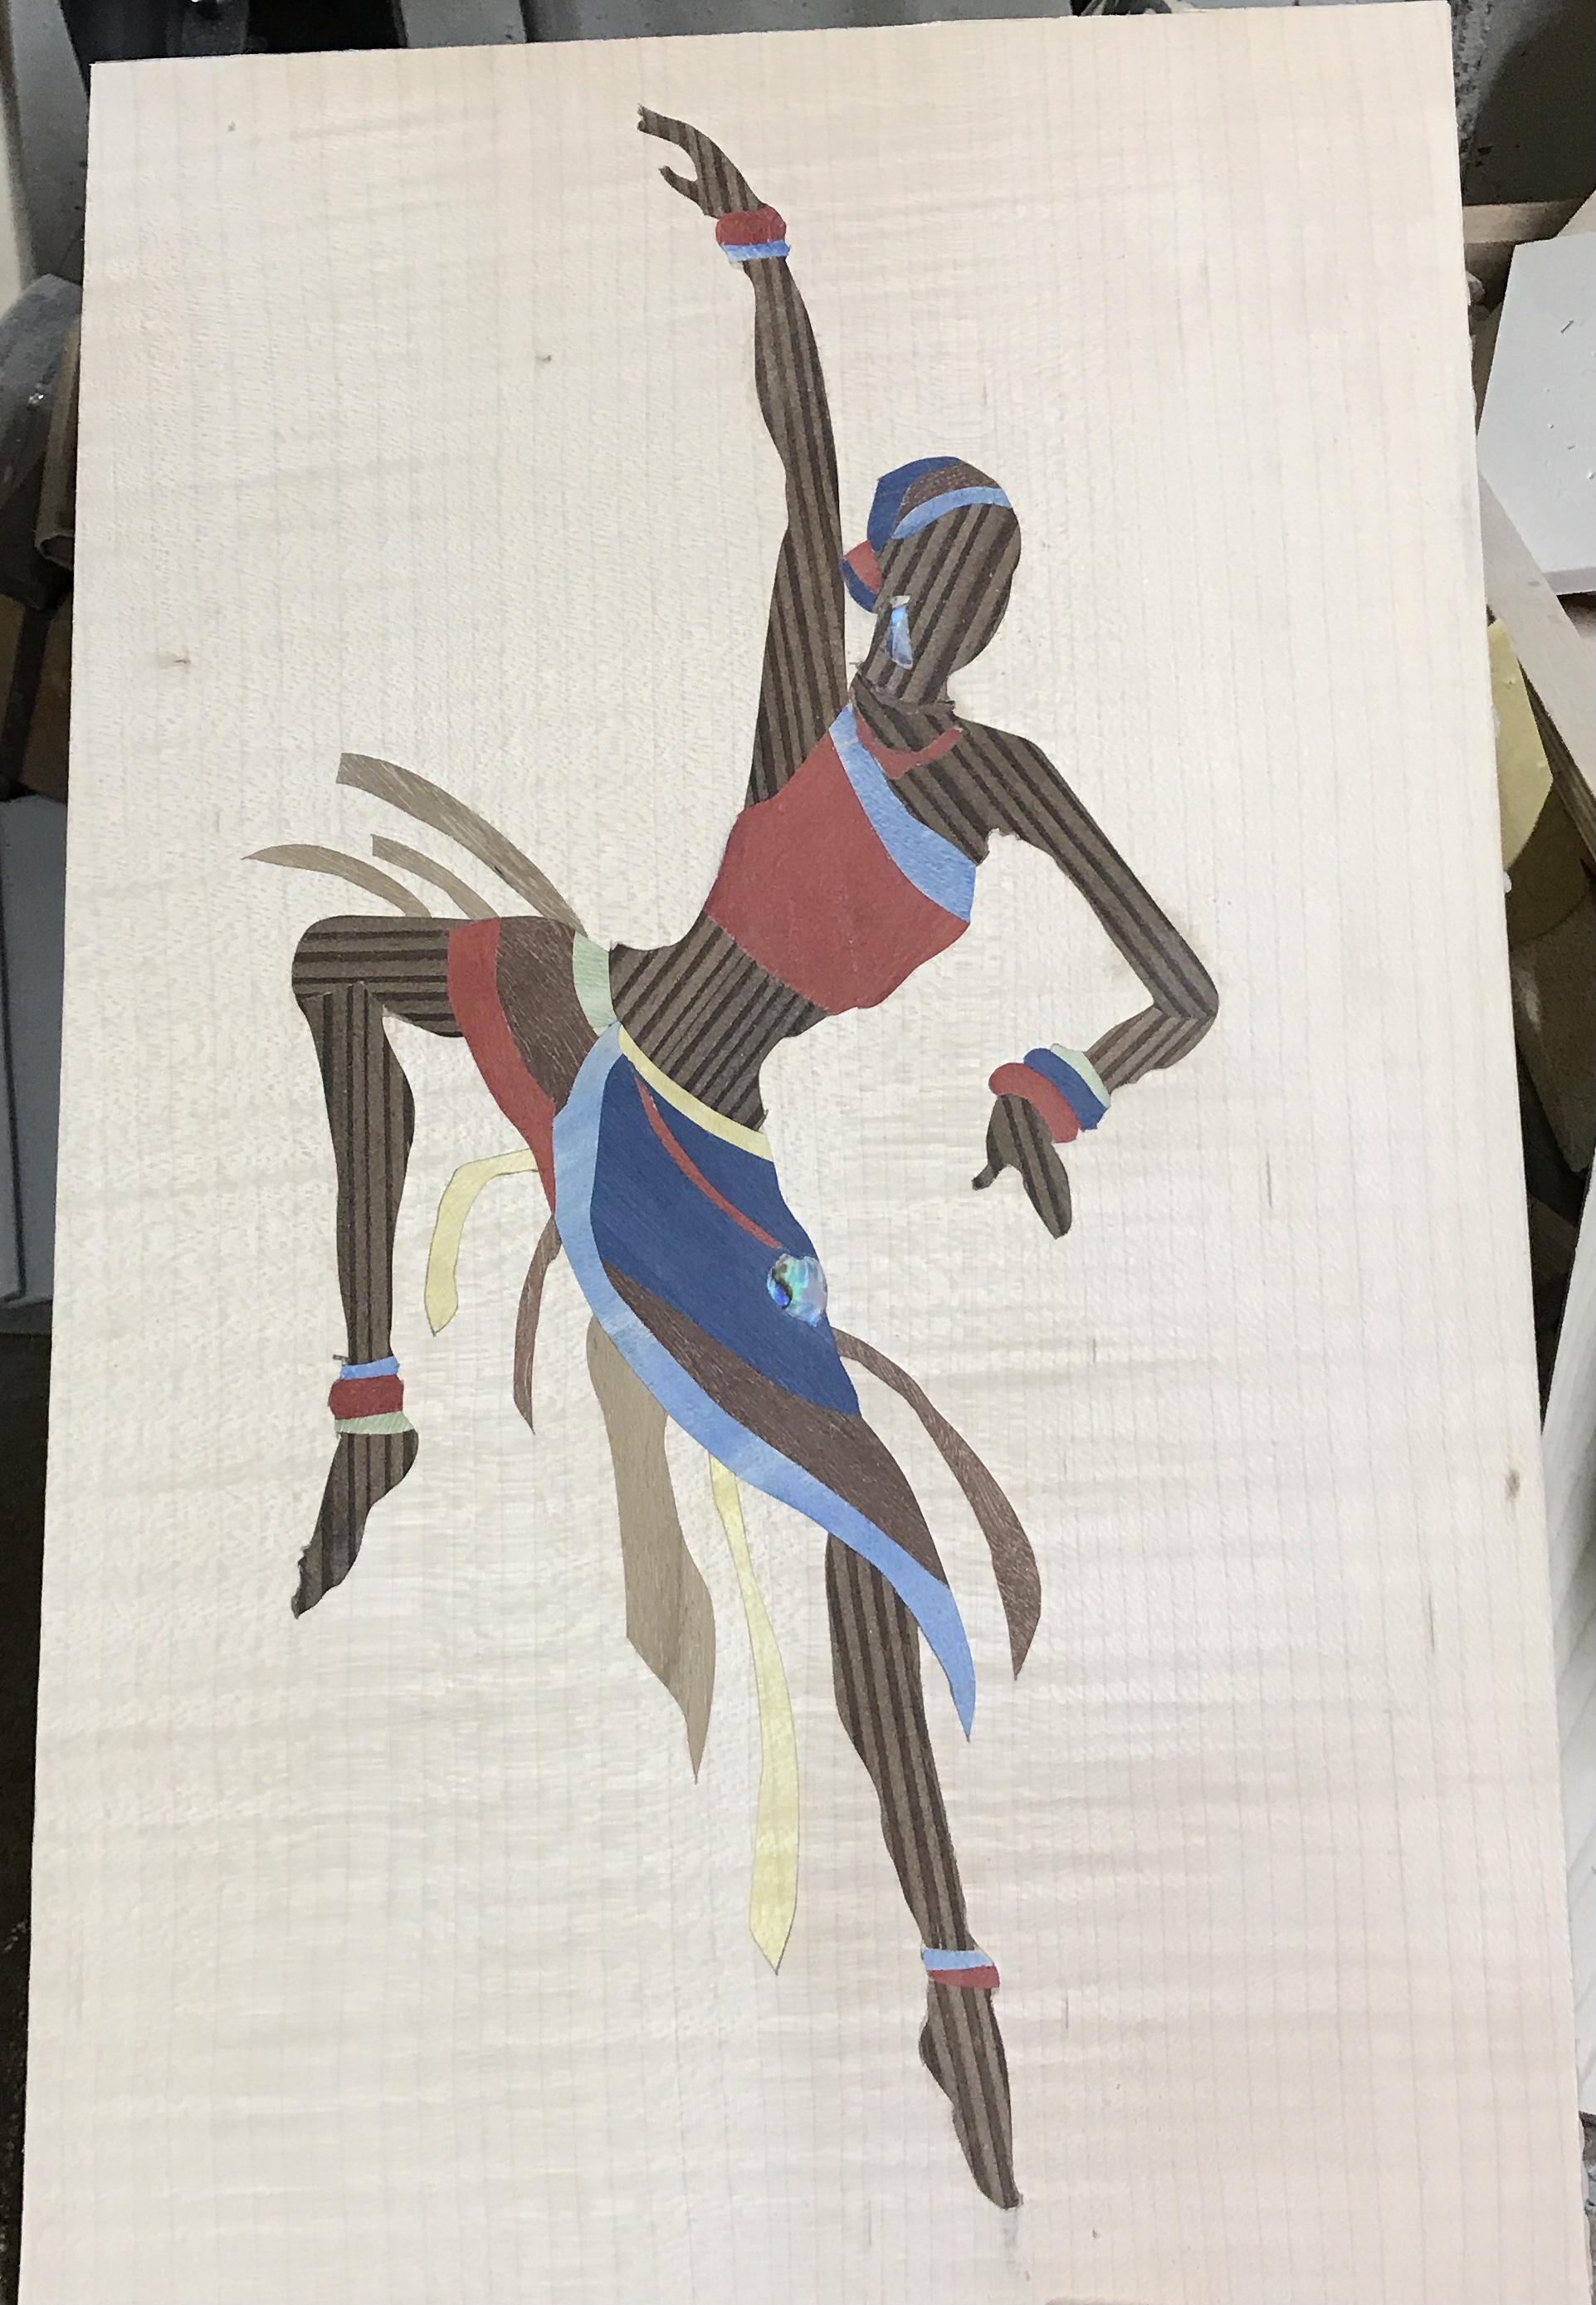
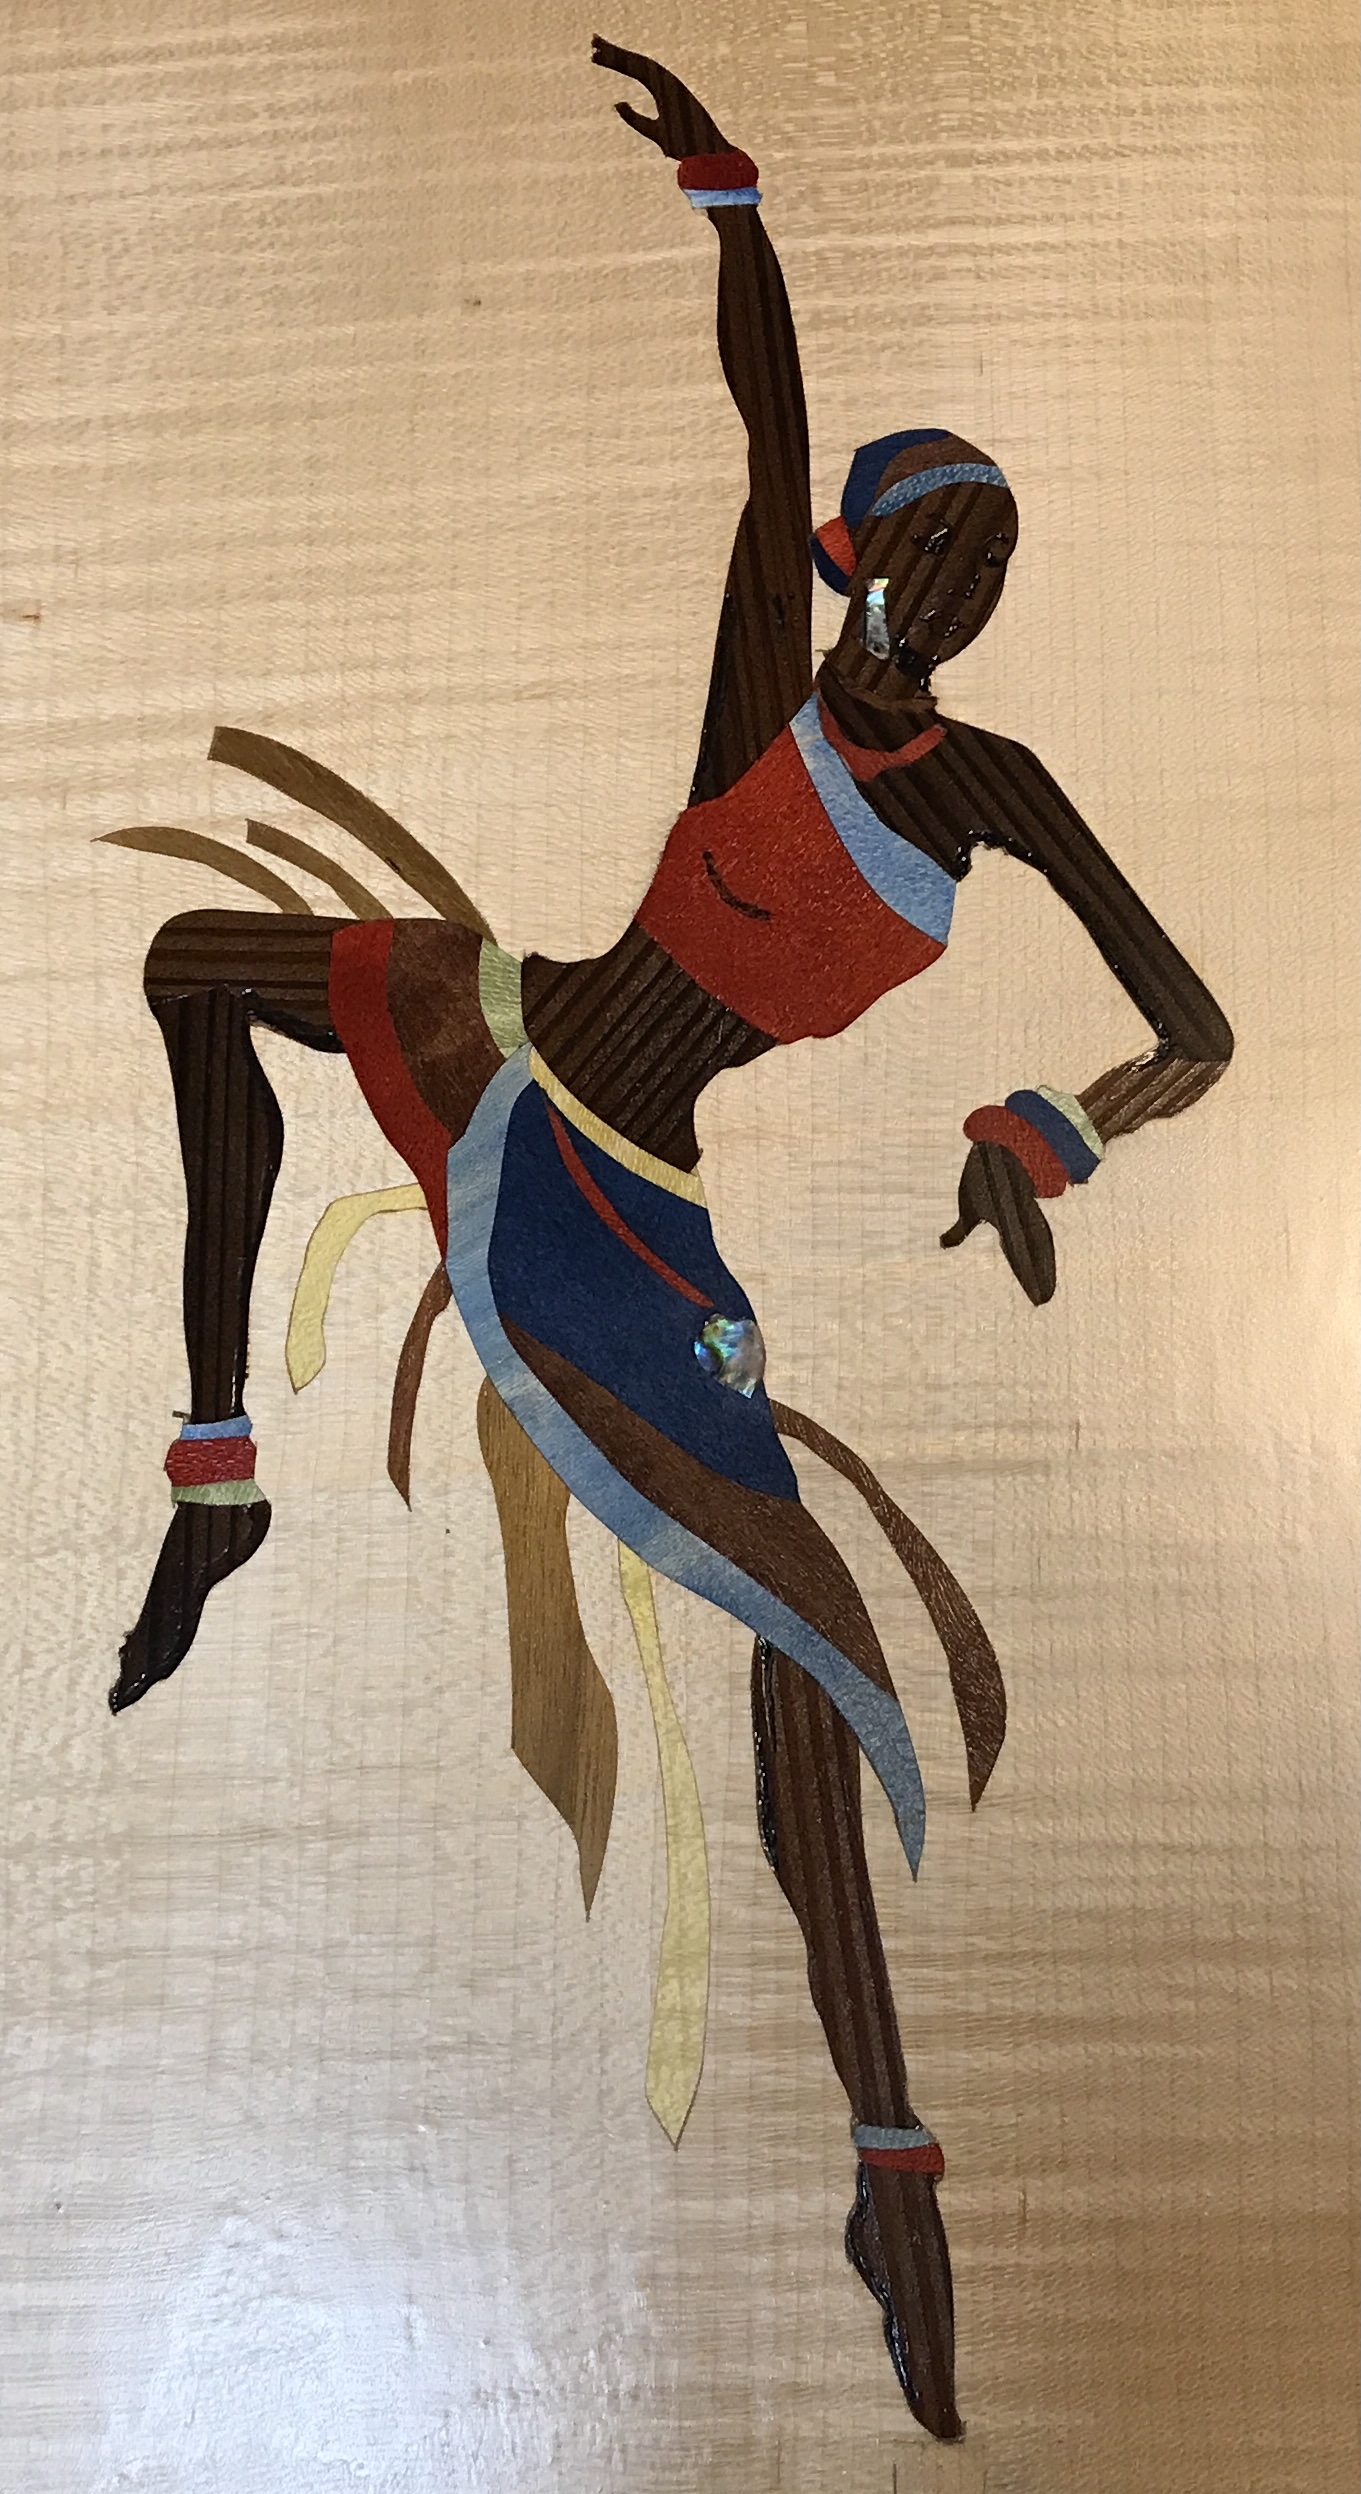
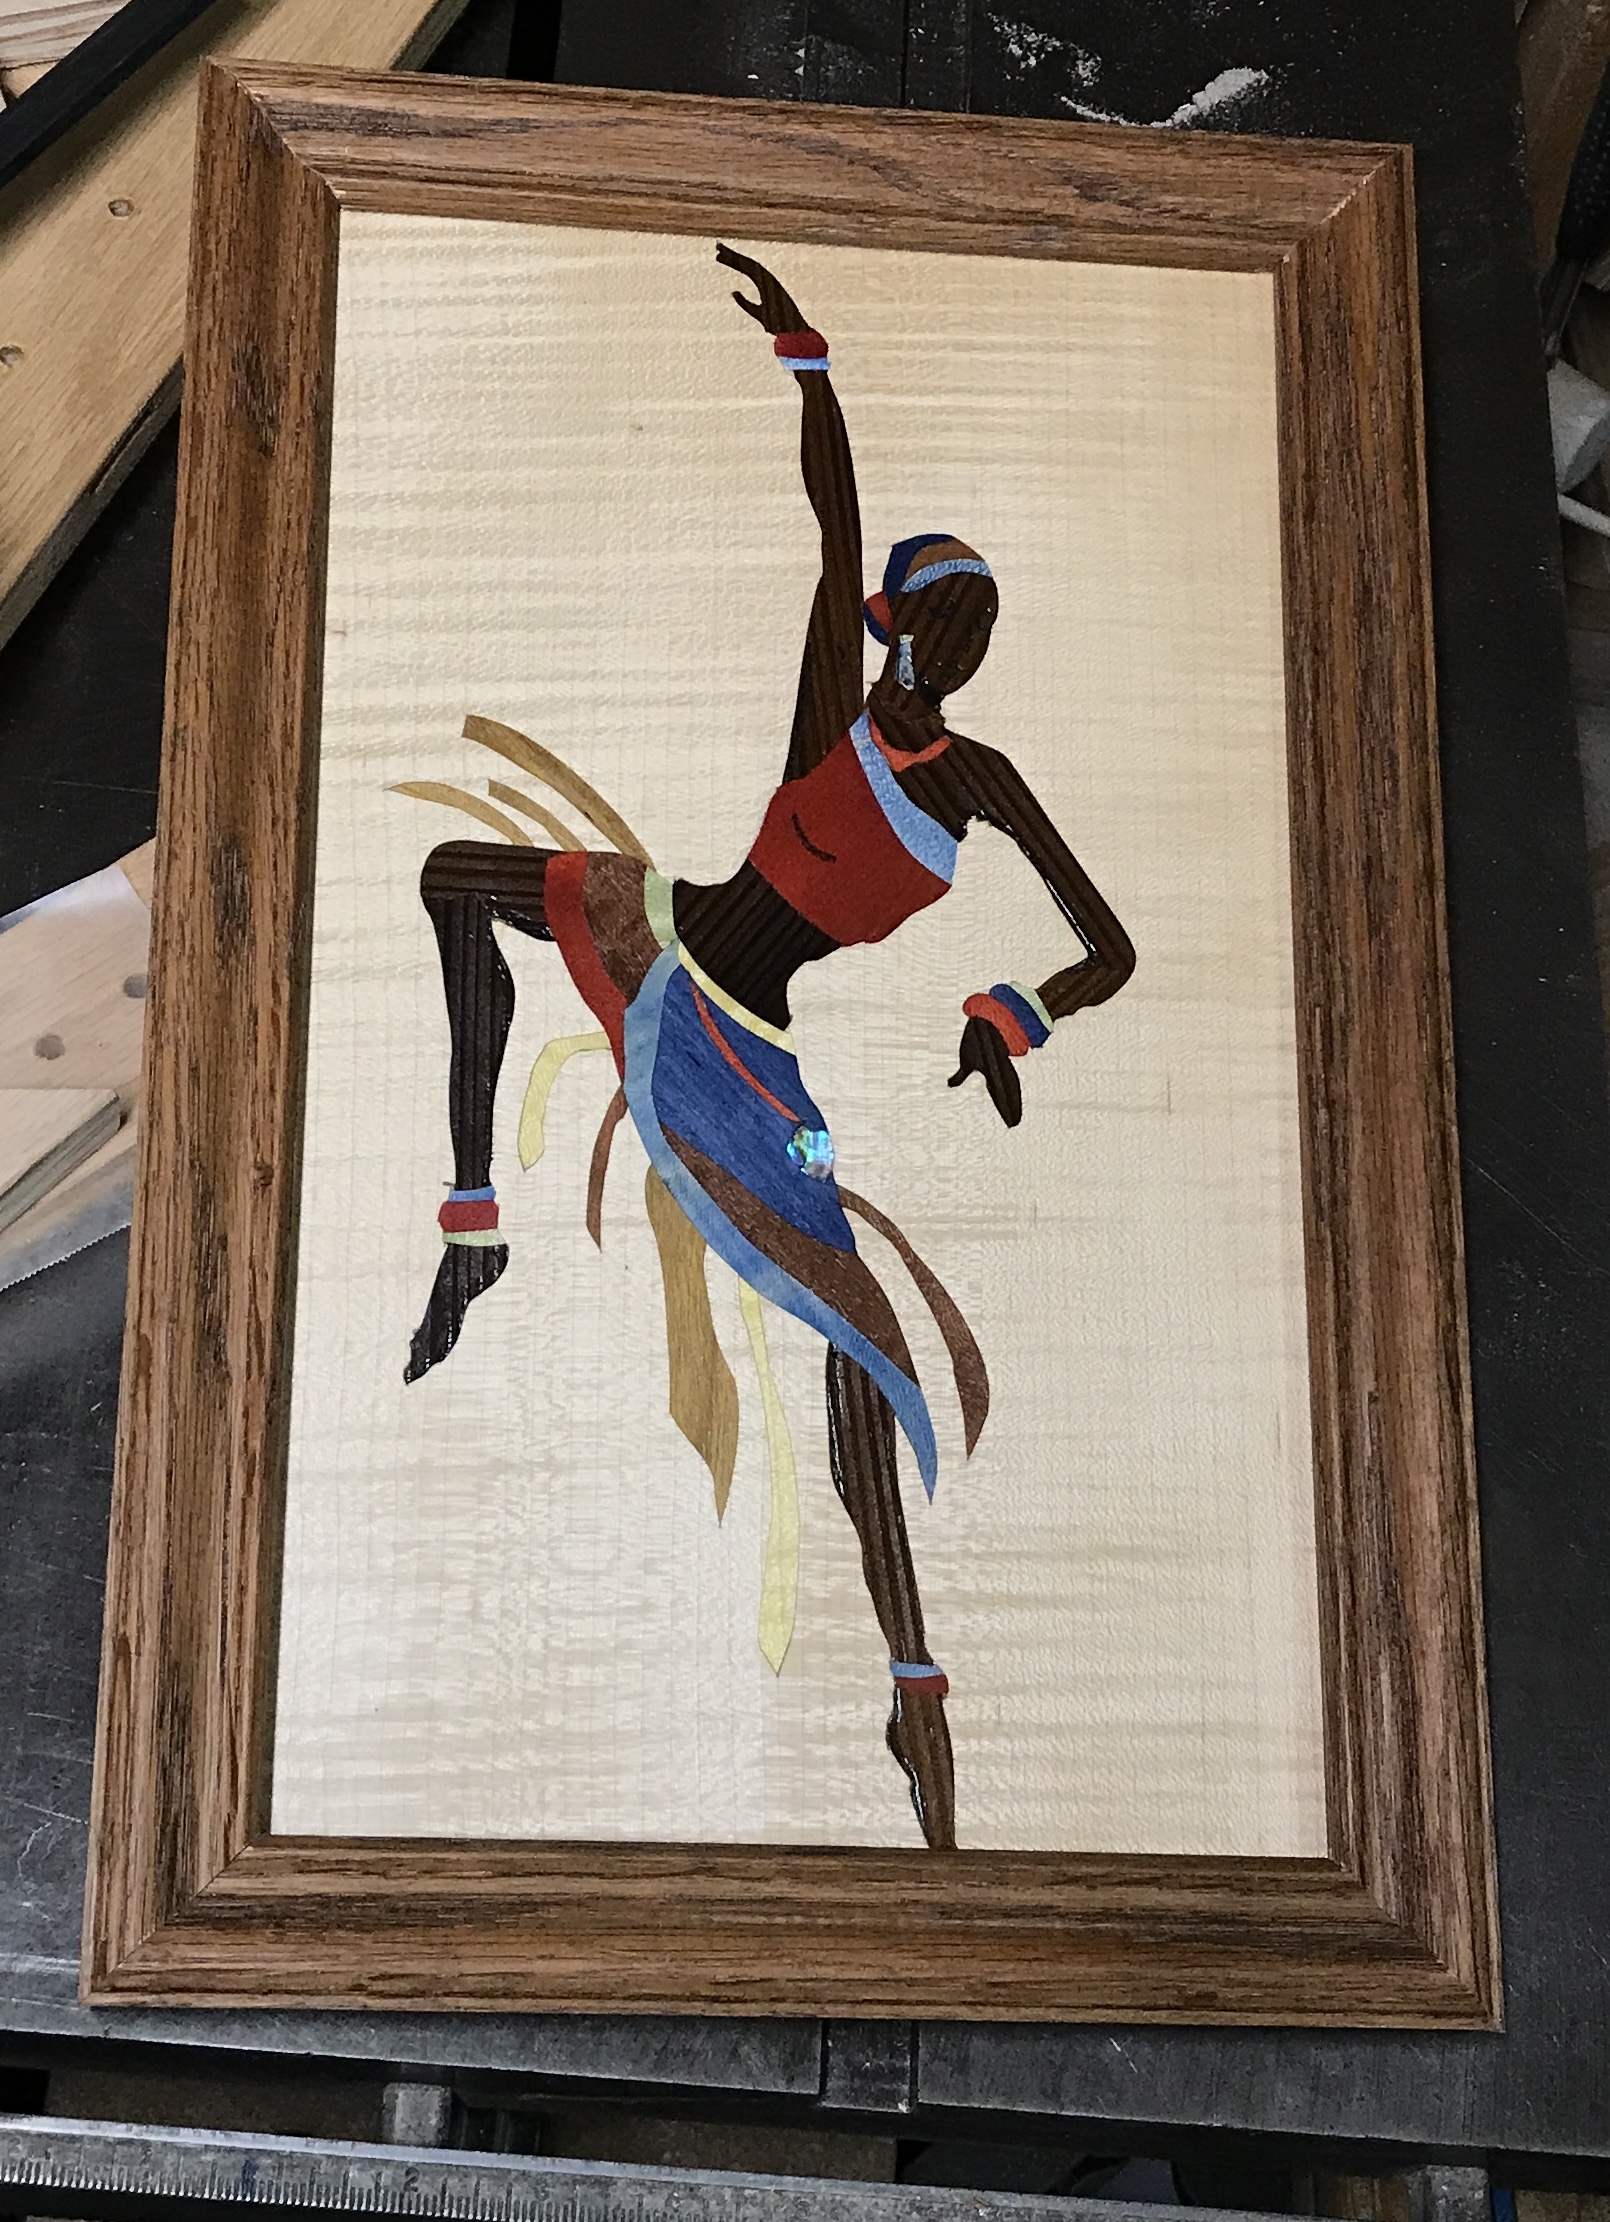
The dancer was painted with lacquer. Two coats were applied separated by two hours. The two photos below show the outcome. It is difficult to ovid glare, so the photos are not completely indicative of the final outcome.
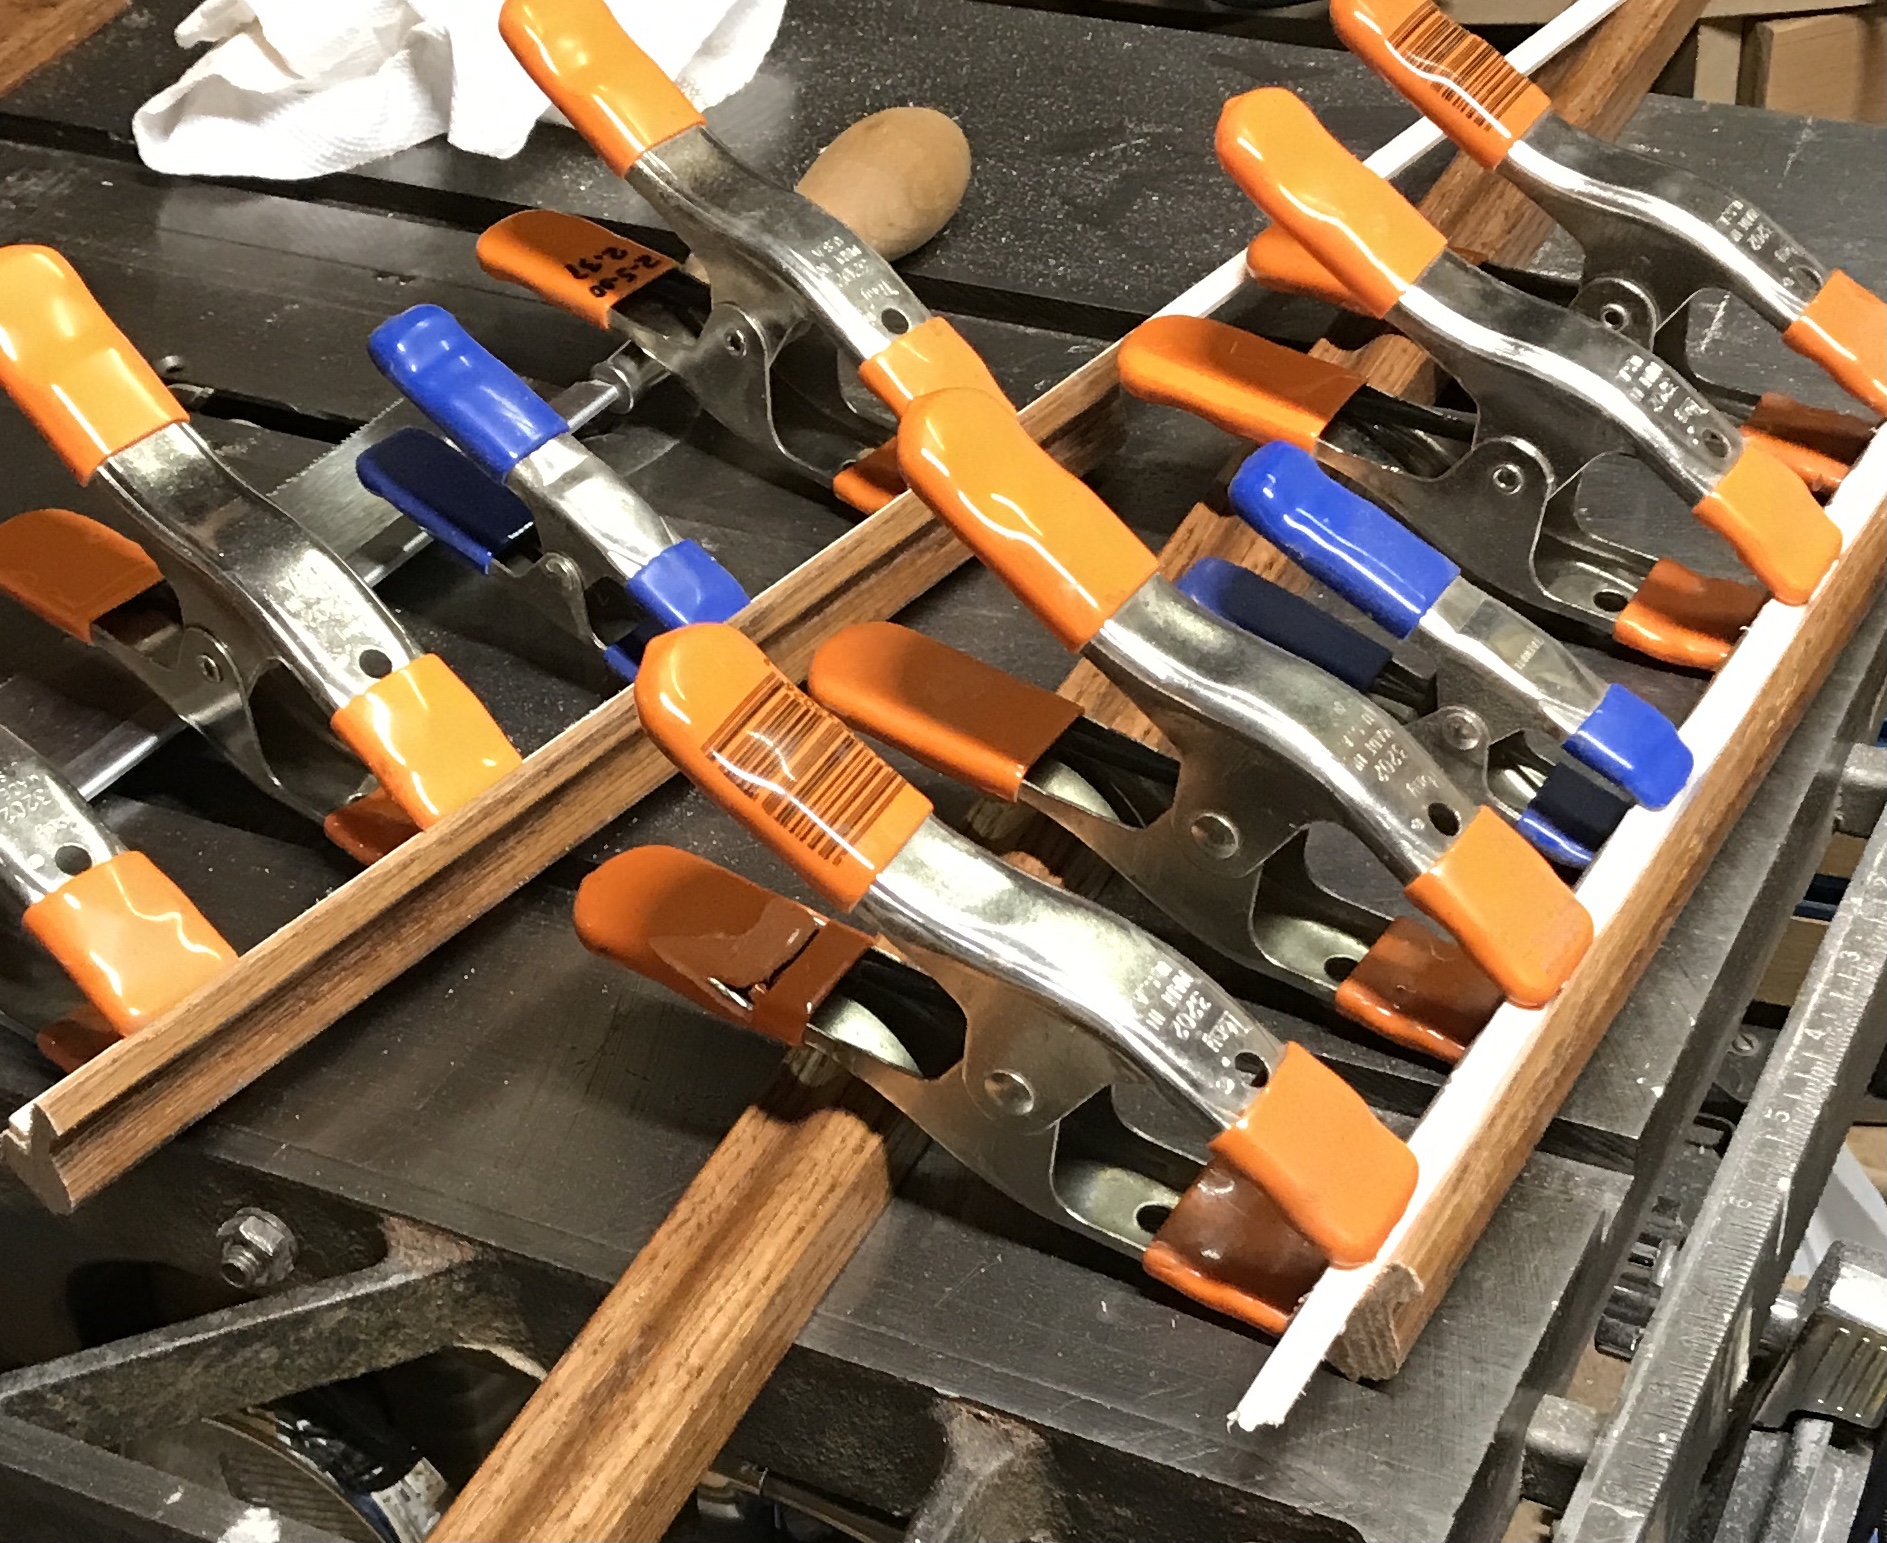
Some oak molding was found and purchased from Menards. The molding was first stained with the mix of stain used for the G&G table. I wanted it a little darker so went over it a second time with the brown stain. I pulled out the frame cutting jig. After relearning how to use it, it became apparent that the rabbet on the molding was too deep for the top and bottom of the picture. Some 1/8" X 1/4" strips were cut from a piece of 1/4" poplar. Two 13" lengths of the molding were cut by hand. One had one strip clued into the rabbet and the other had two. The piece with two is for the frame member above the hand. The photo shows the clamped parts.
As a reminder this jig works directly off of the size of the picture. After making the first miter cut, the second miter cut is made 1/8" longer than the length of that side of the picture. The jig measures on the inside of the rabbet, which matches the picture. The 1/8" takes care of the with of the blade and adds 1/16" for fitting the picture.
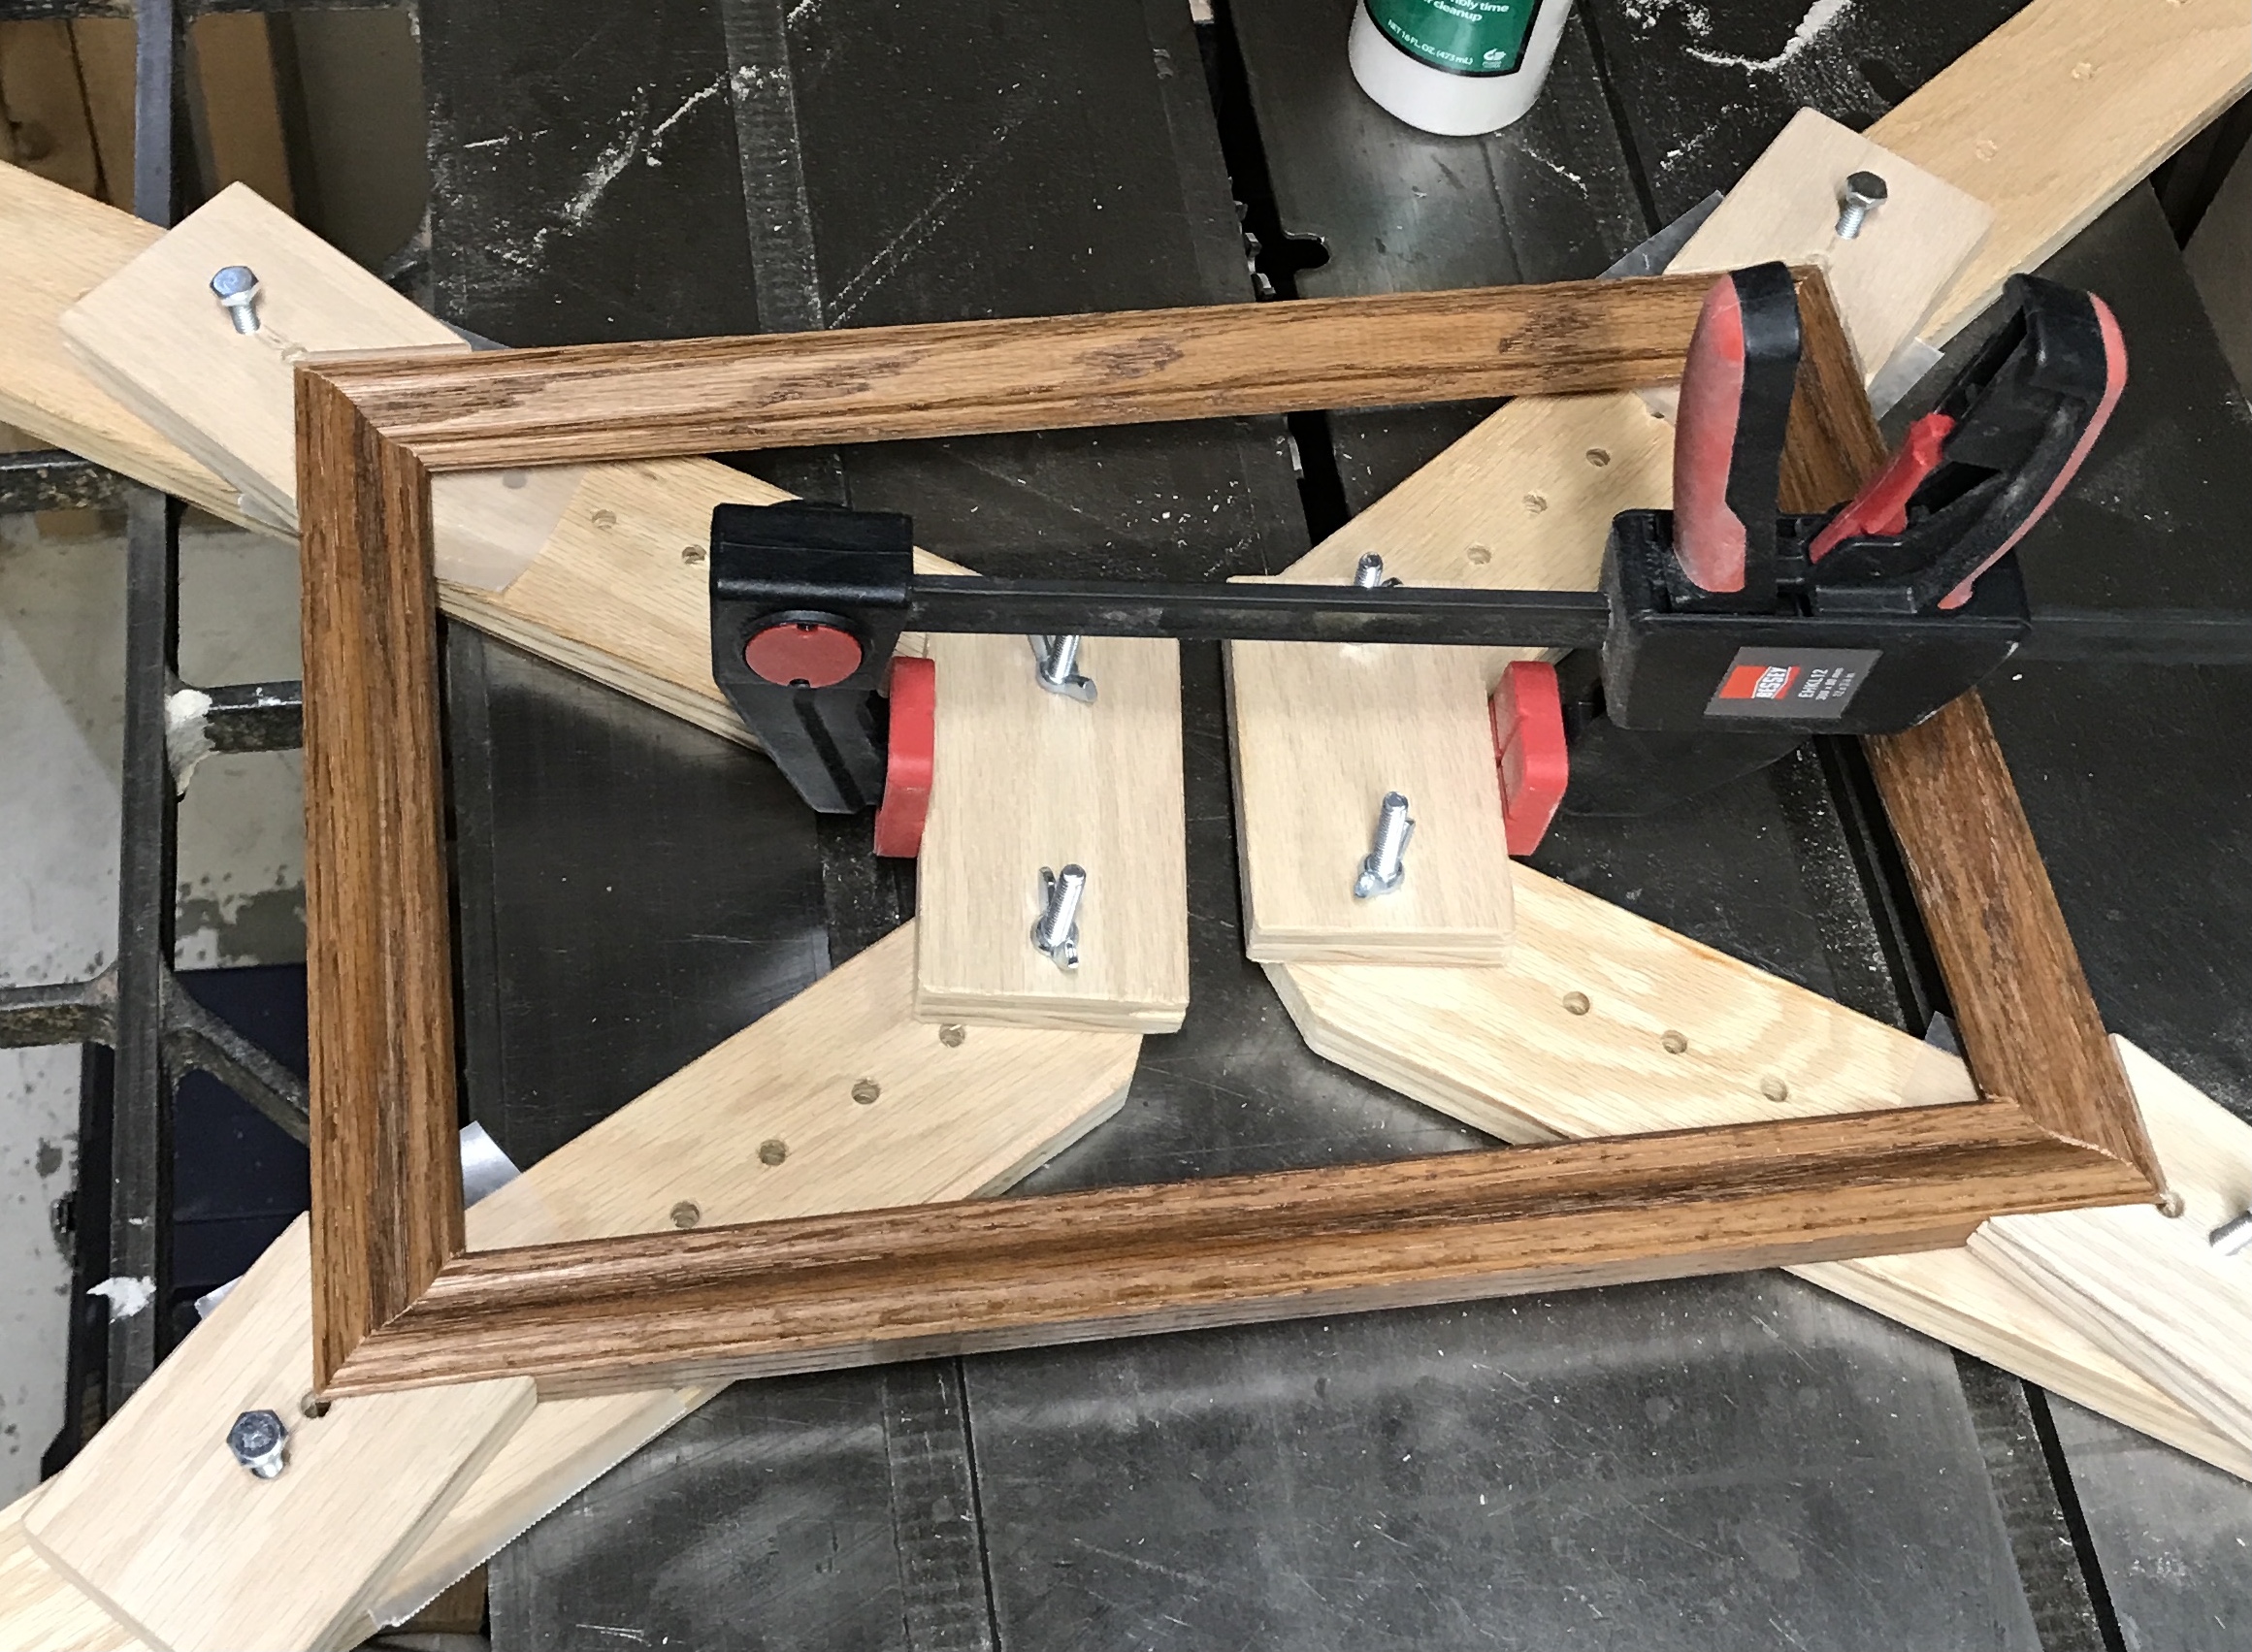
The jig was used to cut the four sides of the frame based on the size of the picture, 9 9/16" X 15 5/16". But the 3/8" of inserts increases the longer sides accordingly. After using the miter cutting jig the frame was glued up as seen below.
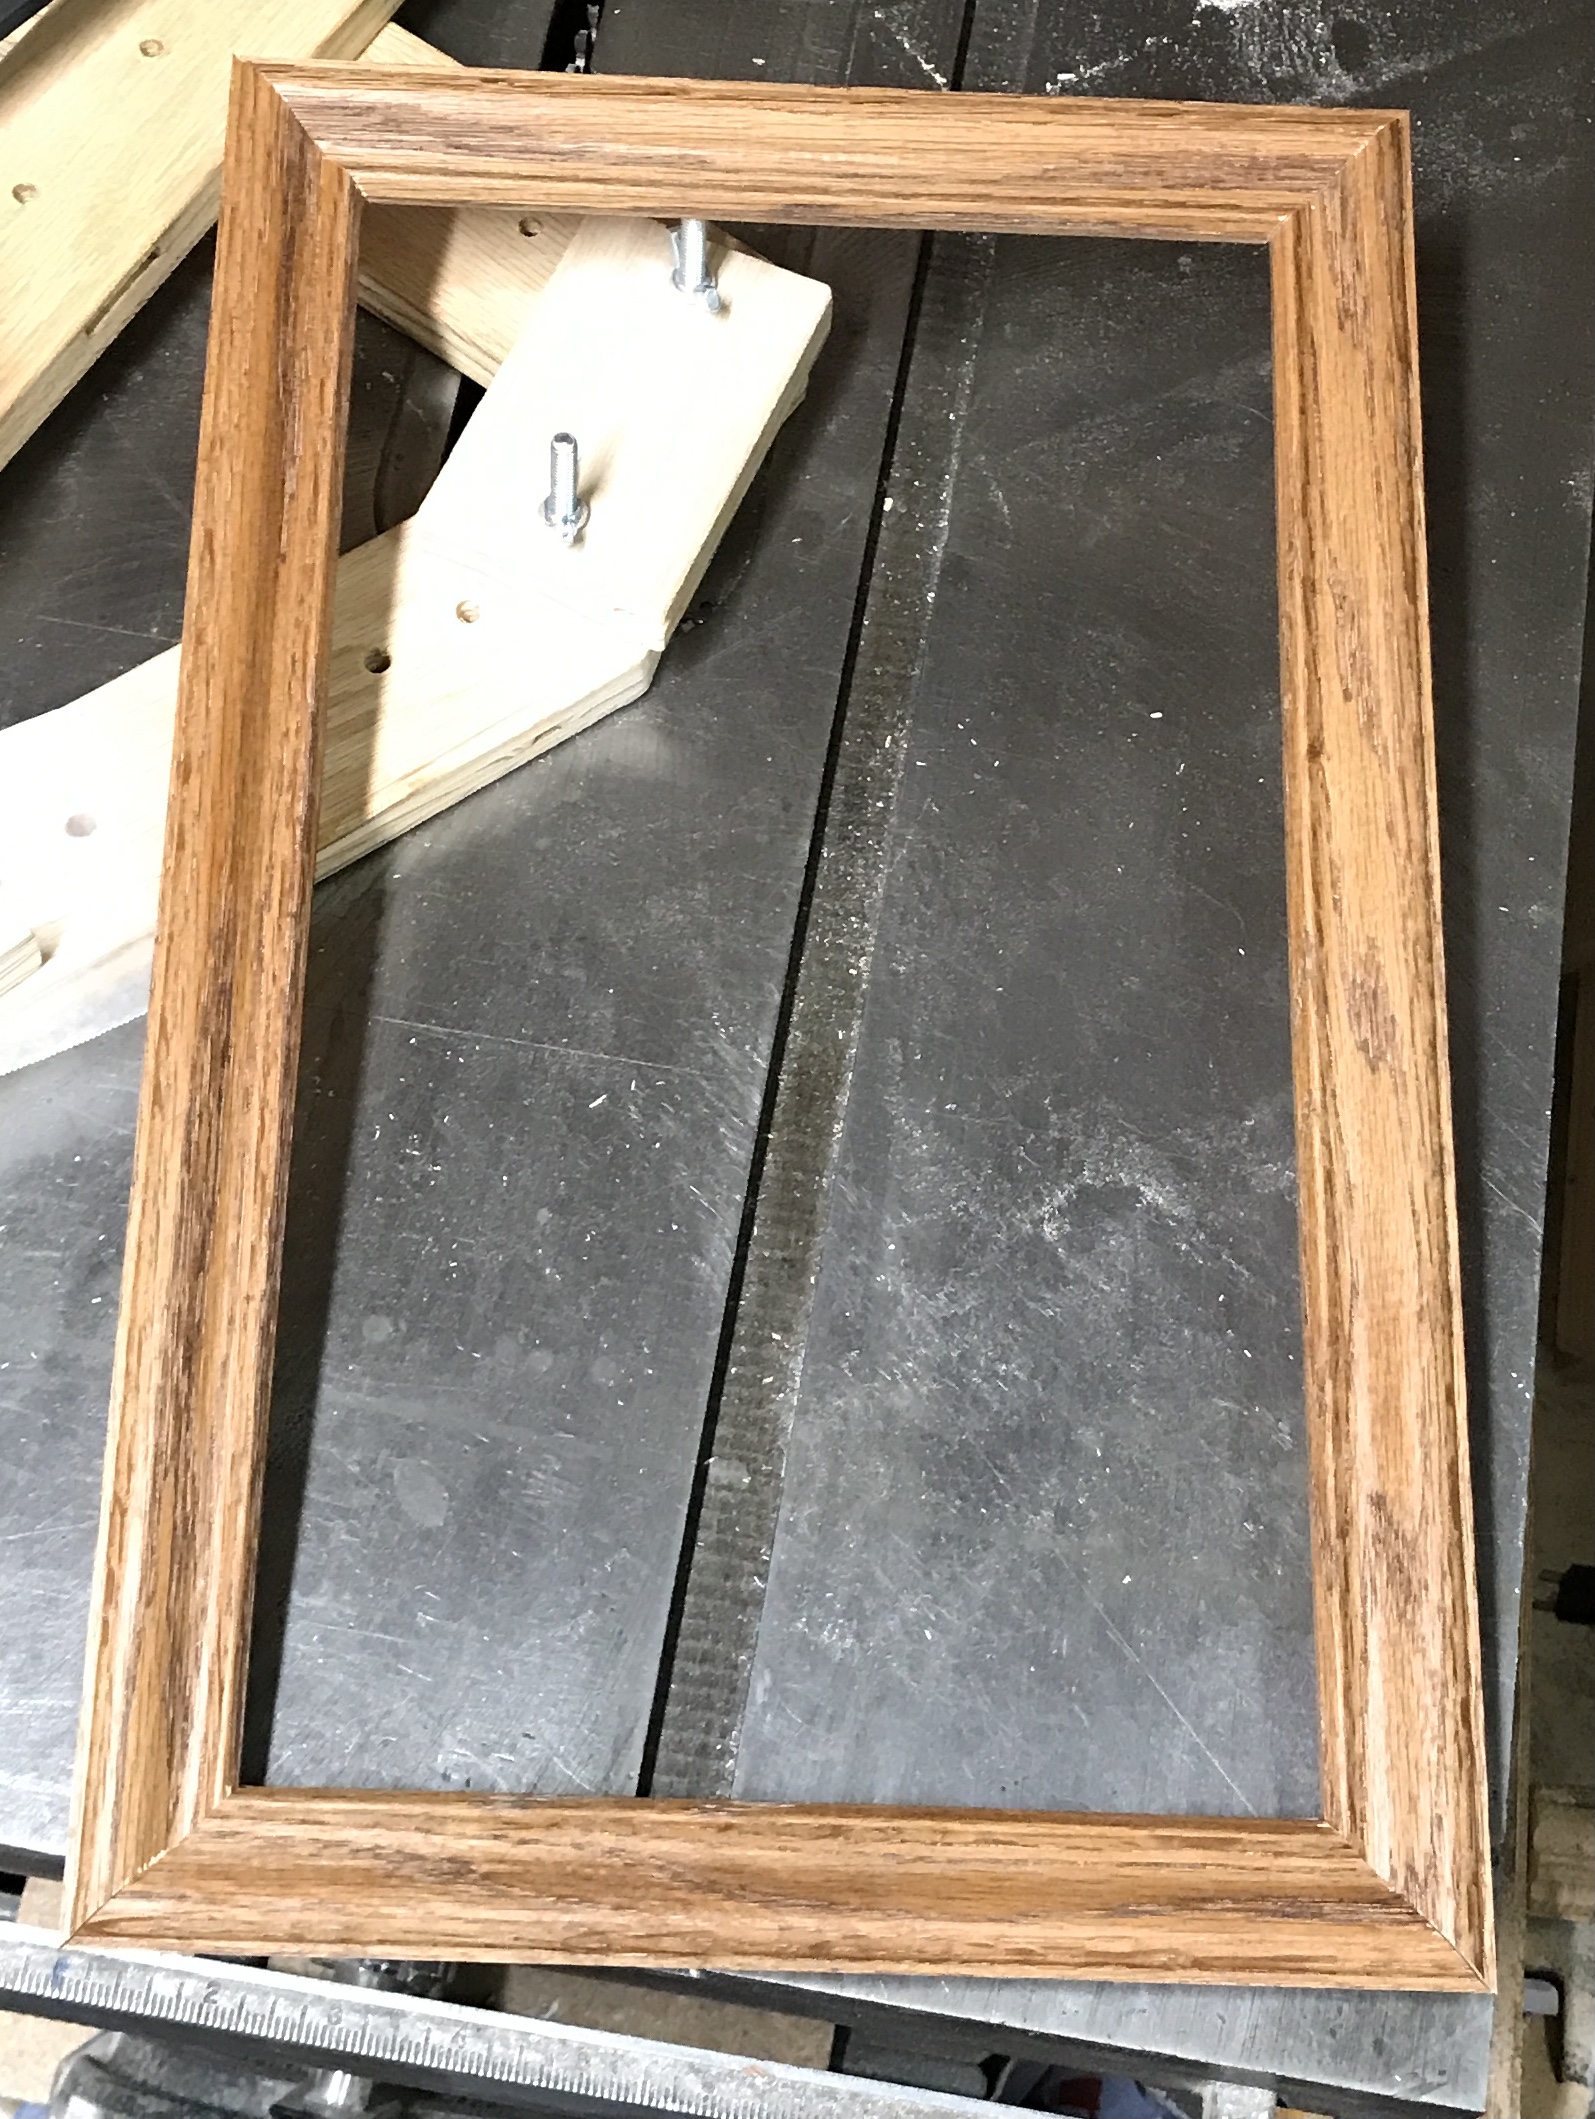
The picture frame was popped out of the framing jig. It is darn near perfect!. The picture seen in the frame in the second photo does not really fit. The frame is about 1/16" too short for the picture. So much for perfection. The excess insert was cut away with a knife and a chisel. The picture then fit tightly.
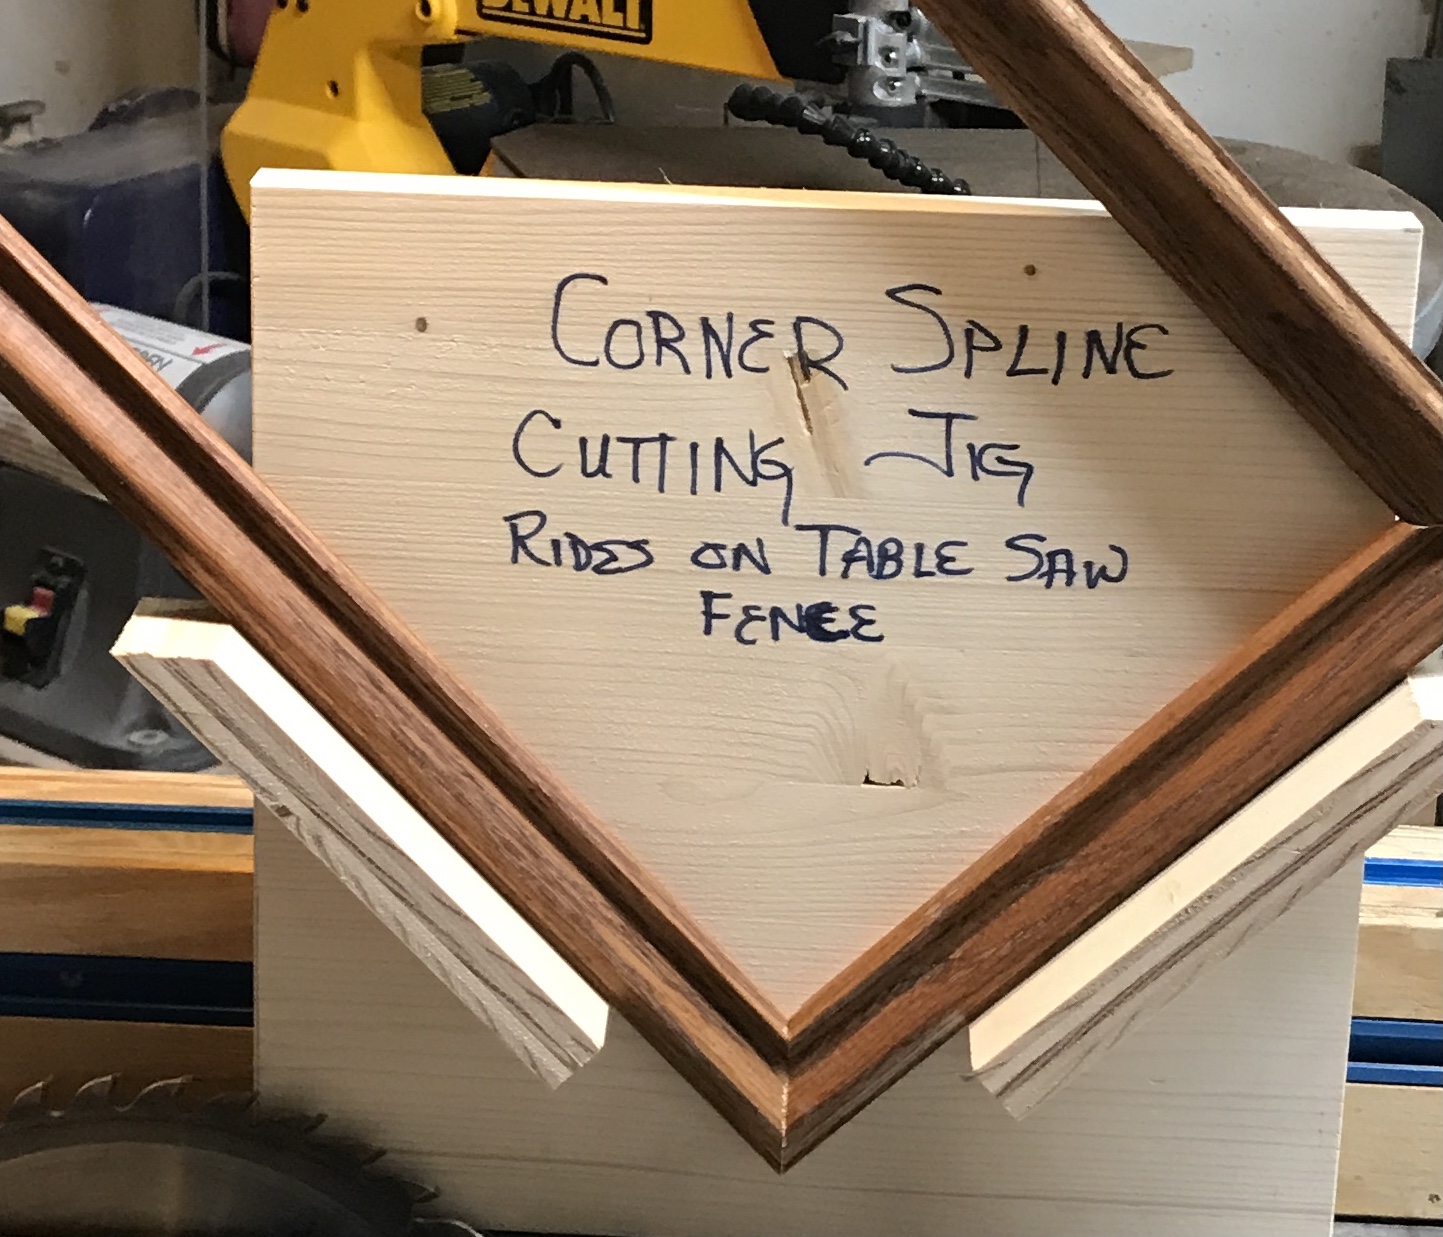
The spline jig was used to cut the dadoes for splines. The frame was clamped to the jig with two spring clamps. The blade was set to cut about 1/4" from the back of the frame and about 5/8" deep. All four dadoes were quickly cut. A scrap of 3/4" walnut had a 1/8" strip cut off to use as splines. The splines were cut to length and glued into the corner dadoes. After drying the splines were sawed off, scraped and sanded flush. The corners were cleaned up as needed. Restained the corners and tried to blend the stain in. The photo shows spline dado cutting.
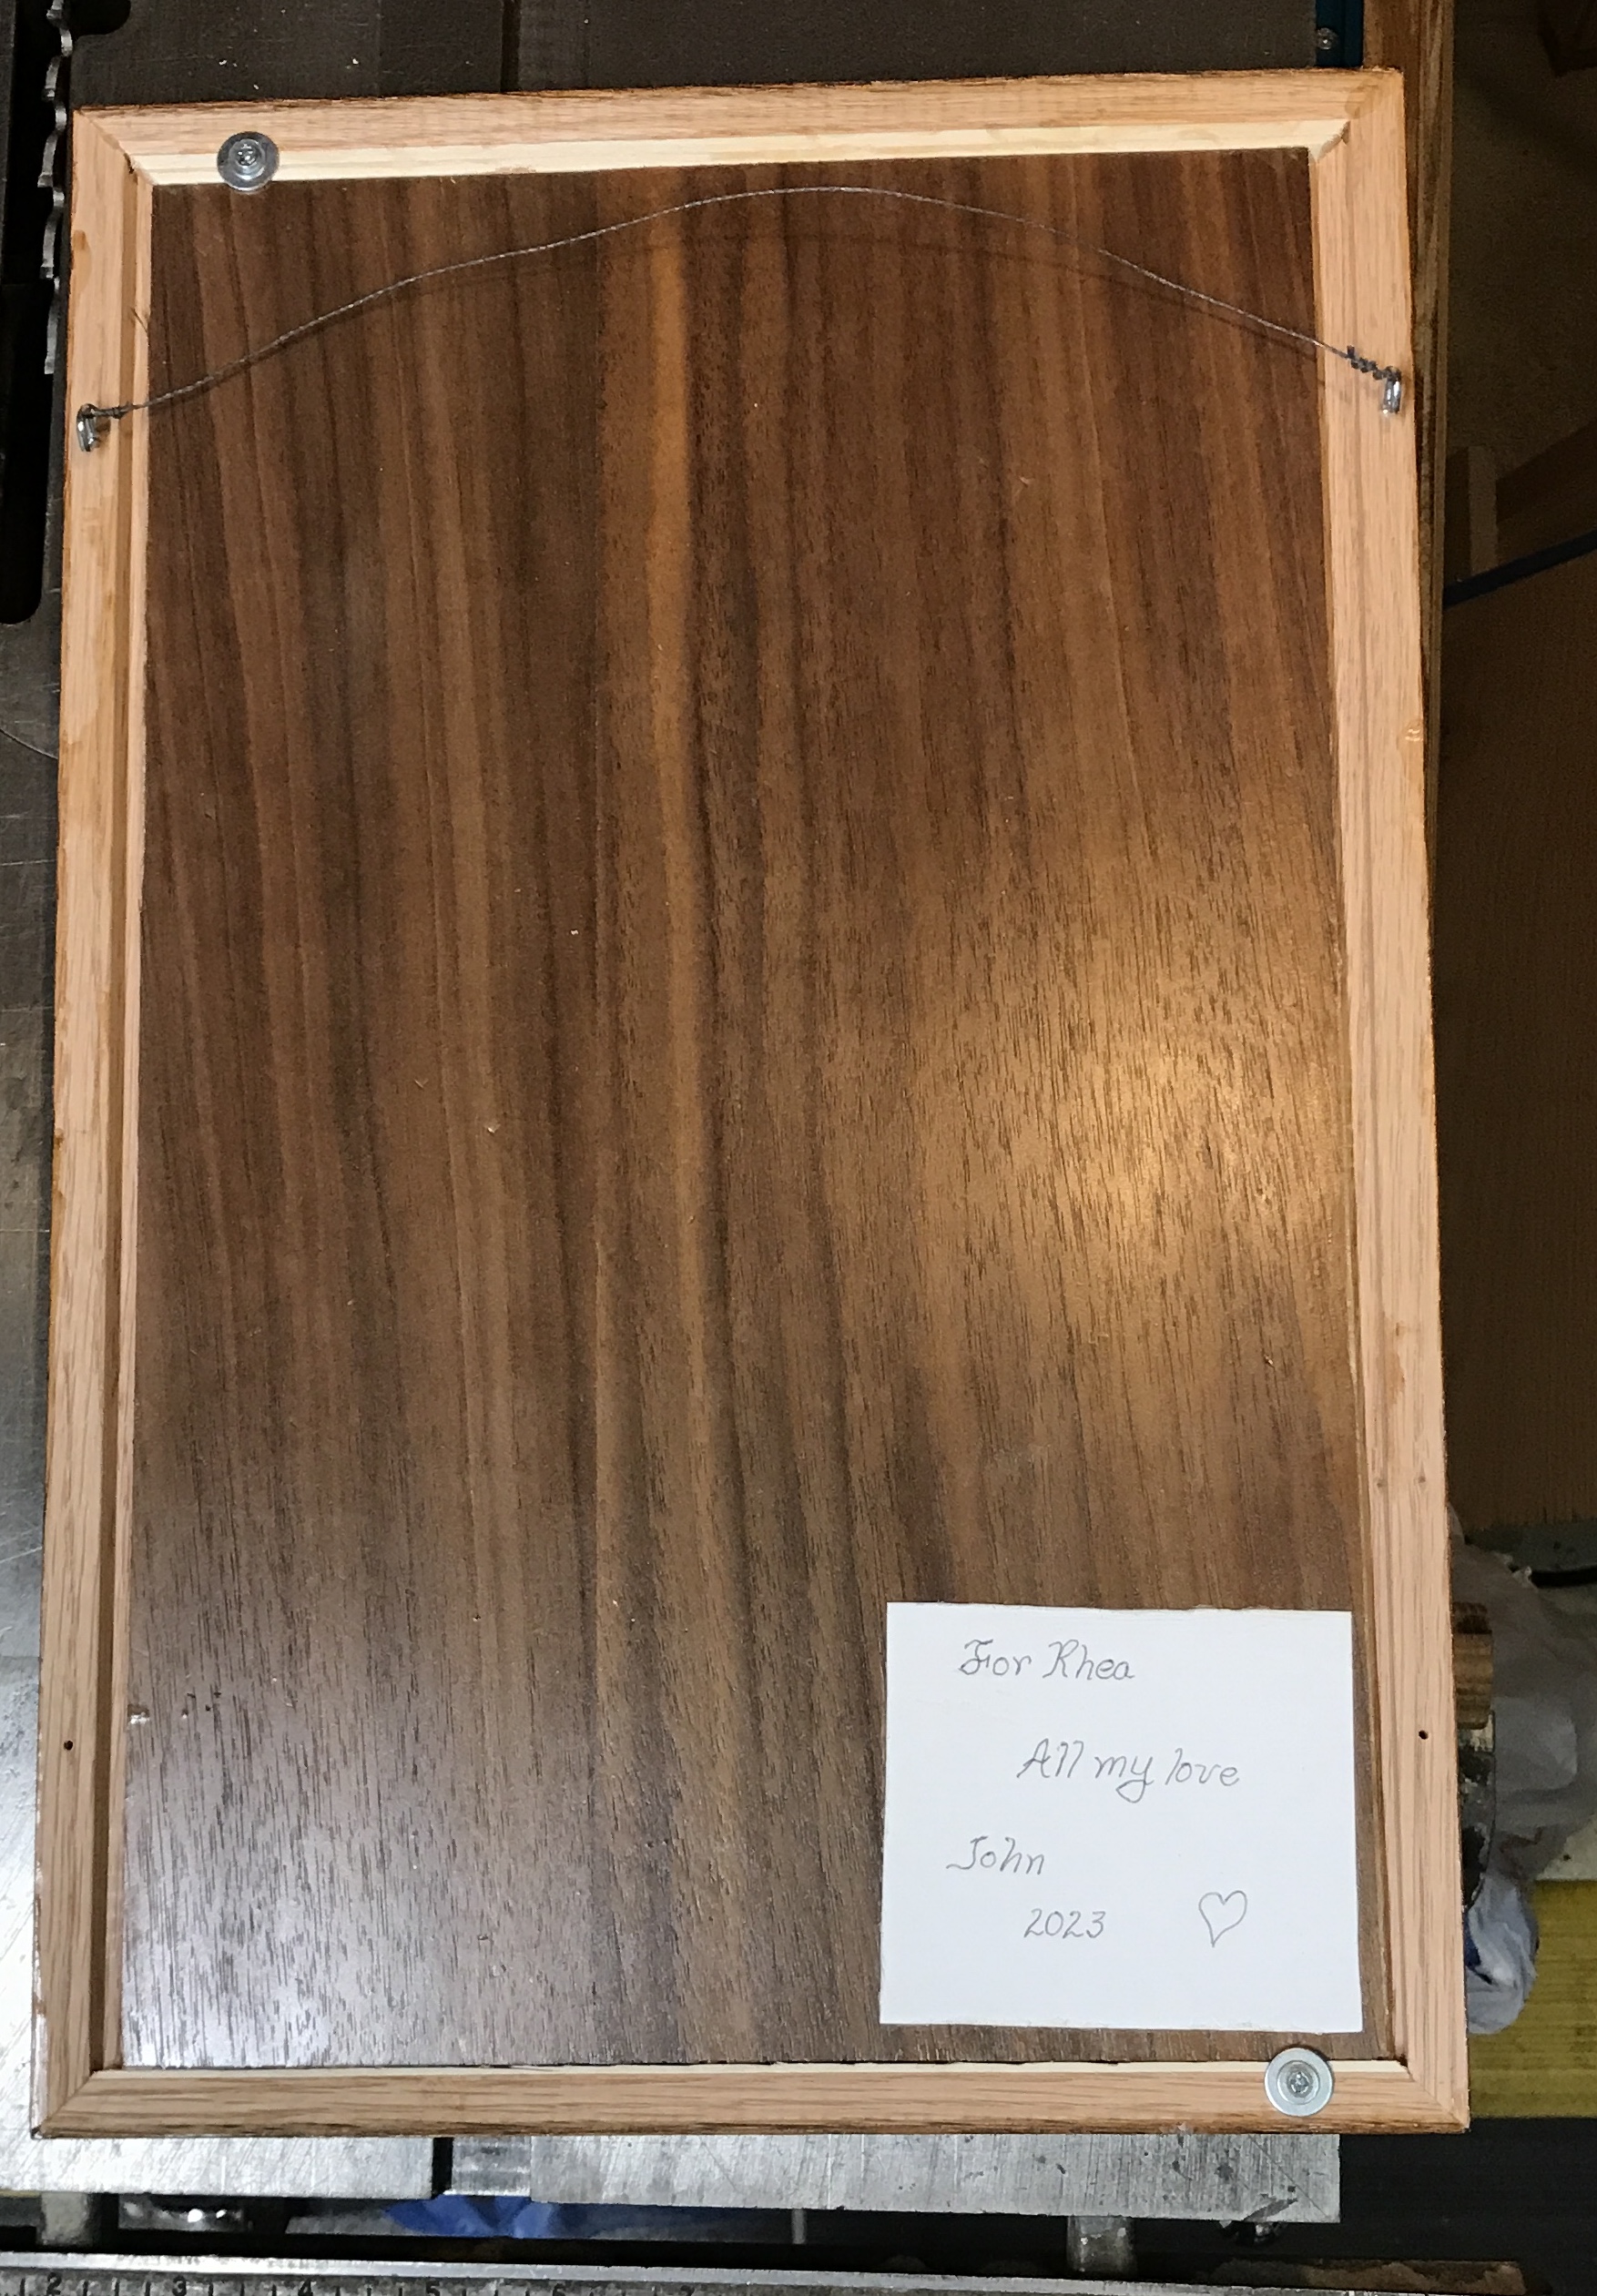
Both the frame and the back of the marquetry piece were painted with two coats of lacquer. After the first coat on the back I remembered to sign the piece. Unfortunately, the second coat of lacquer made the Sharpie ink run. The picture is a tight fit in the frame, but it will still be held by two screws with washers. These were installed. Two washers of different sizes were used. The larger one, needed to span the distance, had a hole too large for the head of the screw, so a smaller one was used to reduce the hole size. A card was made up and glued to the back. Two eyes were screwed into the frame 3" from the top and a wire strung between them for hanging. This completed the project with two weeks to spare.